There are several ways to enable Battery Saver in Windows 11, which we will review in today's post. Battery Saver is an essential part of power management in Windows-based laptops and tablets. It allows you to prolong the battery life by disabling background activities, limiting notification, and slightly reducing the overall performance.
Advertisеment
However, keep in mind that you cannot turn on Battery Saver in Windows 11 when your device is plugged in. In such a case, the Battery Saver button in Windows 11 appears grayed-out. Once you unplug the AC power source, you'll be able to turn on Battery Saver.
Tip: You can combine Battery Saver with other options, such as Airplane Mode and with disabling background apps to improve battery life of your device.
Enable Battery Saver in Windows 11
There are multiple ways to turn on Battery Saver. You can use either Quick Settings, the Settings app, or even make the OS activate it automatically depending on device's battery charge level. Let's review these methods in detail. So, to enable the Battery Saver feature in Windows 11, do the following.
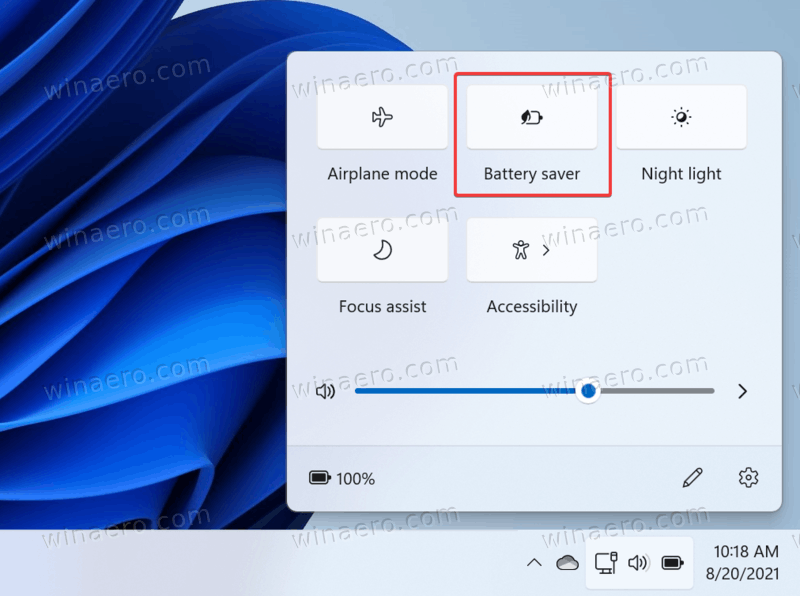
Using Quick Settings
- Press Win + A to open the Quick Settings flyout menu. You can also open it by clicking one of the following indicators in the notification area: Network, Volume, and Battery.
- Click the Battery Saver button
- To disable it later, just repeat the above sequence. Clicking on the Battery Saver option second time will disable it.
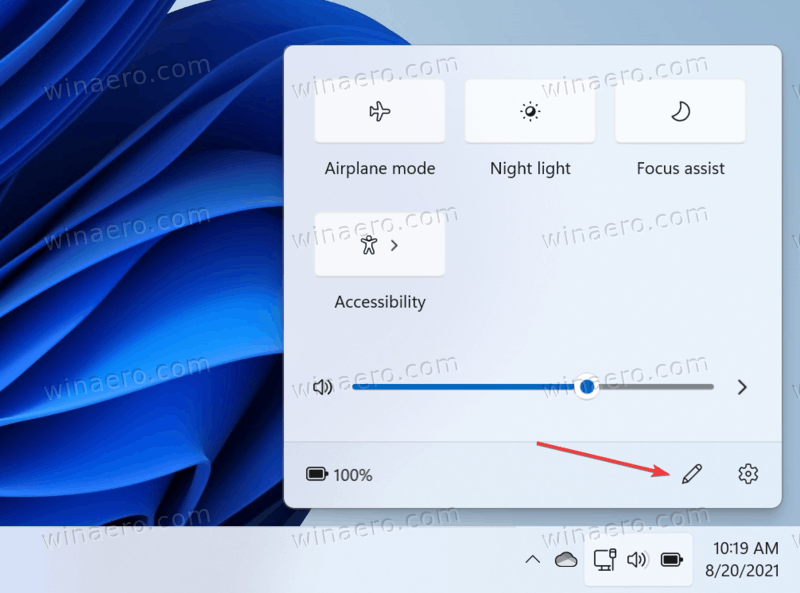
If the Battery Saver button is missing in the Quick Settings menu, you need to add it manually there. do the following.
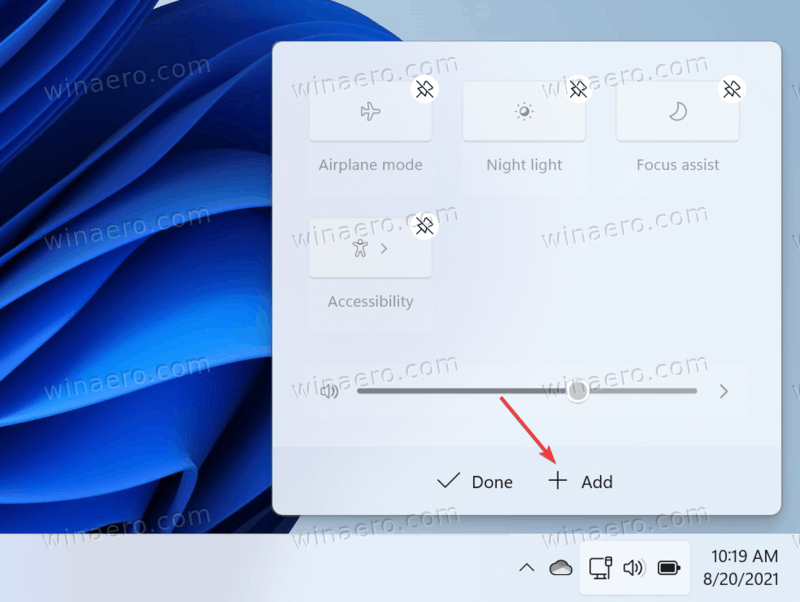
Add Battery Saver to Quick Settings
- Open the Quick Settings menu and click the edit button with a pencil icon.
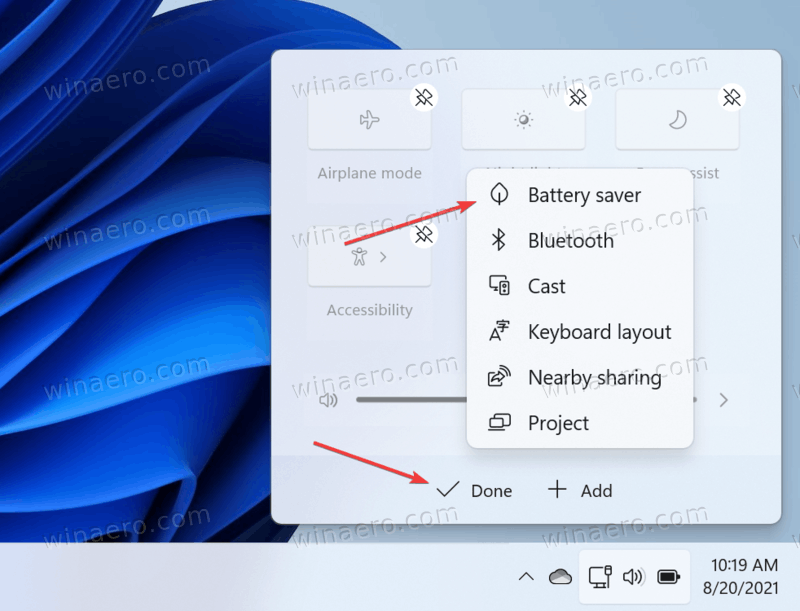
- Click Add, then select Battery Saver from the list of available toggles.
- Click Done to save the changes.
You are done. From now, you'll have the Battery Saver button in Quick Settings.
The Quick Settings menu allows you to turn on or off Battery Saver without customizing it. Alternatively, you can enable or disable it using the Windows 11 Settings. Also, the Settings app allow changing additional power-related options.
Turn on Battery Saver in Settings
- Press Win + I to open the Settings app.
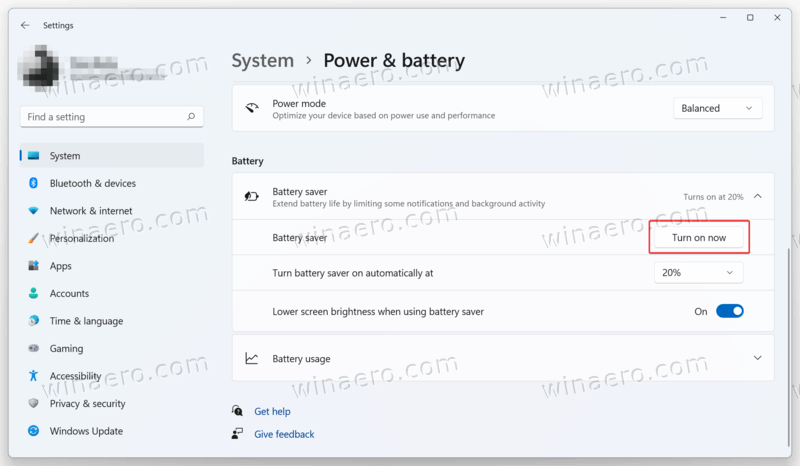
- Go to System > Power and Battery.

- Scroll down and find the Battery section.
- Click the arrow down icon next to the Battery Saver.
- Click Turn on Now. That action enables instantly Battery Saver.
Automatically Enable Battery Saver in Windows 11
You can set Windows 11 to enable Battery Saver automatically once the battery in your laptop or tablet hits a specific threshold. By default, Windows 11 turns on Battery Saver on a 20% charge. Because Battery Saver limits background activity and reduces performance, some users might want to decrease that threshold or disable automatic Battery Saver altogether.
To automatically enable Battery Saver in Windows 11, do the following.
- Open Windows Settings and go to System > Power and Battery.
- Click Battery Saver and find the Turn battery saver on automatically at option.
- Select the required value from a drop-down list.
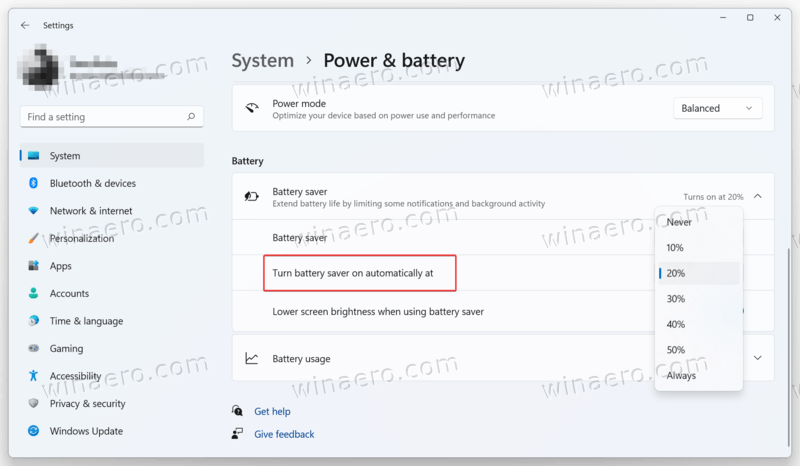
- If you want to disable the automatic Battery Saver in Windows 11, select "Never."
Disable Battery Saver in Windows 11
If you want to turn off Battery Saver in Windows 11, repeat any of the steps above. Press Win + A, then click Battery Saver. Alternatively, open Windows Settings (Win + I) and go to System > Power and Battery. Under the Battery Saver group of options, click Turn off.
Finally, those who frequently change Battery Saver settings in Windows 11 can create a special shortcut to access its options with a single click.
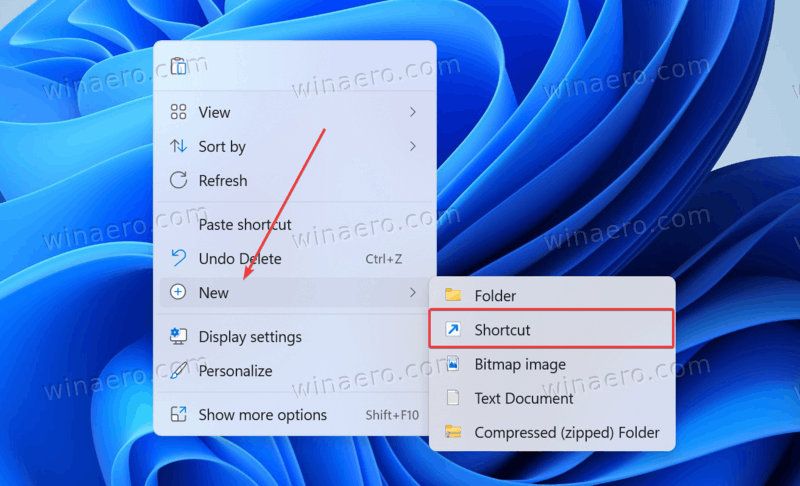
Create Battery Saver Shortcut in Windows 11
- Right-click the empty space on the Desktop and select New > Shortcut.
- On a new window, enter
ms-settings:batterysaver.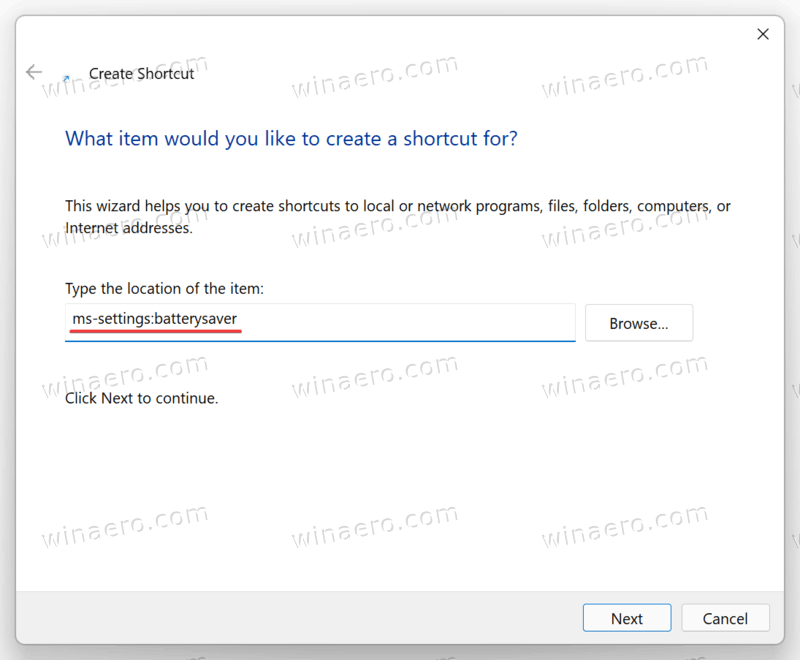
- Click Next, then give your shortcut a proper name, for example, Battery Settings.
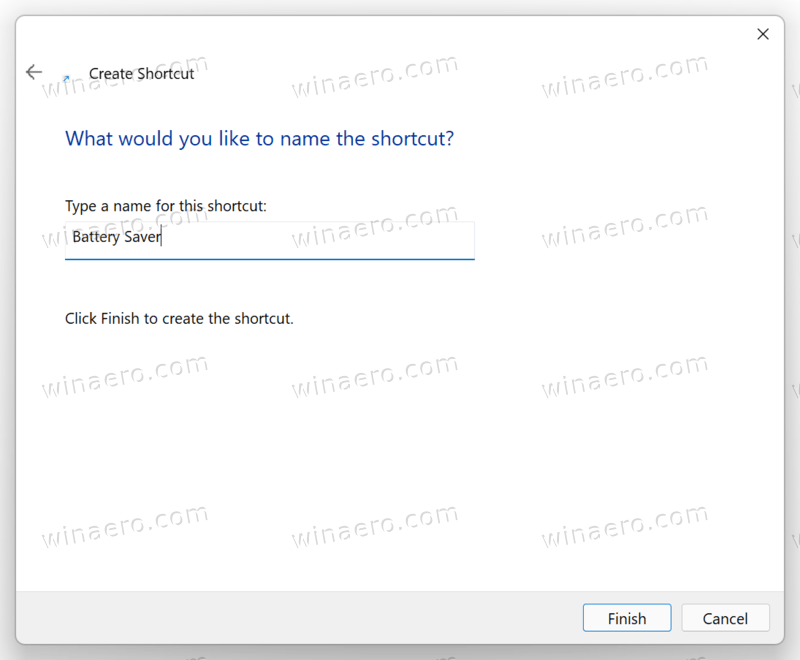
- Click Finish to save changes.
You are done. Note that Windows 11 will assign the default Settings icon to your shortcut, but you can change it using the properties menu.
That's it. Now you know how to enable or disable Battery Saver in Windows 11.
Support us
Winaero greatly relies on your support. You can help the site keep bringing you interesting and useful content and software by using these options:
If you like this article, please share it using the buttons below. It won't take a lot from you, but it will help us grow. Thanks for your support!
Advertisеment
