Today, we'll review how to disable Windows SmartScreen in Windows 11. It is a built-in security filter that Windows uses to check every single file you download and run against a special database. If the file is unknown to the database, it shows a warning when you downloading such a file. If you try to open it, Windows SmartScreen shows a nag screen with an additional confirmation.
Advertisеment
So, Windows SmartScreen guards your browser and computer by preventing you from downloading and running potentially malicious files and programs. While the idea behind Windows SmartScreen is good, there are two primary issues with it. First, Windows SmartScreen often generates false positives even for safe apps. If the system cannot find any information about the program you try to run, it will prevent it from opening by default, thinking it is better safe than sorry. The same is true for any application that does not have digitally signed binaries. Once that happens, any attempt to open a program will end up with the following message:
Windows protected your PC by preventing this potentially malicious app from running.
The second problem with Windows SmartScreen is privacy related. Not everyone is happy with Microsoft scanning your computer and knowing what apps and files you are using.
Note: There is no need to permanently disable Windows SmartScreen if you want to run a rare program once or twice. In such a case, you can simply override the message and force Windows to open the app you need. Click "More Info," then click Run Anyway. The same idea applies to when Windows says it can't reach Windows SmartScreen right now.
How to Disable Windows SmartScreen in Windows 11
There are three ways to disable the SmartScreen filter on Windows 11. First of all, you can use the Windows Security app, that includes all the options to turn it off. Second, there is a Registry tweak that you can apply. Finally, there is also a Group Policy option, along with a corresponding Registry options. You can use any of them, depending on what works best in your situation.
Disable SmartScreen in Windows 11 with the Security app
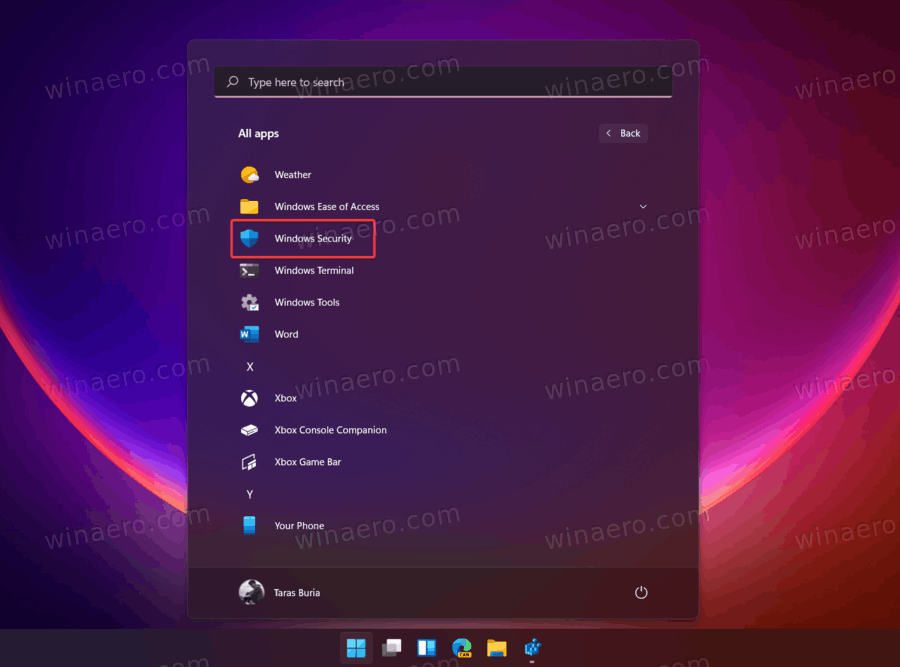
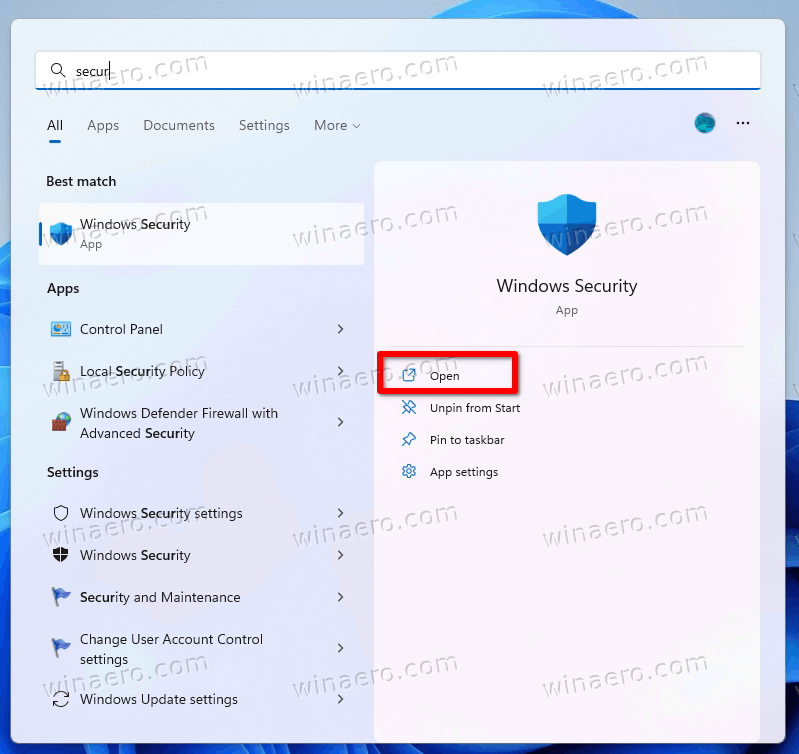
- Open the Start menu and click the All Apps button.
- In the list of apps, find Windows Security and open it. You can also use Windows Search (Win + S) or the app's icon in the notification area.
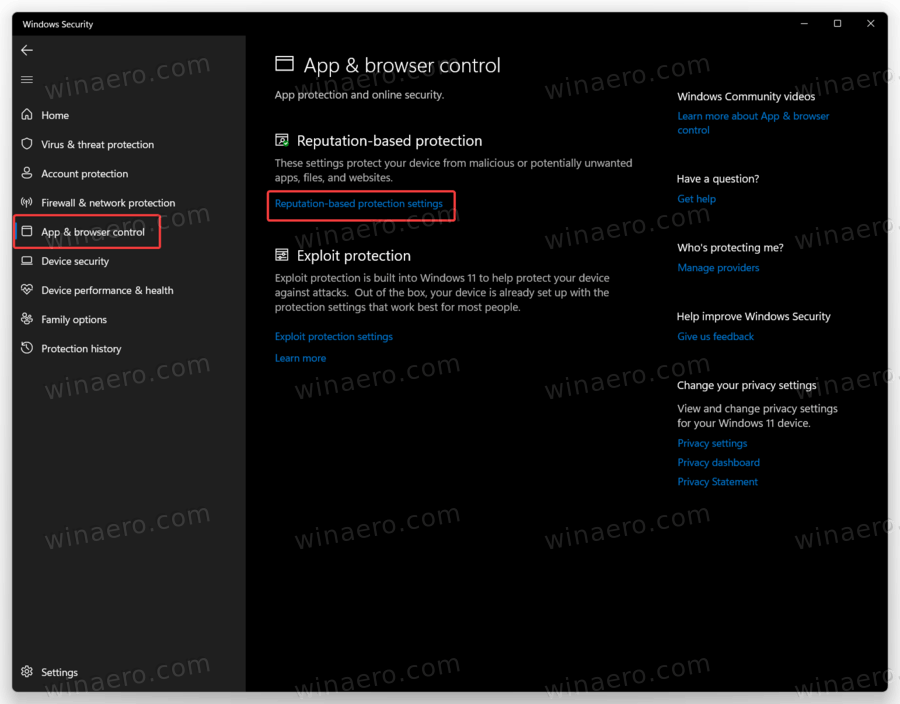
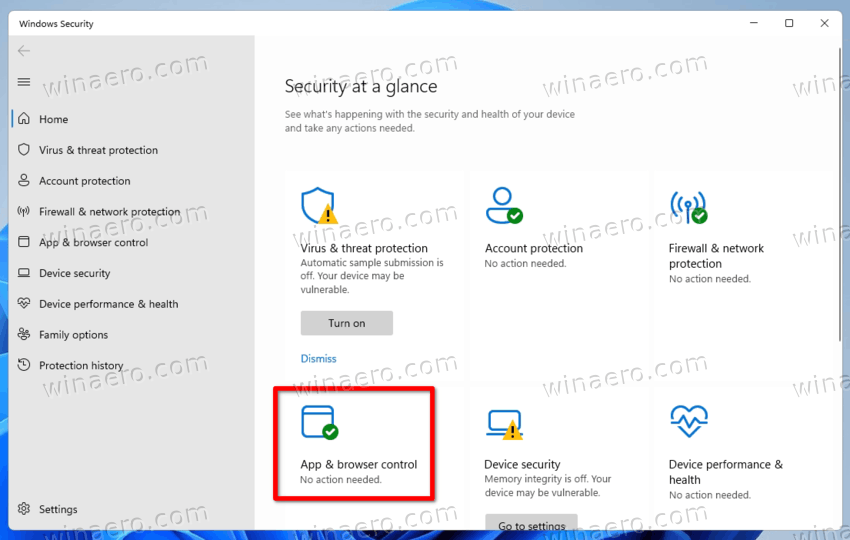
- Once in Windows Security, open the App & browser control section.
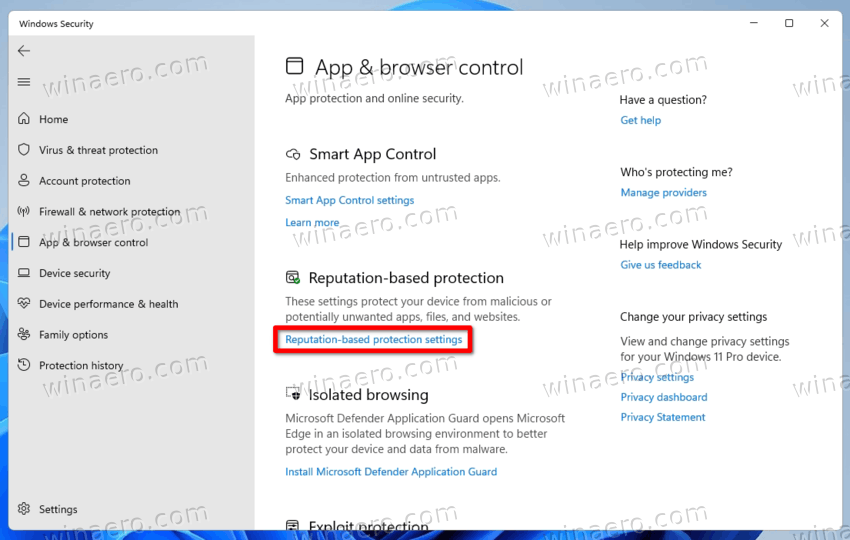
- Click the Reputation-based protection settings link.
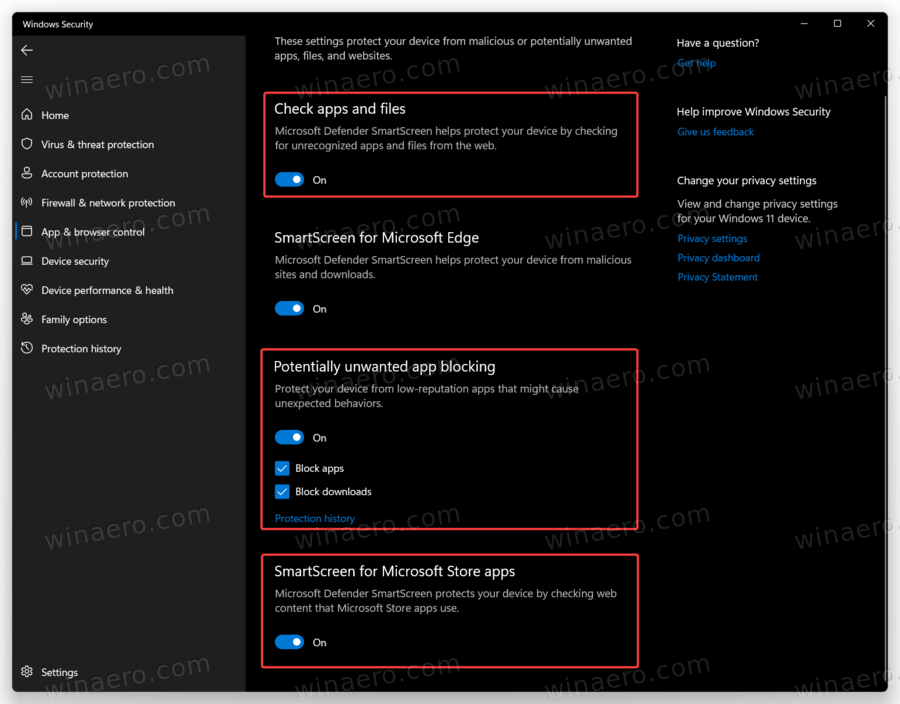
- Disable the following toggles: Check apps and files, Potentially unwanted app blocking, and SmartScreen for Microsoft Store apps.
You are done!
Note that Windows User Account Control will ask for your permission to disable Windows SmartScreen. Click Yes when prompted.
Using Registry Editor
Although the first method is more convenient and user-friendly, you can disable Windows SmartScreen in Windows 11 using Registry Editor.
- Press Win + R and enter
regeditto launch Windows Registry Editor. - Go to
HKEY_LOCAL_MACHINE\SOFTWARE\Microsoft\Windows\CurrentVersion\Explorer. - On the right side of the window, find the
SmartScreenEnabledstring value (REG_SZ) and double-click it to open.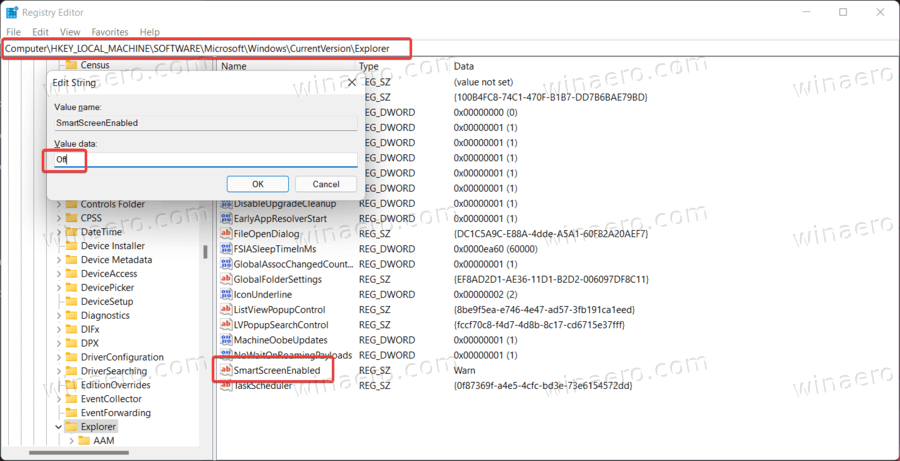
- Set the value data to
Off.
You have now the SmartScreen feature disabled. Here are the ready-for-use registry files that allow you to disable Windows SmartScreen with a single click.
Ready-to-use registry files
- Download these files in a ZIP archive and unpack wherever convenient for you.
- Open the
Disable SmartScreen in Windows 11.regfile and confirm changes. - To restore default values and enable SmartScreen in Windows 11, open the
Enable SmartScreen in Windows 11.regfile.
Finally, for system administrators and advanced users, Microsoft has included a special Group Policy option that allows configuring the SmartScreen feature on Windows 11. You can use it do turn off the SmartScreen for all users.
Disable SmartScreen in Windows 11 with Group Policy
- Open the Local Group Policy Editor app; for that, press the Win + R keys and type
gpedit.mscin the Run box. - In the left pane, navigate to Computer Configuration > Administrative Templates > Windows Components > File Explorer.
- Double-click the Configure Windows Defender SmartScreen policy in the right pane.
- Set the policy to Disabled and click on the Apply and OK buttons.
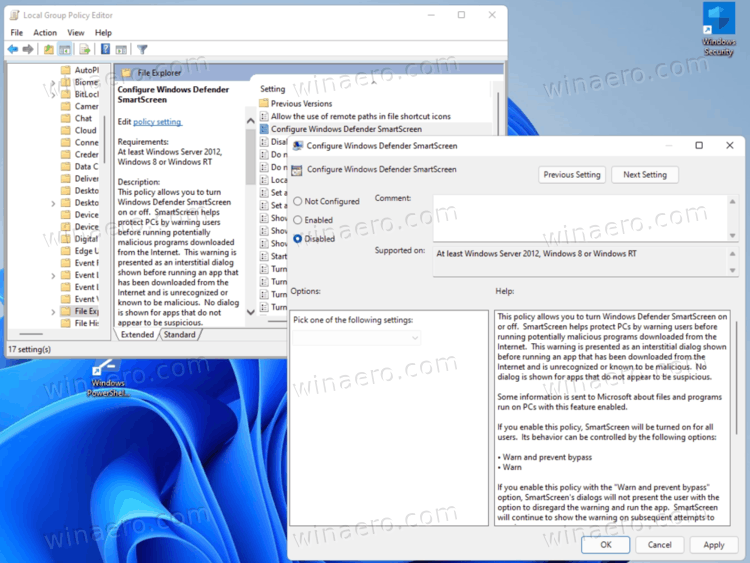
- Restart Windows 11 to activate the change.
You are done. The SmartScreen is now turned off for all user accounts of your computer.
If your Windows 11 edition doesn't include the gpedit.msc tool, or for some other reason you can use a special Registry tweak. It will apply the same restrictions as the above reviewed policy.
Turn off Windows 11 SmartScreen with a Registry tweak for Group Policy
- Open the Registry editor app (Win + R >
regedit). - Navigate to the following branch:
HKEY_LOCAL_MACHINE\SOFTWARE\Policies\Microsoft\Windows\System. If this key is missing, then create it manually. - Right-click the empty space on the right, and select New > DWORD (32-bit) value from the context menu.
- Name the value as EnableSmartScreen, and leave its value data as 0.
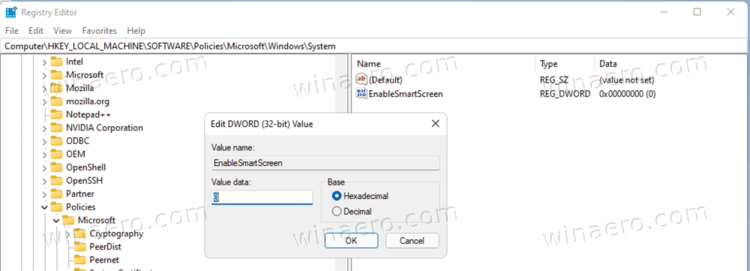
- Restart Windows 11.
You are done. You can undo the change at any moment later by removing the EnableSmartScreen value and then restarting Windows 11.
Again, for your convenience, you can download these ready-to-use Registry files.
Ready-to-use Registry files
- Download the following ZIP archive with REG files.
- Extract it to any folder of your choice, e.g. right on your Desktop.
- Double-click the file
Disable Windows 11 SmartScreen with Group Policy.reg. to apply the restriction. - Confirm the UAC prompt.
- Restart Windows 11.
You are done. The undo tweak is also available in the ZIP archive. To re-enable SmartScreen, open the Enable Windows 11 SmartScreen with Group Policy.reg file and confirm the UAC request.
Disable SmartScreen in Microsoft Edge
Windows allows managing SmartScreen separately for the operating system and the Edge browser. If you want, you can disable Windows SmartScreen just for Microsoft Edge.
To disable Windows SmartScreen in Microsoft Edge, do the following.
- Open the Windows Security app using the search or the list of all apps in the Start menu.
- Go to the App & browser control section.
- Click the Reputation-based protection settings link.
- Turn off the SmartScreen for Microsoft Edge option.
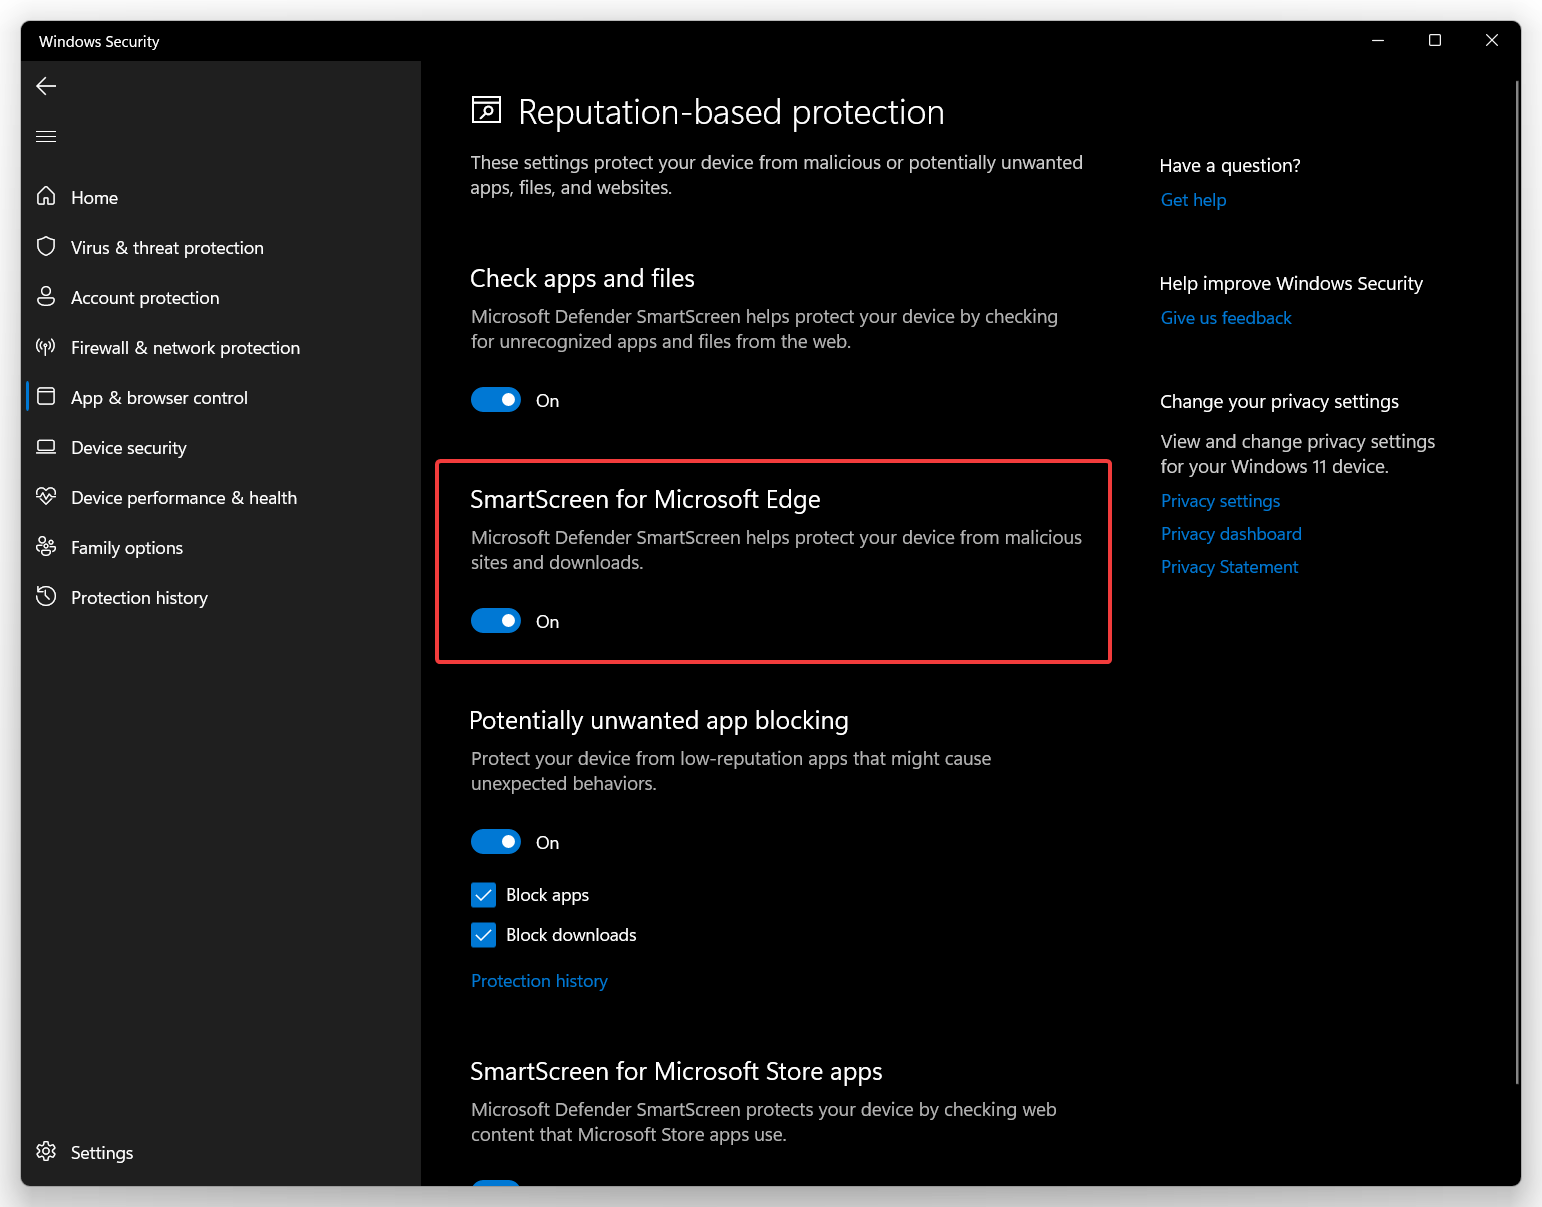
That will disable built-in security measures that keep you off potentially harmful websites and downloads.
Disable SmartScreen for Microsoft Edge in the Registry
- Launch Windows Registry Editor using the Win + R shortcut and the
regeditcommand. - Go to the following address:
HKEY_CURRENT_USER\Software\Microsoft\Edge\SmartScreenEnabled. - On the right side of the window, double-click the (Default) value and change its value data from 1 to 0.
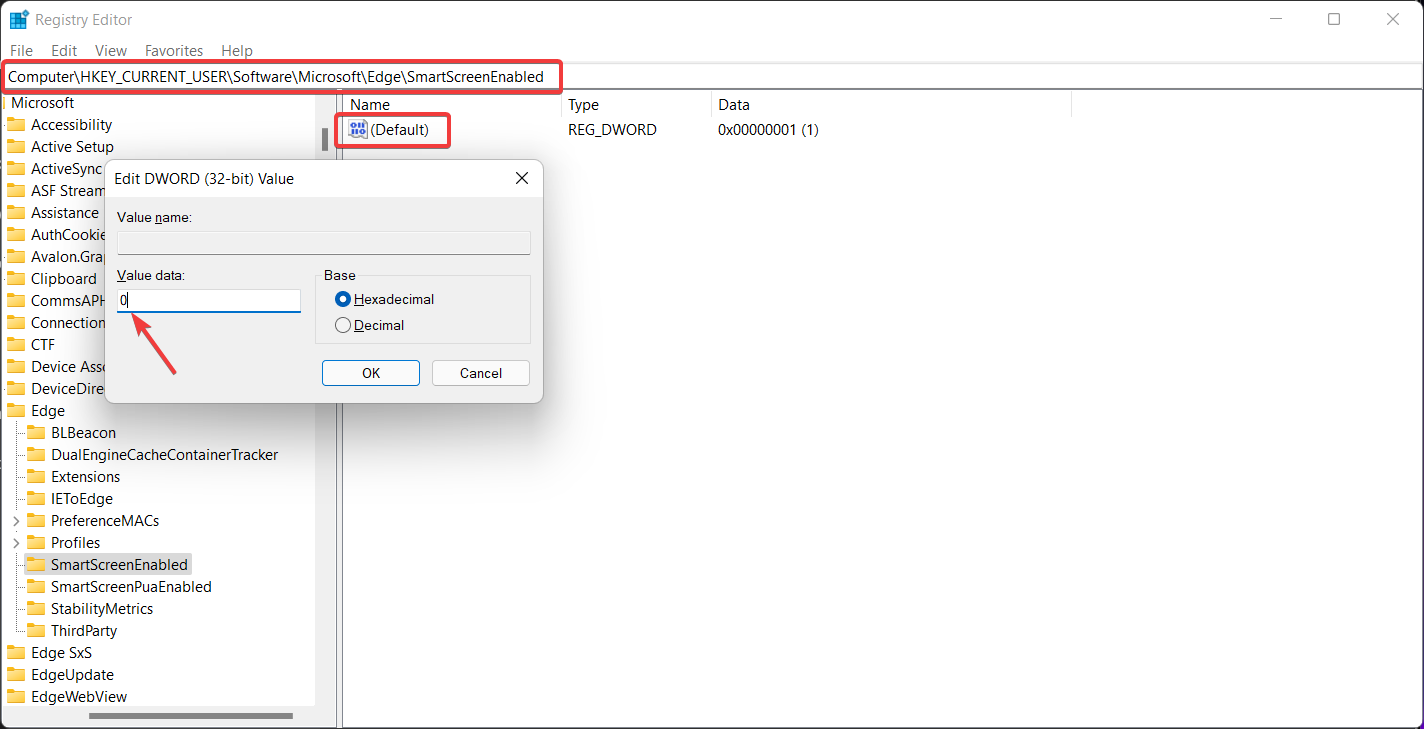
- Click OK to save changes.
You can apply the described above changes in Windows Registry using prebuilt reg-files. They allow disabling Windows SmartScreen in Microsoft Edge with a single click.
Ready-to-use registry files
- Download REG files in a ZIP archive using this link.
- Unpack files wherever convenient.
- Open the
Disable SmartScreen in Microsoft Edge.regfile and confirm changes. - If you need to re-enable SmartScreen in Microsoft Edge, open the
Turn on SmartScreen in Microsoft Edge.regfile.
That is how you disable SmartScreen in Windows 11 and Microsoft Edge.
Winaero Tweaker
Finally, you can use Winaero Tweaker, my freeware app to disable the SmartScreen filter in both Windows Explorer and Microsoft Edge. It comes with the following options:
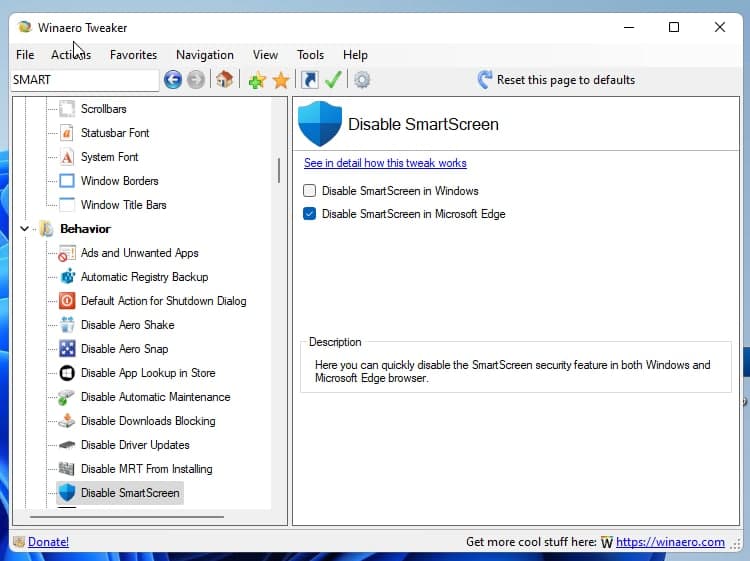
The appropriate options are under the "Behavior" section in the left navigation tree. Check the desired options to disable the feature. Winaero Tweaker also supports exporting and importing its settings, so you can quickly restore your preferences or move them to a new PC.
Download Winaero Tweaker here.
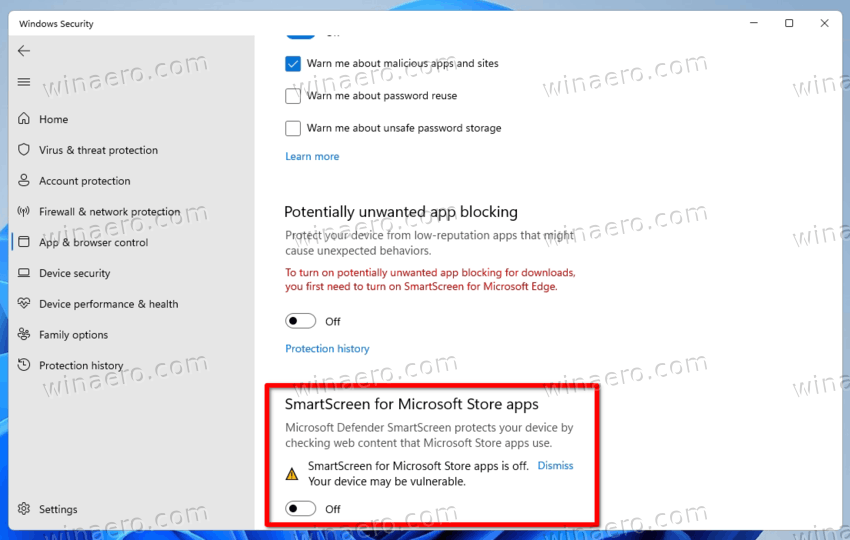
Disable SmartScreen for Microsoft Store apps
By default, the SmartScreen feature in Microsoft Defender always protects your device from unwanted or dangerous activity of apps installed from the Microsoft Store. It will show a warning if some app connects or downloads something from a potentially dangerous website. You will be able to continue and dismiss the warning. Alternatively, you can turn off this behavior.
To disable SmartScreen for Microsoft Store apps, do the following.
- Find the Windows Security app in Windows Search or in the Start menu, and run it.
- Click on the App & browser control button.
- On the next page, click the Reputation-based protection settings link.
- Finally, turn off the SmartScreen for Microsoft Store apps option.
Done. If you need to automate this process for multiple computers via a REG or batch file, here is how you can get that done.
The registry file method
Open the Registry editor (regedit.exe) to the following key:
HKEY_CURRENT_USER\Software\Microsoft\Windows\CurrentVersion\AppHost
Here, create two 32-bit DWORD values, EnableWebContentEvaluation and PreventOverride. Leave both as 0.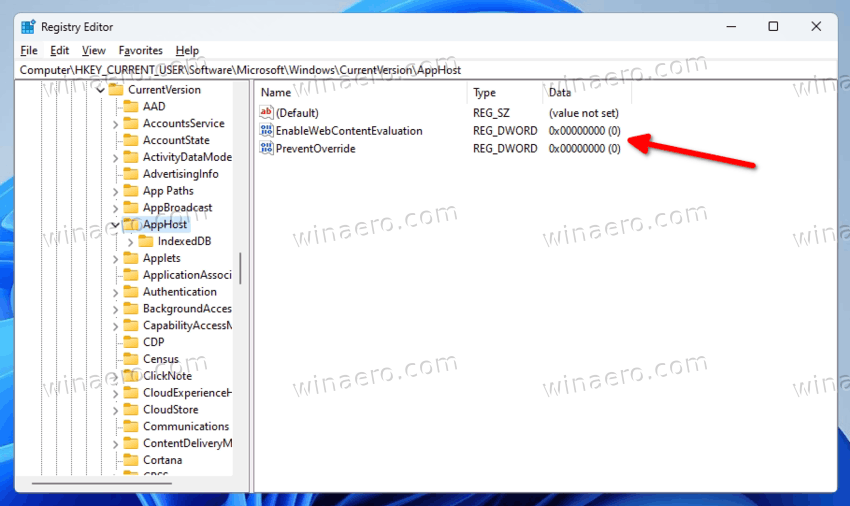
To enable SmartScreen for Microsoft Store apps, set EnableWebContentEvaluation to 1. Don't change PreventOverride, it should be remain set to 0.
You can download ready-to-use REG files from this link.
The archive includes two files:
-
Disable SmartScreen for Microsoft Store apps.reg- disables the SmartScreen feature for Store apps. -
Enable SmartScreen for Microsoft Store apps.reg- enable the feature (default).
Enable Windows SmartScreen in Windows 11
To turn Windows SmartScreen back on in Windows 11, you can repeat all the steps above and toggle on all the options you have previously disabled.
More specifically:
- Set the Group Policy to "Not configured".
- If you used REG files, use the appropriate "Enable *.reg" undo tweak.
- Finally, you can restore Windows SmartScreen from the home screen of the Windows Security app if you have disabled it using it.
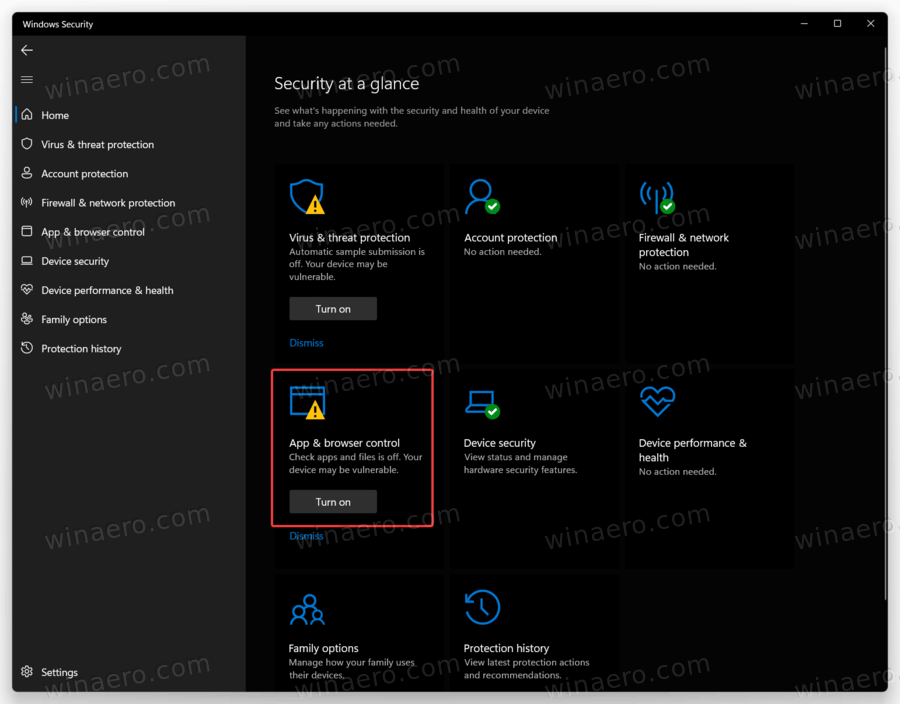
To enable Windows SmartScreen in Windows 11, do the following.
- Open the Windows Security app from the Start menu or system tray.
- On the Home tab, where the app shows security at a glance, find the App & browser control button. You will notice a yellow exclamation point indicating potential security risks due to disabled SmartScreen.
- Click Turn On. Select Yes on the UAC prompt, and after that, Windows 11 will enable SmartScreen automatically.
That's it.
Support us
Winaero greatly relies on your support. You can help the site keep bringing you interesting and useful content and software by using these options:
If you like this article, please share it using the buttons below. It won't take a lot from you, but it will help us grow. Thanks for your support!
Advertisеment

keren banget thanks
as smartscreen.exe hung in processes, it hangs in Windows 11
Thanks a much for info.