You can quickly disable all ads in Windows 11, such as advertisements in File Explorer and on the Lock Screen, suggestions in Settings and on the Desktop, and so on. What Microsoft shows is actually not third-party ads or banners like you see on websites. The Redmond firm is instead promoting its own services and apps. Some notifications may include “fun facts” or suggestions Microsoft considers useful to the end user. But users often find them annoying.
Advertisеment
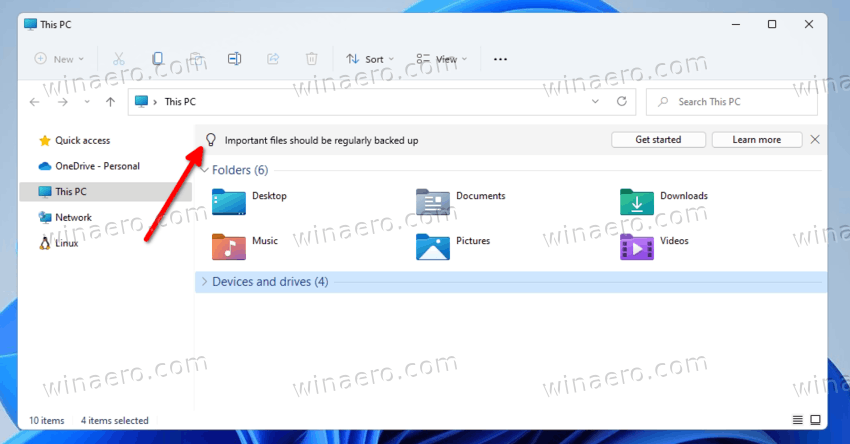
Such ads are nothing new to Windows 11. The OS share a lot of common with its predecessor. It is Windows 10 where Microsoft first introduced such promotional notifications. Along with desktop toasts that show tips and app suggestions, it also included a promotional banner for OneDrive directly in File Explorer.
If you are not happy with seeing tips and suggestions in the user interface of the operating system, then carefully follow the steps below.
Disable Ads in Windows 11
To disable all variations of ads, you need to subsequently change a few options in Windows 11 Settings and in File Explorer. There are also a couple of Registry tweaks to apply. Here’s how you can do that.
Disable ads in File Explorer
- Open File Explorer; press Win + E or click its icon in the taskbar or Start menu.
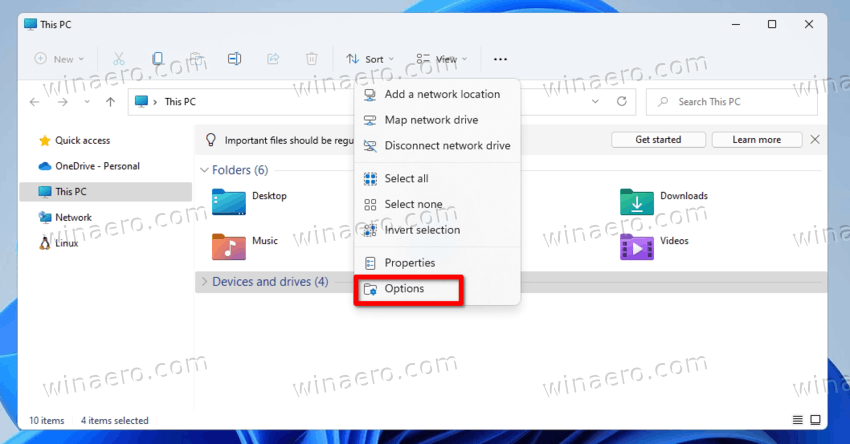
- Click on the See more button with 3 dots in the toolbar, and select Options.
- Switch to the View tab in the Folder Options dialog.
- Remove the check mark from the Show sync provider notifications option to disable ads in File Explorer.
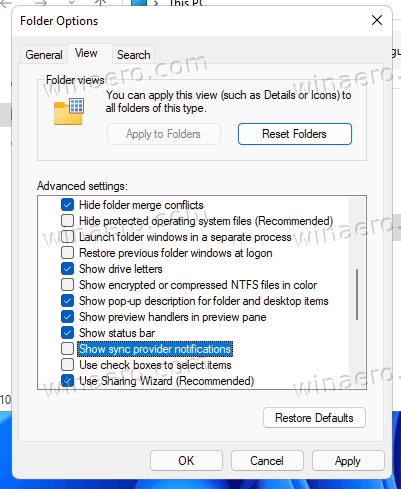
- Click OK in the Folder Options window.
- Re-open File Explorer to make the existing ads disappear.
You are done.
You may wonder what's actually the "sync provider notifications"? Those notifications display quick and easy tips and suggestions about Windows 11 apps and features you can try to have a better experience with Microsoft's ecosystem.
Alternatively, you can apply a registry tweak.
Using a Registry tweak
- Download two REG files in a ZIP archive using this link.
- Extract the REG files to any folder of your choice.
- Now, double-click the Disable_sync_provider_notifications.reg file and confirm the UAC prompt.
- File Explorer will no longer show promotional notifications.
Done. Finally, to undo the change and restore notifications double-click the Enable_sync_provider_notifications.reg file. You may also need to learn how the REG files do their work.
How it works
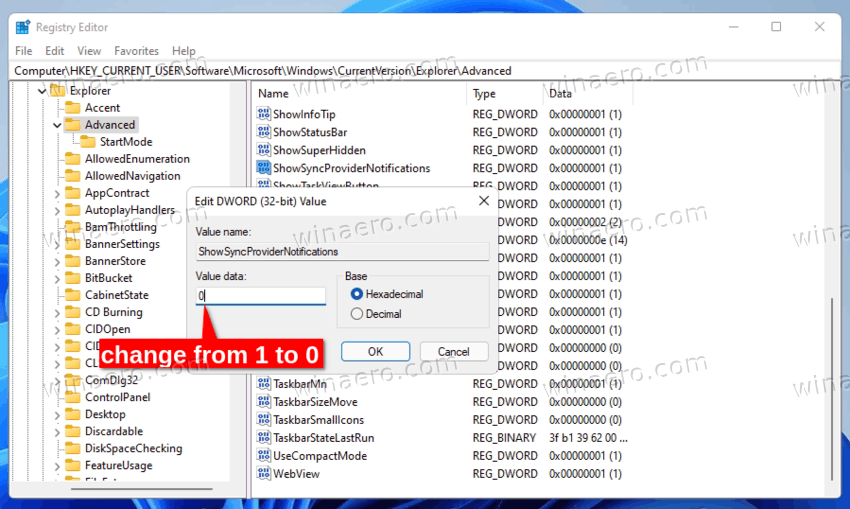
The above REG files will change the ShowSyncProviderNotifications DWORD value under the HKEY_CURRENT_USER\SOFTWARE\Microsoft\Windows\CurrentVersion\Explorer\Advanced key.
-
ShowSyncProviderNotifications = 0- disables notifications. -
ShowSyncProviderNotifications = 1- File Explorer shows ads (default)
The next step you may want to take is to disable ads on the Lock Screen. It may periodically show promotional materials. The latter includes games, apps, and services, including ones from Microsoft's partners.
Disable ads on the Lock screen in Windows 11
- Press Win + I to open the Settings app.
- Click Personalization on the left.
- Select Lock screen in the right pane.
- Finally, uncheck the option Get fun facts, tips, tricks, and more on your lock screen. Note that it is only appears when the Lock Screen background is set to Picture or Slideshow.

You are done. The lock screen will no longer show extra notifications.
But if you prefer a Registry editing method, here are the files for you.
Registry files
- Download this ZIP archive.
- Unpack the REG files to any folder.
- Double-click the file "Disable_ads_on_lock_screen.reg" to get rid of ads on the lock screen in Windows 11.
- The other file, "Enable_ads_on_lock_screen.reg", will re-enable extra lock screen notifications.
The two files change the following Registry keys and values.
HKEY_CURRENT_USER\SOFTWARE\Microsoft\Windows\CurrentVersion\ContentDeliveryManager
; To disable ads
"RotatingLockScreenEnabled"=0
"RotatingLockScreenOverlayEnabled"=0
"SubscribedContent-338387Enabled"=0
; defaults (enable ads)
"RotatingLockScreenEnabled"=1
"RotatingLockScreenOverlayEnabled"=1
"SubscribedContent-338387Enabled"=1
All three values are of the DWORD type.
Disable tips about Windows features
Windows 11 occasionally show tips on how to use this or that feature, like the new Start menu or Quick Settings. They are great if you see Windows 11 for the first time. But if you have some experience with the OS, they are a bit annoying.
To disable tips and notifications about Windows features, do the following.
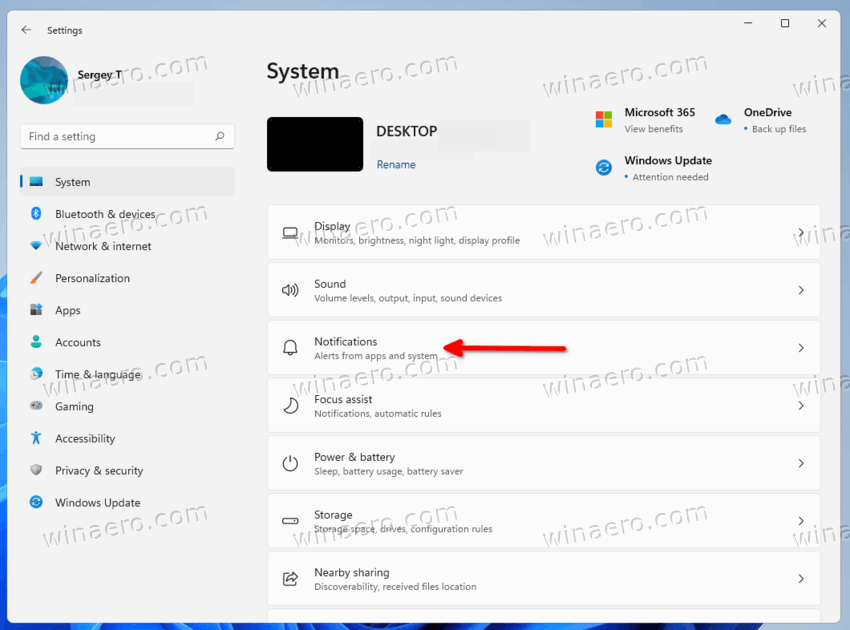
- Open the Settings app with the Start menu shortcut or by pressing Win + I.
- Click System on the left.
- On the right, click on Notifications.
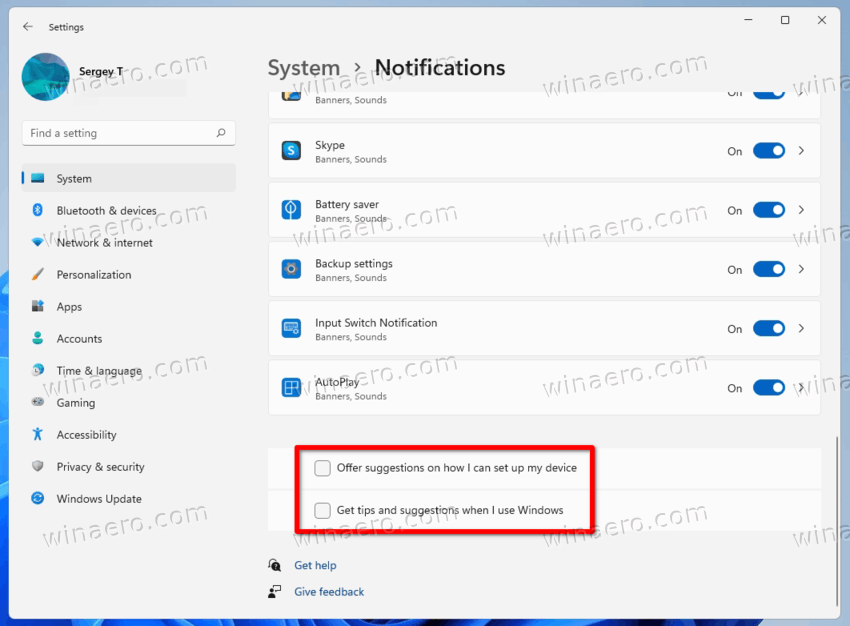
- Scroll down the next page to the Additional settings button and click it.
- Remove the check marks from the Get tips and suggestions when using Windows, Suggest ways to get the most out of Windows and finish setting up this device, and Show me the Windows welcome experience... options. The latter is reviewed in detail in the 'Disable "Let's finish setting up your device" screen' article.
Tip: If you have an OEM version of Windows 11 that comes preinstalled with your computer, it can be a good idea to review the list of apps that can send you notifications. If you spotted some promotional software in the list of apps, or some of the utility apps is annoying you with toasts, toggle off notifications for it here.
The same can be done with a Registry tweak.
Disable Windows tips in the Registry
You can disable tips about Windows 11 features by changing a couple of DWORD values. For the "Get tips and suggestions when using Windows" option, the corresponding value is SoftLandingEnabled located at the key HKEY_CURRENT_USER\SOFTWARE\Microsoft\Windows\CurrentVersion\ContentDeliveryManager. Set if to one of the following values:
- SoftLandingEnabled = 0 - tips are disabled.
- SoftLandingEnabled = 1 - tips are disabled
As for the "Suggest ways to get the most out of Windows and finish setting up this device" option, the value is ScoobeSystemSettingEnabled under the HKEY_CURRENT_USER\Software\Microsoft\Windows\CurrentVersion\UserProfileEngagement key.
- ScoobeSystemSettingEnabled = 0 - suggestions are disabled.
- ScoobeSystemSettingEnabled = 1 - suggestions are enabled (default).
You can also download REG files that automate the reviewed Registry tweaks using this link.
Finally, Windows 11 shows suggestions directly in the Settings app, even when the two above options are disabled. You may want to disable them as well.
Disable suggestions in the Settings app
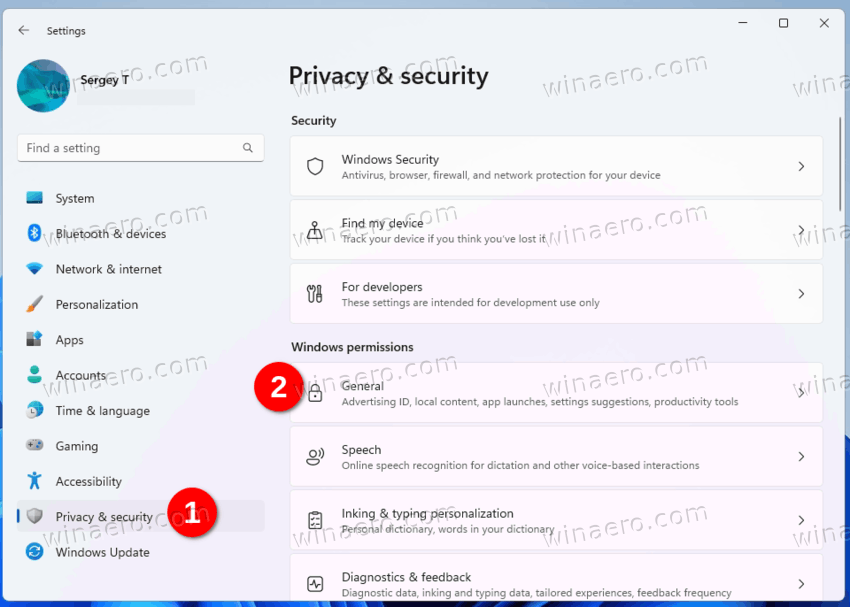
- Open the Settings app using any of the available methods.
- Click on Privacy & security on the left.
- On the right, click on the General section.
- Finally, on the next page disable the toggle switch from the Show me suggested content in the Settings app option.
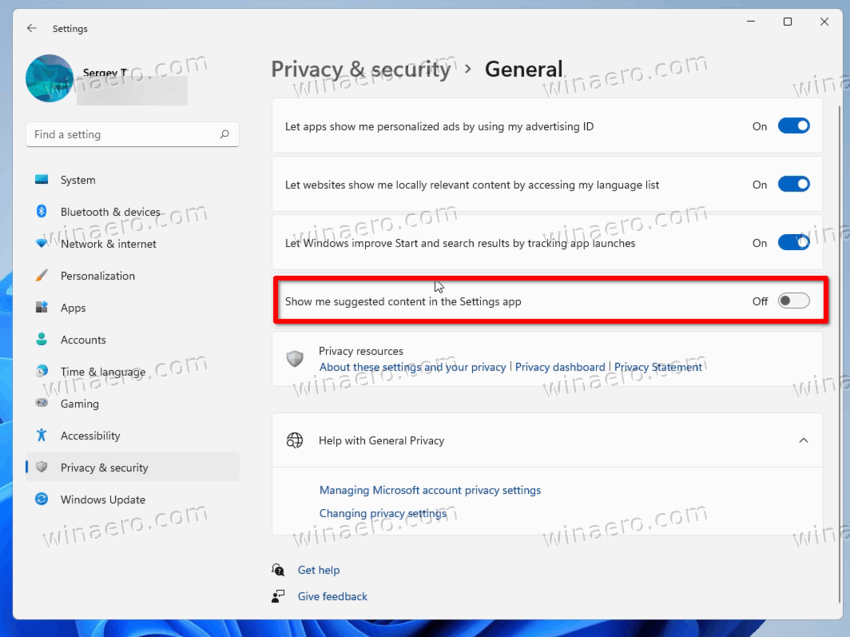
- You can now close the Settings app.
Alternatively, you can disable this option in the Registry.
Disable Settings app suggestions in the Registry
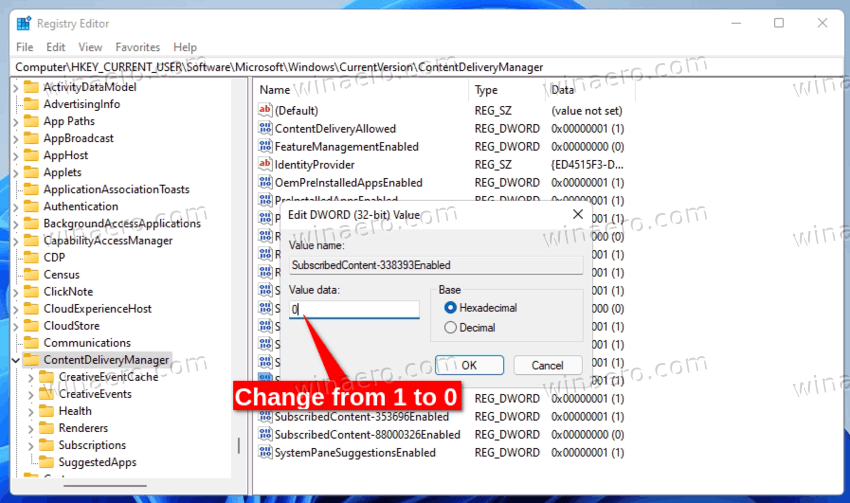
To disable suggestions and tips for the Windows 11 Settings app, In the Registry, visit the HKEY_CURRENT_USER\Software\Microsoft\Windows\CurrentVersion\ContentDeliveryManager key and change the value data for the SubscribedContent-338393Enabled value.
-
SubscribedContent-338393Enabled = 0- suggestions in Settings are disabled. -
SubscribedContent-338393Enabled = 1- enable suggestions in Settings (default).
You can also download these REG files in the ZIP archive to avoid editing of the Registry manually. Extract them to any folder.
Another thing to disable are suggested apps that Windows 11 installs automatically after you sign-in to your user account. If your device remains connected to the Internet, you will notice that apps like Twitter, Facebook, and similar software are getting downloaded automatically. Here's how to disable them.
Disable automatic installation of apps in Windows 11
- Press Win + R and type
regeditinto the Run box. - Open the following key:
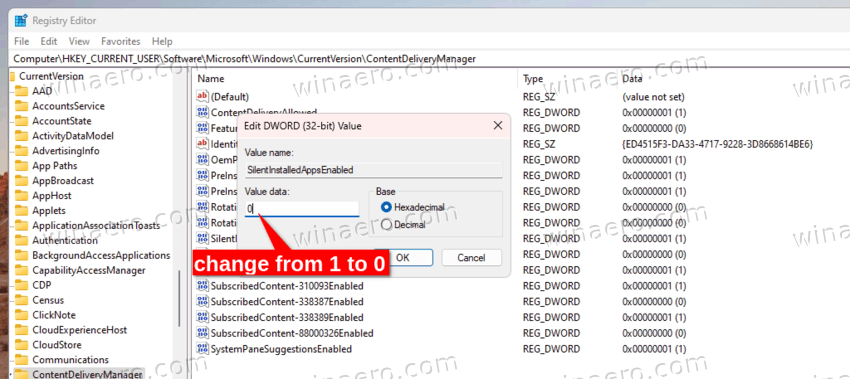
HKEY_CURRENT_USER\Software\Microsoft\Windows\CurrentVersion\ContentDeliveryManager. - Now, create or modify the 32-bit DWORD value SilentInstalledAppsEnabled.
- Set its value data to 0.
- Restart Windows 11 to apply the change.
You are done. Keep in mind that you need to apply this tweak in every user account you have on your computer.
Download REG files
To save your time, you can download these ready-to-use Registry files. Extract the downloaded ZIP archive and double-click the REG file.
-
Disable_automatically_installing_apps.reg- prevents Windows 11 from auto-installing apps. -
Enable_automatically_installing_apps.reg- restores the defaults.
Disable personalized ads in Windows 11 apps
Finally, you can disable personalized ads in all Store apps. By default, Windows generates a unique identifier for your user account. Apps can use it to associate it with your preferences, searches and other personal data. The collected information can be used for ad targeting, i.e. to show ads that match your interests.
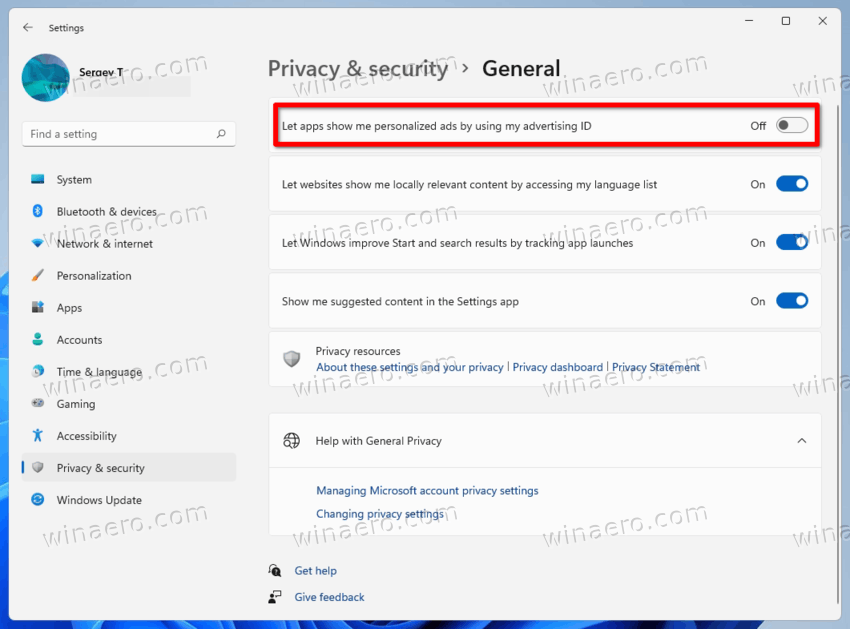
If you are not happy with personalized ads in Windows 11, open the Settings app and open the Privacy & security > General page. On the right, disable the Let apps show me personalized ads by using my Advertising ID option.
Again, you can disable this option in the Registry.
The Registry Editor method
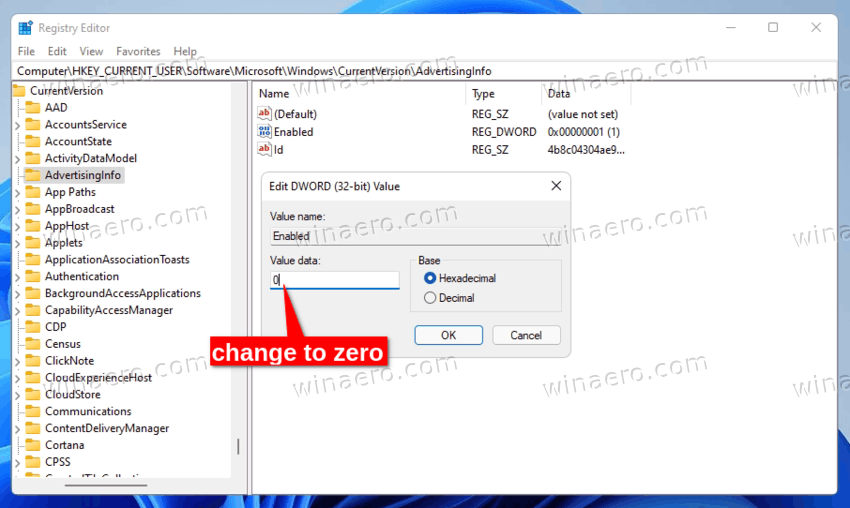
Open the Registry editor (regedit.exe) and go to the HKEY_CURRENT_USER\Software\Microsoft\Windows\CurrentVersion\AdvertisingInfo key. In the right pane, change the 32-bit DWORD value Enabled.
- Enabled = 0 - disable personalized ads.
- Enabled = 1 - enable personalized ads (default).
The ready-to-use REG files with this tweak are available at this link.
They are packed into a ZIP archive that you can extract to any folder. After that, open the Disable personalized ads in Windows 11.reg file to apply the change. The other REG file in the archive is an undo tweak.
Disable the "Tailored Experiences" diagnostic data
By default, Microsoft collects and analyzes a set of information on how do you use your PC. The data may include details about your computer hardware, the software you have installed, its settings, performance metrics, and so on.
This information is also used to determine what ads and tips Windows can show you based on you activity.
If you are not happy with sharing this info with Microsoft, you may want to disable it as well.
To disable the "Tailored Experiences" diagnostic data in Windows 11, do the following.
- Open the Settings app using the Win + I shortcut keys.
- Navigate to the Privacy & security page and click on the Diagnostics & feedback button.
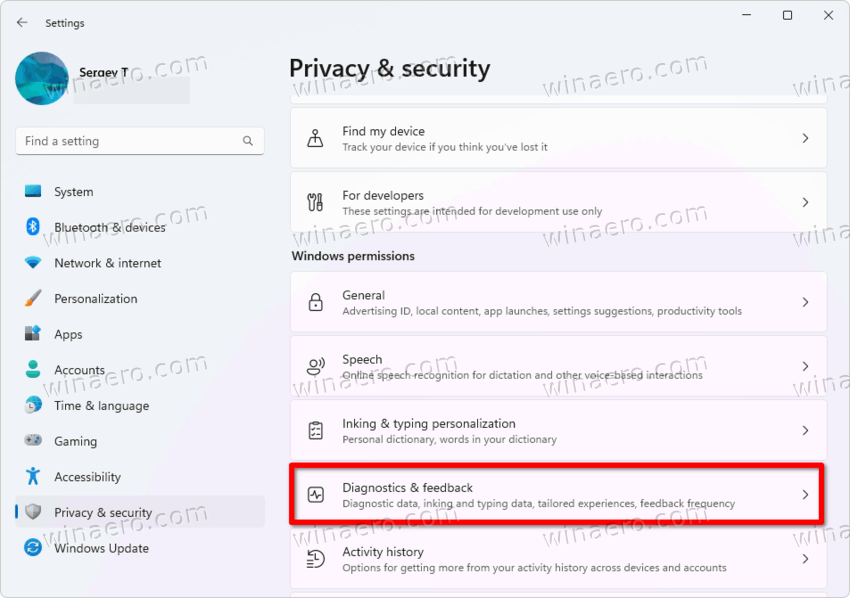
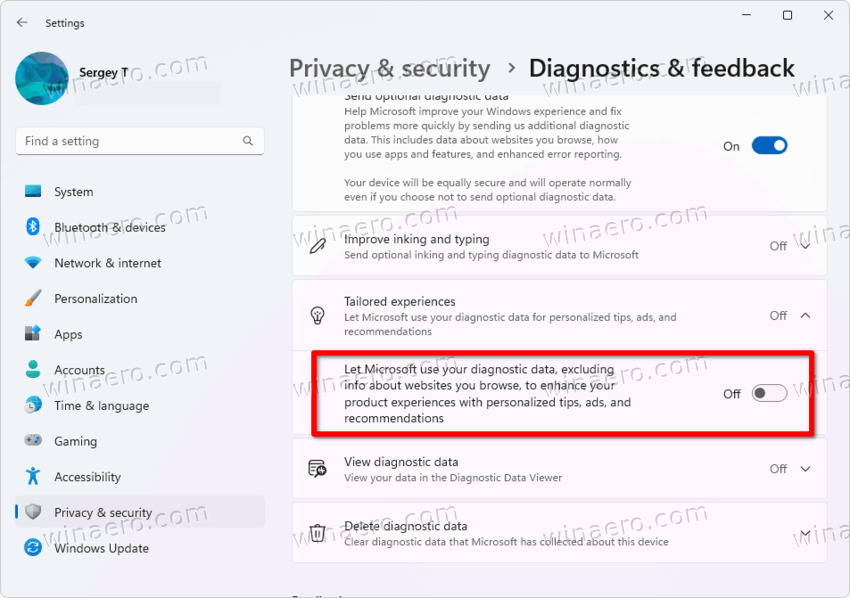
- Click on the Tailored experiences option on the next page to expand open it.
- Finally, disable the toggle option named "Let Microsoft use your diagnostic data, excluding info about websites you browse, to enhance your product experiences with personalized tips, ads, and recommendations".
You are done!
Disable Tailored Experiences in the Registry
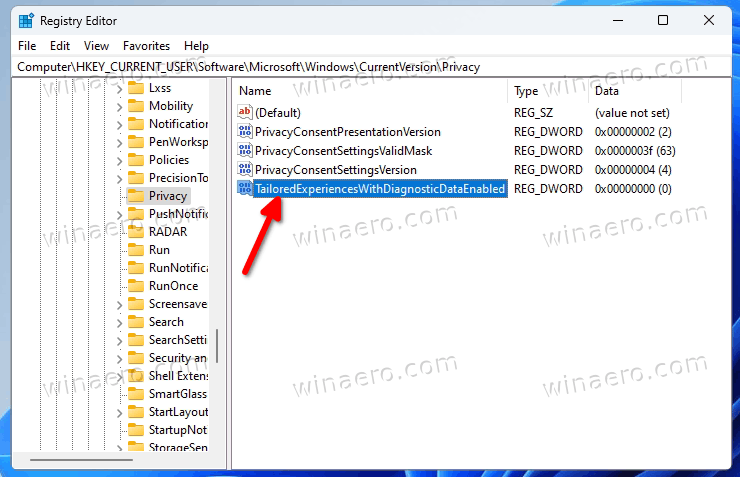
Launch the regedit.exe app, and browse it to the following branch.
HKEY_CURRENT_USER\Software\Microsoft\Windows\CurrentVersion\Privacy
Under the Privacy key, create or modify the TailoredExperiencesWithDiagnosticDataEnabled 32-bit DWORD value. Set it as follows.
- TailoredExperiencesWithDiagnosticDataEnabled = 0 - disable the data collection.
- TailoredExperiencesWithDiagnosticDataEnabled = 1 - enable the data collection (default).
Again, to save your time, you can download these REG files. They have self-explanatory names, Disable Tailored Experiences.reg and Enable Tailored Experiences.reg. Double-click the appropriate REG file to apply it, and confirm the User Account Control prompt.
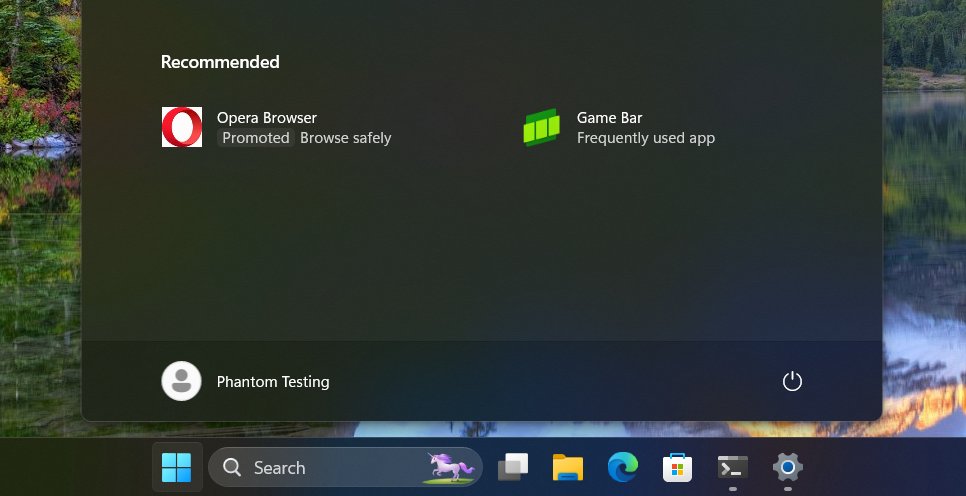
Starting in Build 25227, Windows 11 shows ads in the Start menu that promote various websites and apps in the Recommended section of the Start menu. This includes not only Microsoft's own services, but also third-party offers. E.g. you can spot the Opera browser, or a link to some random website.
To disable the Start menu ads in Windows 11, do the following.
- Open the Registry editor app (regedit.exe).
- Navigate to this key:
HKEY_CURRENT_USER\Software\Microsoft\Windows\CurrentVersion\Explorer\Advanced. - Find the Start_IrisRecommendations in the right pane and double-click it.
- Change its value data from 1 to 0.
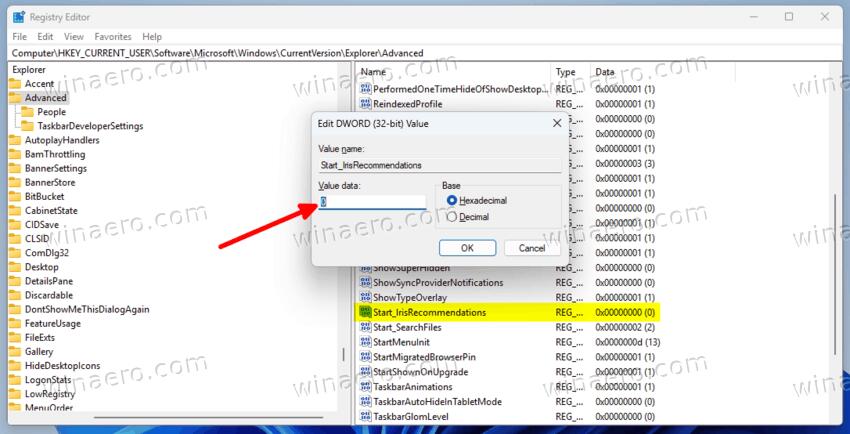
This way you will get rid of the ads in the Recommended section of the Start menu.
For the ready-made REG files, visit this link.
If you are a Winaero Tweaker user, most of these options are already available in the app. There, you can stop Windows from showing various ads with a couple of clicks.

You can download Winaero Tweaker here.
That's it!
Support us
Winaero greatly relies on your support. You can help the site keep bringing you interesting and useful content and software by using these options:

If this comes into Windows, it’s the end of Windows for me. I’ve accepted a lot of sh#t from MS. I draw my line here. There are so many great OS today from GNU/Linux. I’m not new to GNU/Linux either. Used it for many years already.
I’ve always had a Windows computer if I had to do something with Windows. I’m starting to think all the work to put it up is too hard. Remove +20 programs, hack it so it’s more private and so on. Takes hours!
For the winaero tweaker options, are options that do not specifically say “stop” or “disable” in the title positive or negative? For example, if the “Ads in File Explorer” option is checked, does that disable or enable that feature?
Checked = disabled
OMG! I was looking for this explanation everywhere.
I found it pretty hard to understand even the basics of WinAero (as in “is it enabled or not? “), and I really love the in depth explanation of how to manually tweak things from the UI and even more the registry edits for Policies in a domain. But I surely could love very much seeing “disable disable disable disable disable disable disable” on every box (or better “enable enable enable” to avoid the double negation of “unchecked=enabled”. I know some slavic languages have double negation and maybe it sounds ok there, but it’s confusing or at least cumbersome for most of the rest of the world ). No matter if it’s enabled or disabled when checked, surely explicit text would be very much welcome!
Or that as the first explanation in the website, at least. I was kinda expecting that when I clicked “See in detail how this tweak works” and I was about to give up and uninstal even though the app seemed interesting so far.
Is it a translation error, or on purpose to avoid repeating “disable/enable” over and over?
Sergei, please, add all these settings as a submenu in Win 11 section. Why to use an additional app like OFGB to do this:
https://i.postimg.cc/x8gWHkNn/Snap2028.png
10x
Sure I will add. Planned for the next version.
I hope to release it this week.
reset page to default, and now can no longer disable any item. wa 1.63, win10 19045.5011
thank you. Investigating.
yeah, group toggle only works to uncheck them, to check them, you need to do it manually, one by one