How to Disable Run Dialog in Windows 10 and Prevent Users from Accessing It
The Run dialog is one of the oldest Windows features. Its current implementation is available starting in Windows 95, with some improvements made to it in Windows 10. The operating system allows you to prevent users from accessing it. It can be useful if you are a system administrator and need to apply extra restrictions to the user environment.
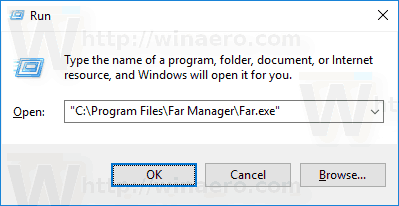
In Windows versions prior to Windows 8, the Run dialog could be accessed from the Start menu. While Vista and Windows 7 had it hidden from the Start menu by default, it was a matter of two clicks to re-add it there. Starting in Windows 8, Microsoft has eliminated the classic Start menu from the Windows shell, leaving no place for the Run command. Even in Windows 10 the Start menu is a modern application separated from the Explorer process.
Advertisеment
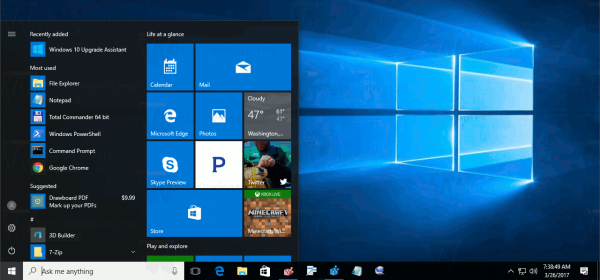
It utilizes the Universal Windows Platform, a framework that is used to build Store apps. Simply speaking, it is a separate UWP app. Check this out:
Starting in Windows 8, the Run dialog can be opened from the Win + X menu, or from the app listing provided by the Start screen in Windows 8 and 8.1, and in the Start menu of Windows 10. There is a shortcut that can be found under the Start \ Windows Accessories folder.
Also, the good old Win + R shortcut works in all Windows versions.
Recent Windows 10 version allow starting apps as Administrator directly from the Run dialog. All you need is to press CTRL + SHIFT + ENTER to launch your application elevated from the Run box.
Tip: You can Launch your favorite apps with useful aliases from the Run dialog.
If you need to apply a restriction and prevent users from accessing the Run dialog, Windows 10 offers you at least two methods, a Group Policy option, and a Group Policy Registry tweak. The first method can be used in editions of Windows 10 that come with the Local Group Policy Editor app. If you are running Windows 10 Pro, Enterprise, or Education edition, then the Local Group Policy Editor app is available in the OS out of the box. Windows 10 Home users can apply a Registry tweak. Let's review these methods.
To Disable Run Dialog in Windows 10,
- Open the Local Group Policy editor app, or launch it for all users except Administrator, or for a specif user.
- Navigate to User Configuration > Administrative Templates > Start Menu and Taskbar on the left.
- On the right, find the policy setting Remove Run menu from Start Menu.
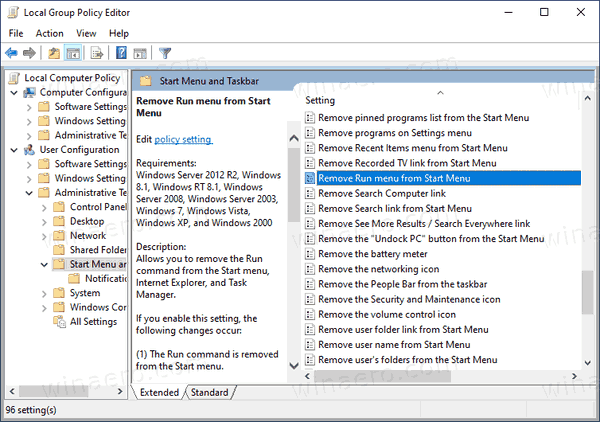
- Double-click on it and set the policy to Enabled.
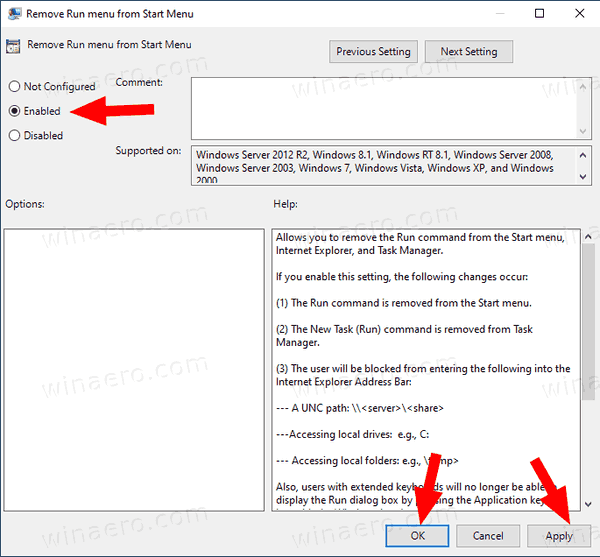
- Click on the Apply and OK buttons.
You are done. If someone try to access the Run dialog, regardless of the method he or she use the operation will be cancelled with the following message:

Tip: See How to Reset All Local Group Policy Settings at once in Windows 10.
Now, let's see how the same can be done with a Registry tweak.
Disable Run Dialog in Windows 10 With a Registry Tweak
- Open Registry Editor.
- Go to the following Registry key:
HKEY_CURRENT_USER\Software\Microsoft\Windows\CurrentVersion\Policies\Explorer. Tip: See how to jump to the desired Registry key with one click.If you do not have such a key, then just create it. - Here, create a new 32-bit DWORD value NoRun. Note: Even if you are running 64-bit Windows, you still need to use a 32-bit DWORD as the value type.
Set it to 1 to disable the Run dialog.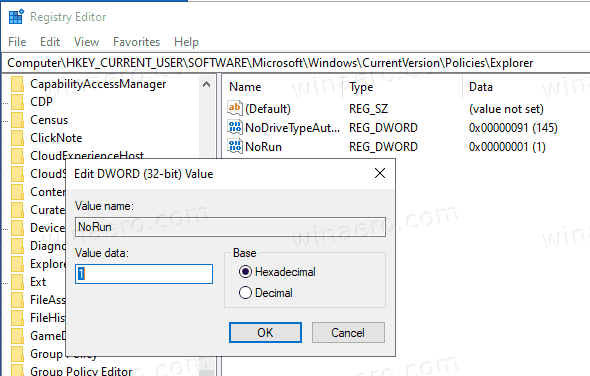
- To make the changes done by the Registry tweak take effect, you need to sign out and sign in again to your user account.
Later, you can delete the NoRun value to allow the user to use the Run dialog.
To save your time, you can download the following Registry files:
Download Ready-to-use Registry Files
The undo tweak is included.
Tip: You can try to enable GpEdit.msc in Windows 10 Home.
That's it!
Support us
Winaero greatly relies on your support. You can help the site keep bringing you interesting and useful content and software by using these options:
