When you are not using your PC, Windows 10 performs a number of maintenance tasks. These scheduled tasks are configured to run automatically out-of-the-box. One of them is Computer Maintenance. It is a complex task which performs a number of operations to keep your OS clean and configured properly. It performs various tasks like finding and fixing broken shortcuts, removing unused Desktop shortcuts, correcting the system time and more. If you are not happy with the result of this maintenance or have a reason to prevent the OS from changing your shortcuts and settings, here is how to disable it.
Advertisеment
By default, the Automatic Computer Maintenance task is configured to perform the following actions:
- Broken shortcuts removal. If you have more than 4 broken shortcuts in the Start menu and on the Desktop, Windows 10 will remove them. Such shortcuts usually point to executable files which do not exist any more, for example, after you delete the app's folder from Program Files manually.
- Desktop icons which have been unused in 3 months will be removed.
- System clock will be checked and synchronized with a time server.
- Hard disks will be checked for file system errors.
- The troubleshooting history and error reports which are older than 1 month will be removed.
Personally, I find this feature useful and never disable it. If your situation is different, here is how you can disable this feature. Before proceeding, ensure that your user account has administrative privileges. Now, follow the instructions below.
To disable automatic computer maintenance in Windows 10, do the following.
- Open Registry Editor.
- Go to the following Registry key:
HKEY_LOCAL_MACHINE\SOFTWARE\Microsoft\Windows\ScheduledDiagnostics
Tip: You can access any desired Registry key with one click.
If this key doesn't exist, then just create it. - In the right pane, you will see the EnabledExecution value. If this value doesn't exist, create a 32-bit DWORD value of this name. Even if you are running 64-bit Windows, you still need to create a 32-bit DWORD value. Set it to 0 to disable Automatic Computer Maintenance in Windows 10.
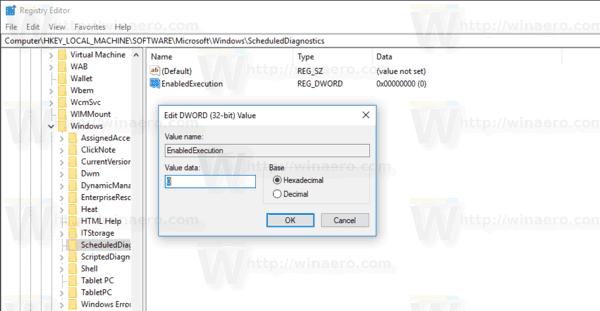
- Restart Windows 10.
You are done.
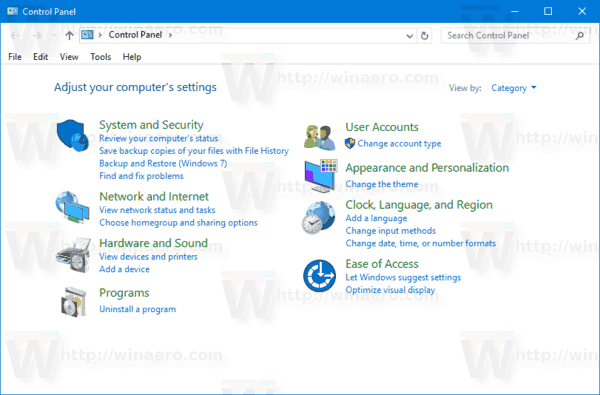
If you prefer the GUI method, there is a special option in the classic Control Panel app.
Disable Computer Maintenance in Windows 10 with Control Panel
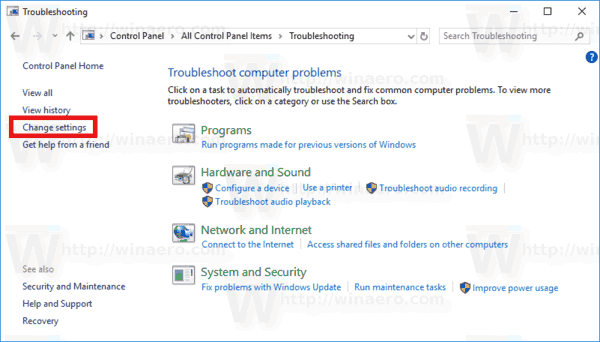
- Open the classic Control Panel app.
- In the search box, type troubleshooting as shown below.
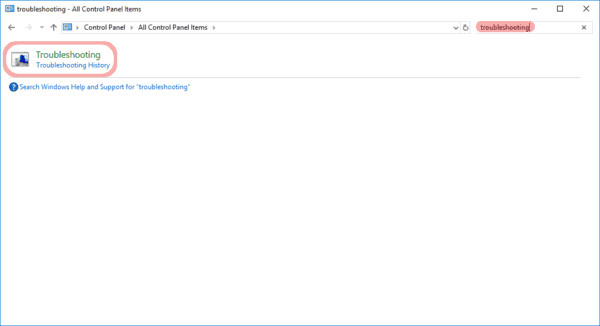
- Click on the Troubleshooting item. The following page will open:
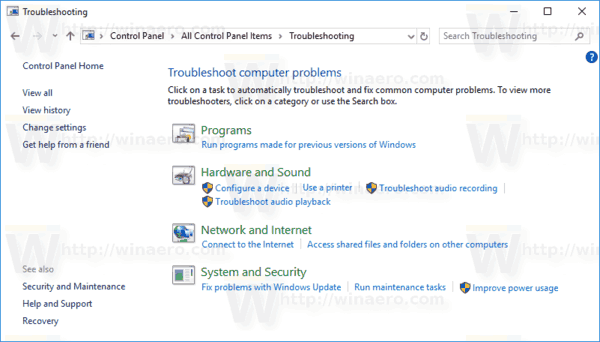
- On the left, click the link "Change settings".
 The following page will open.
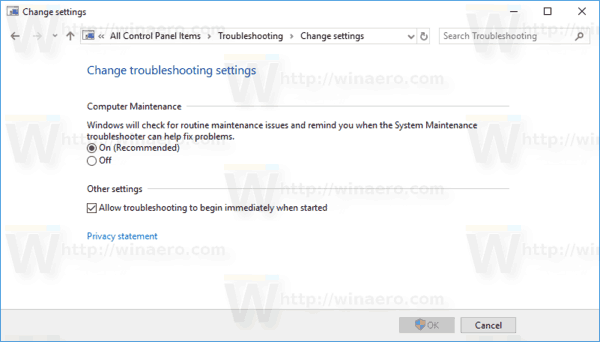
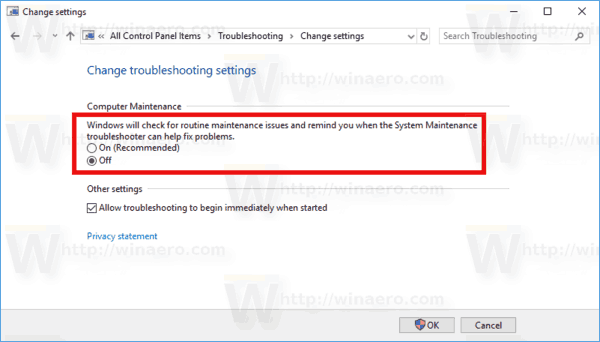
- Select the Off option under Computer Maintenance and click the OK button.
That's it.
Support us
Winaero greatly relies on your support. You can help the site keep bringing you interesting and useful content and software by using these options:

Wow, I came to the right place. I learned a few things just reading two of your articles, and easy for me to understand. My laptop has been acting erratic and slow since the last Windows 10 update, I am hoping I can find some more answers on your site. (such as Registry errors, deleting system cache, duplication, etc..) Thank you so much for the help so far.
What’s the difference between the method posted in this article versus the one you’ve posted here…?
https://winaero.com/blog/how-to-disable-automatic-maintenance-in-windows-10/
These are just different maintenance tasks. For instance, the second one you mentioned doesn’t work with shortcuts.
I had a feeling you were gonna say that. While waiting for your reply, I been doing some more research and it looks like the Maintenance that you’re referring to in this article is one that has been included since Windows 7. The one from the article looks like it was added in Windows 8.
Seems like every time MS releases a new version of Windows there’s just more and more stuff to DISABLE! SMH
Thanks for posting these articles, they’re very informative and helpful! =)
You are most welcome Ray. Thanks for your kind words.
I’ve been doing some testing and it looks like the “Remove Shortcuts” and “Remove Unused Desktop Icons” scripts were removed in Windows 8 and 10. I personally tested this in my Virtual Machines tonight and found that these were definitely removed starting in Windows 8. This can also be verified by checking in…
C:\Windows\diagnostics\scheduled\Maintenance
and you’ll see that…
RS_RemoveShortcuts.ps1
RS_RemoveUnusedDesktopIcons.ps1
no longer exist in Windows 8 or 10.
You can also test by creating a ‘New Folder’ on the desktop and then making multiple shortcuts of that folder on the desktop. Then delete the ‘New Folder’. Now go into Task Scheduler…
Task Scheduler Library > Microsoft > Windows > Diagnosis
and you can manually run the “Scheduled” task, (which is what gets ran by the “Automatic Maintenance” you’ve discussed in this article), and you’ll see that the broken shortcuts will still exist after the task has run.
Also, if the Automatic Maintenance that you posted about in this article…
https://winaero.com/blog/how-to-disable-automatic-maintenance-in-windows-10/
is disabled, then the Scheduled Maintenance from this article will not run either.
WIN10 maintenance has NEVER done anything useful on the workstations I use, rather it randomly destroys settings .
It messes with my 32bit software compatibility (either making some applications non functional or dysfunctional) , destroys my display settings, (without showing a resolution change, it moves the icons and taskbar off screen) messes with the Media player’s playlist settings
So it would appear that network icons that Windows-10 considers “broken” are still getting deleted.
With so many of my users working from home, and not being on the VPN on startup, their icons that point to mapped drive paths ARE in fact getting deleted presumably by this Scheduled Diagnostics.
I’m going to try the old Win-7 registry solution to see if it still works.
Windows Registry Editor Version 5.00
[HKEY_LOCAL_MACHINE\SOFTWARE\Microsoft\Windows\ScheduledDiagnostics]
“IsBrokenShortcutsTSEnabled”=dword:00000000
“IsUnusedDesktopIconsTSEnabled”=dword:00000000