Microsoft is consequentially creating replacements for the classic Control Panel applets in order to get rid of it completely. With each and every major release, more and more classic tools are getting their modern successors that implemented in Settings. With Windows 10 build 20175, Windows 10 has a new replacement for the Disk Management tool.
Advertisеment
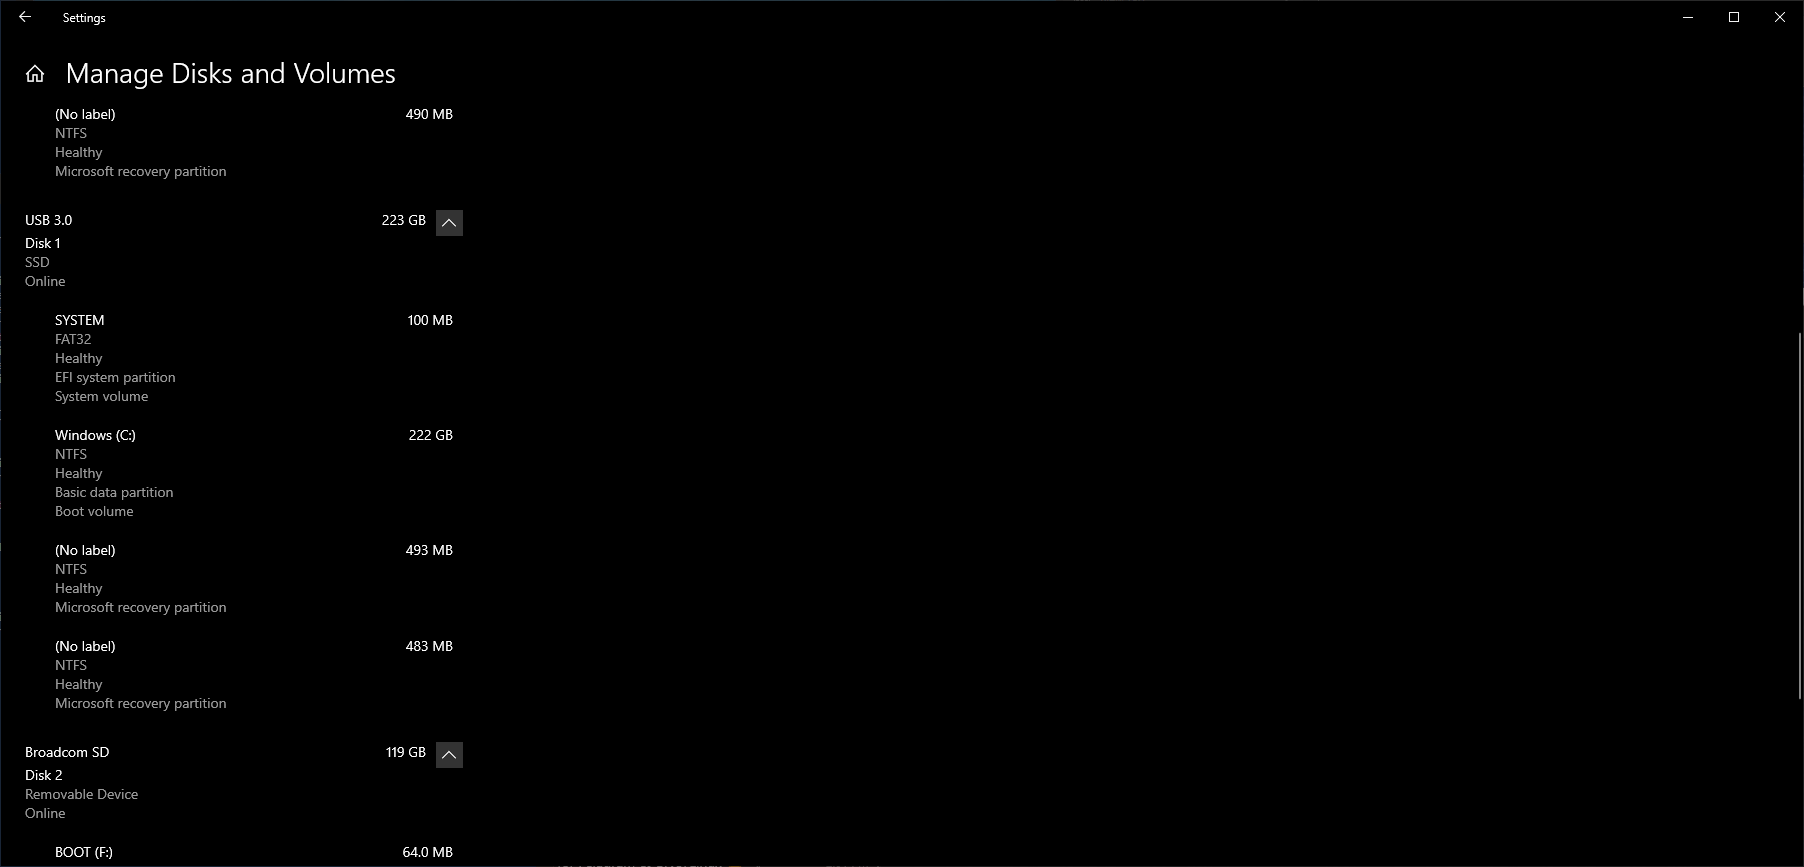
The new tool, after you enable it, becomes available under Settings > Storage, with the new Manage Disks and Volumes link.

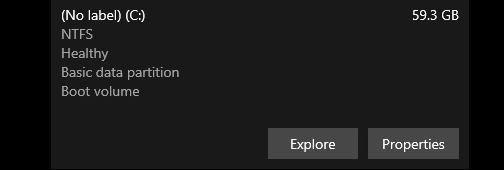
It lists all your storage devices and their partitions. For a partition, it provides the following two options:
- Explore - this will simply open the selected partition/drive in the File Explorer.
- Properties - opens the next page with management tools.
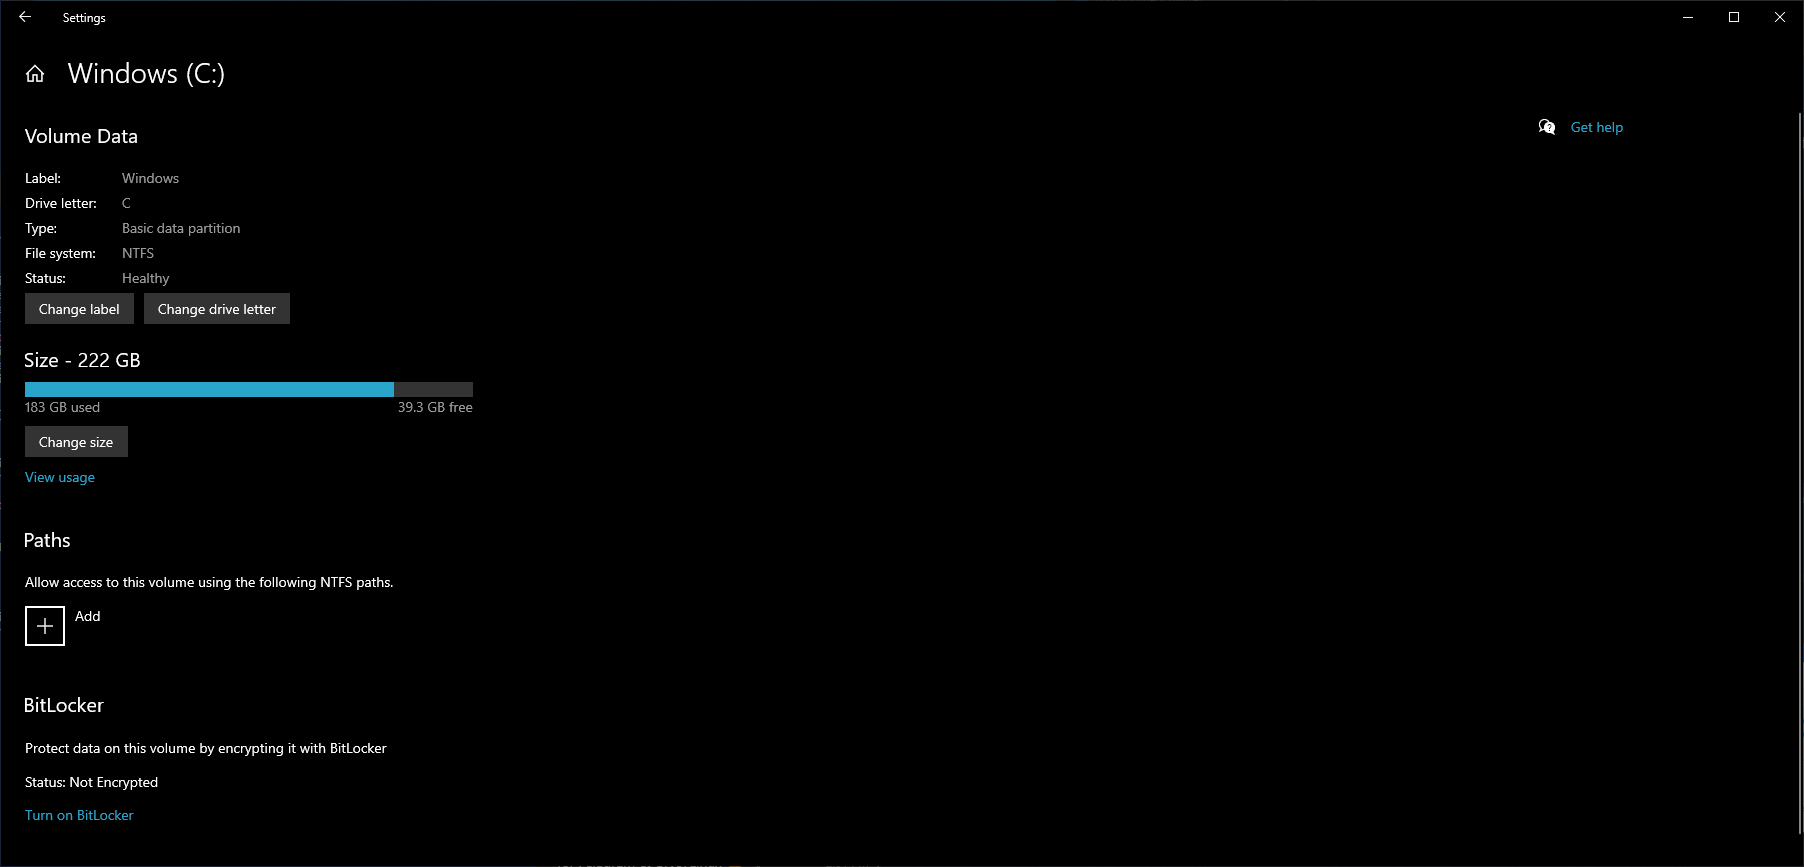
From the Properties page for a fixed drive, you can do the following things:
- Change the drive letter
- Change its label (rename the drive)
- Resize the drive - here you shrink or extend the partition.
- Add paths - allows creating extra mount points for the selected volume.
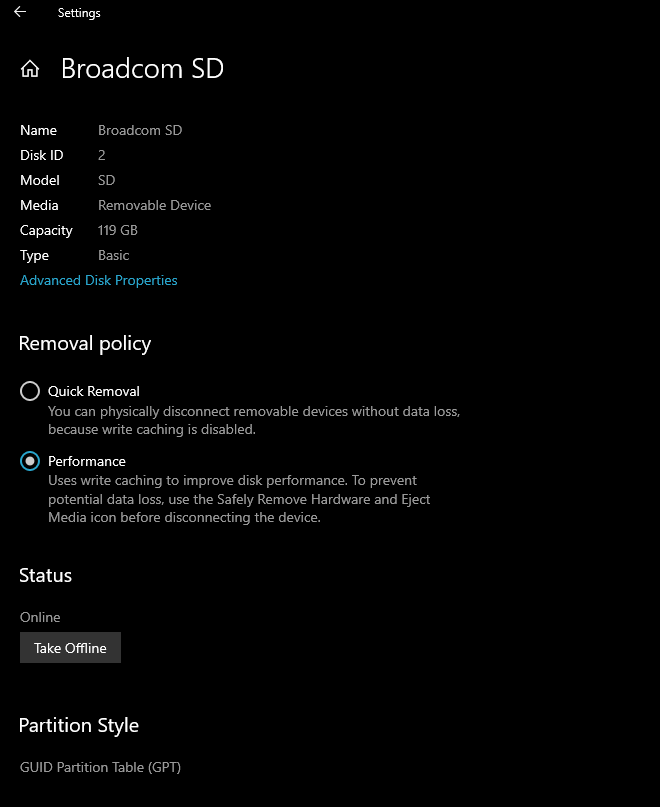
For a removable drive, the Properties page allows changing the removal policy, take it offline, and view some extra data.
And that is all at this moment. The new Disk Management tool can't yet compete with the its classic counterpart, and it only works partially (that's why it is hidden). However, there is no shadow of a doubt that soon it will be promoted as a primary partition management option, exactly like it had happened to the classic Disk Cleanup tool.
If you are interested in enabling this new Settings page, you need a third-party but open source tool Vive. For reference, check out this: Activate Hidden Features in Windows 10 Insider Builds.
How to Enable New Disk Management Tool in Settings
- Download the latest ViveTool release (it is 0.2.0 as of this writing).
- Unblock the downloaded file.
- Extract the archive contents to any folder you like.
- Open the command prompt or PowerShell as Administrator in that folder.
- Type the following command:
ViveTool.exe addconfig 23257398 2. If you are using PowerShell, add.\to the command, as follows: .\ViveTool.exe addconfig 23257398 2. - You will get a message "Successfully set feature configuration".
You are done. The new Disk Management Tool page should become available in Settings. If not, try to restart Windows 10 to get it done.
Thanks to Windows Latest and Gustave Monce.
Support us
Winaero greatly relies on your support. You can help the site keep bringing you interesting and useful content and software by using these options:

Steve Jobs was right. Microsoft has no taste. Windows 10 keeps getting worse with each build. Nothing in settings has been better than the original. This Windows 10 settings team needs to be taut how to properly make a proper user interface. Did they outsource their UX/UI team to interns?
RIP Disk Management… This new one looks just as ugly and dysfunctional as all their “modern” replacements.
I have not yet met anyone who’s happy with the Settings app. Personally, I find it convoluted, bloated and confusing. When I use dark mode, my accent color of choice makes it hard to read. I welcome that Microsoft continues to work on Windows 10, but they should allow people to use “legacy” management tools and control panel applets, too, because they are tried and trusted and both home users and professionals are used to them.
As a desktop-only user, this looks horrible to me. Massive backward step.
Are you removing comments you don’t agree with now?
Nope.
I do apologise, my comments didn’t seem to be appearing.
Must be a server-side cache effect. I will check its settings.
Settings is much better organized than Control Panel however it really wastes a lot of space by only occuping 40% of the entire size.
Hi,
Per your instruction’s I have downloaded the Vive Tool Release & unzipped the file into a folder I have labeled ‘unzipped files’. I opened a administrator command prompt and typed the following into it : ViveTool.exe addconfig 23257398 2 , I received the message that stated ” ‘ViveTool.exe’ is not recognized as an internal or external command, operable program or batch file. ” I guess I must be doing something incorrectly. And of course the very first step that I performed was to un-block the downloaded zip file from github . At this point I really don’t know what else to try so I can at least check out the ‘revised’ disk management tool.
Thanks,
David
In command prompt, first run the following command:
cd /d "the\ full\ path to the folder you unzipped the Vive Tool to".Hi
I’m Trying this on version 21H1. is it available yet. ViveTool said it set successfully, but there is no disk management in settings.
“./ViveTool.exe addconfig 23257398 2” didn’t work for me in Powershell, but “ViveTool.exe addconfig 23257398 2” worked in Command Prompt.