Today, we will see how to rename a drive in File Explorer and change its label. In modern Windows, this can be done without using third party tools. Windows 10 allows assigning a unique name of up to 32 characters for NTFS drives or 11 characters for FAT drives to identify a media connected to your computer. There are plenty of methods you can use to change it.
Advertisеment
A drive label acts as a friendly name for a drive and allows the user to quickly find and recognize it in File Explorer and other apps.
Before proceeding, ensure that your user account has administrative privileges. Now, follow the instructions below.
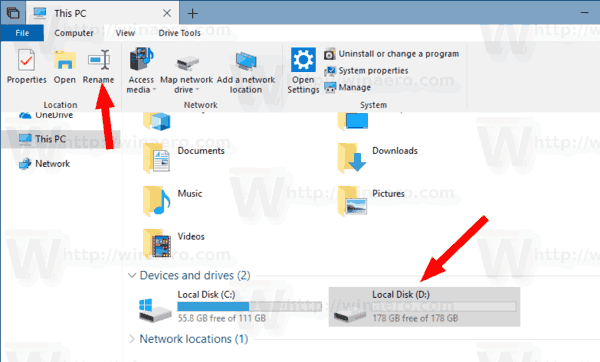
To rename a drive in Windows 10, do the following.
- Open File Explorer.
- Go to the This PC folder.
- Select a drive under Devices and drives.
- Click "Rename" in the Ribbon.
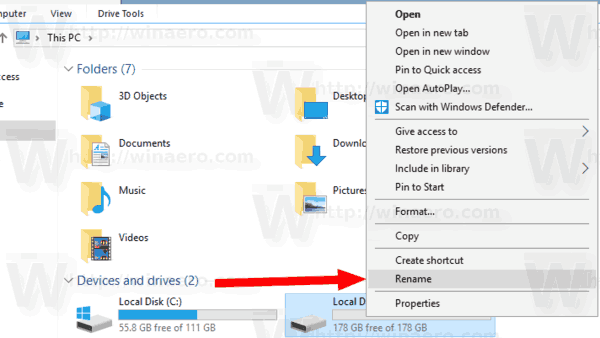
- Alternatively, you can right-click on the drive and select Rename in the context menu. Also, pressing F2 when a drive is selected will allow changing its label.
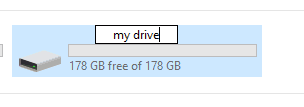
- Type a new label and hit the Enter key.
Another method is the Drive Properties dialog.
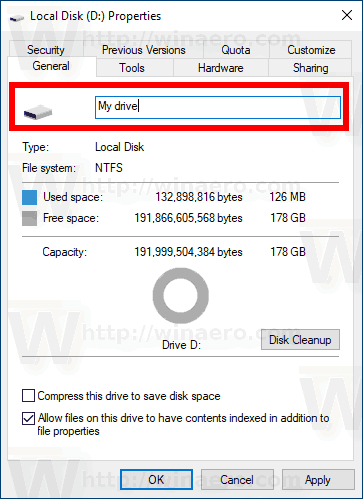
Change Drive Label in Drive Properties
- Open the This PC folder in File Explorer.
- Right-click on a drive and select Properties in the context menu.
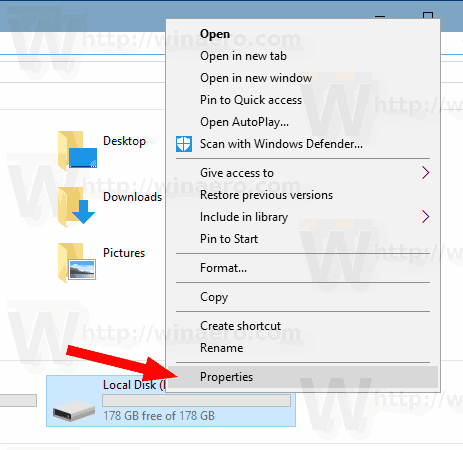
- On the General tab, type the new label value in the text box.
Tip: The Drive Properties dialog can be opened from the Disk Management MMC snap-in. Right-click on a drive there and select Properties from the context menu.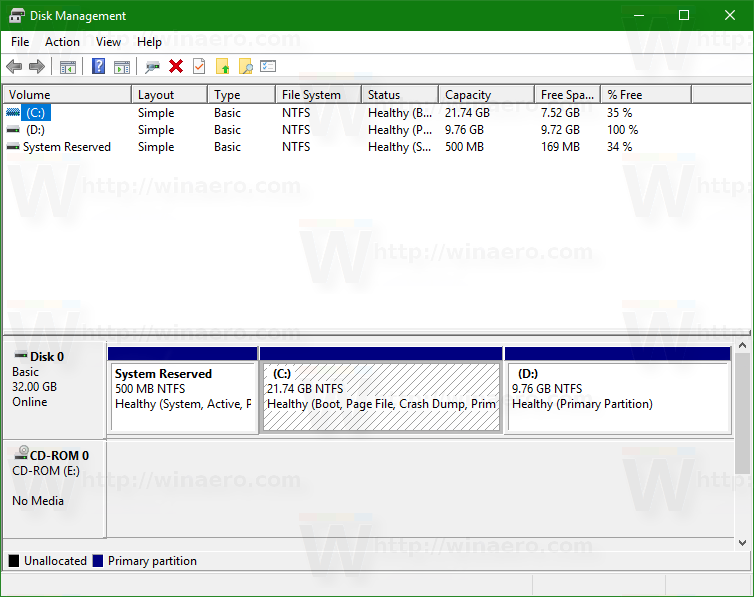
Also, you can use the good old command prompt and the classic label command to rename a drive in Windows 10. Here is how.
Change Drive Label in Command Prompt
To set a new drive label using the command prompt, do the following.
- Open an elevated command prompt.
- Type the following command:
label <Drive Letter>: <New name>. - Substitute the <Drive Letter> portion with the actual drive letter you would like to rename.
- Substitute the <New name> portion with the desired text.
See the following screenshot: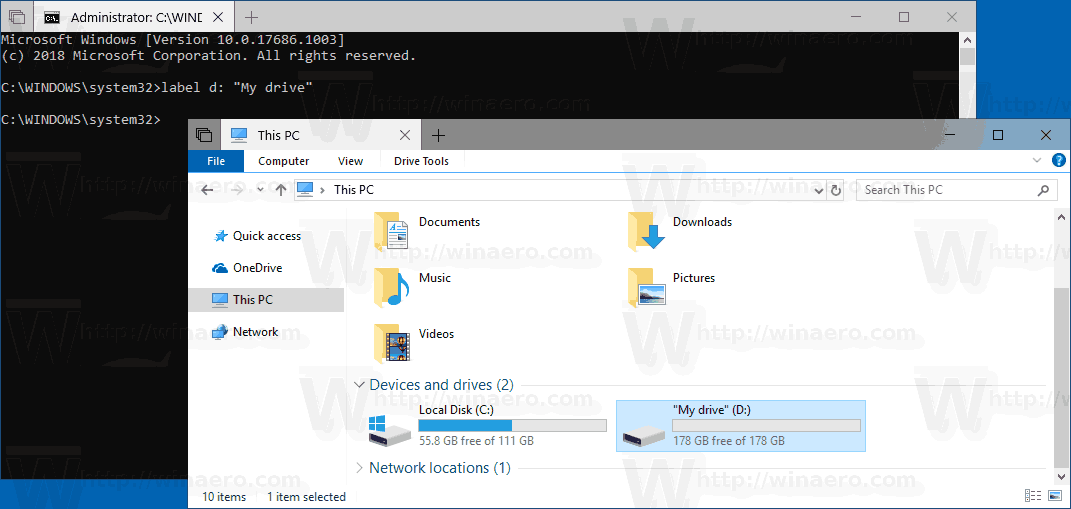
Tip: Run the command label DriveLetter(e.g. label D:) without specifying the new drive label to delete the current label.
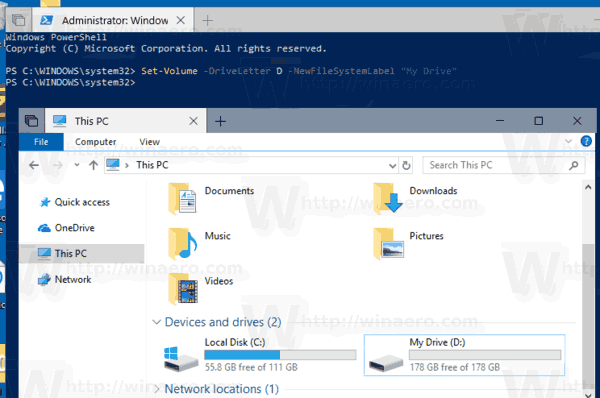
Change Drive Label in PowerShell
Finally, PowerShell can be used to change the label for a drive.
- Open PowerShell as Administrator.
- Run the command
Set-Volume -DriveLetter <Drive letter> -NewFileSystemLabel "<New drive label>". - For example, this will set the "My Drive" label for the drive D:
Set-Volume -DriveLetter D -NewFileSystemLabel "My Drive"
That's it!
Related articles:
- How to Extend a Partition in Windows 10
- How to Shrink a Partition in Windows 10
- How to Change Drive Letter in Windows 10
Support us
Winaero greatly relies on your support. You can help the site keep bringing you interesting and useful content and software by using these options:
