Here's how to uninstall updates in Windows 11. This post will show you four different methods that you can use if a recent update is causing software malfunction for your computer.
Advertisеment
Windows 11 includes an automatic service Windows Update. It downloads new patches from Microsoft servers in the background and installs them on your computer. Once such an update installed, you often see a prompt to restart Windows 11 to finish the update process and replace system files that are currently in use.
Sometimes, updates include bugs that may affect device's stability. An update may cause some software error, or interfere with a driver. If you experienced issues after installing updates, you can install them. That will help you to restore your device back to normal.
Uninstall Updates in Windows 11
To uninstall an update in Windows 11, you can use the Settings app, the classic Control Panel, and Windows Terminal. Also, you can uninstall the latest quality update or feature update from the Advanced Startup screen. Some of these methods are version specific,as Microsoft constantly improves Windows 11 and changes how it works. Let's review all these methods.
Uninstall Updates in Windows 11 in Settings
Note: This method works starting with Windows 11 build 22523. Press Win + R and type winver in the Run dialog to see the build number you have installed.
To uninstall updates in Windows 11 with the Settings app, do the following.
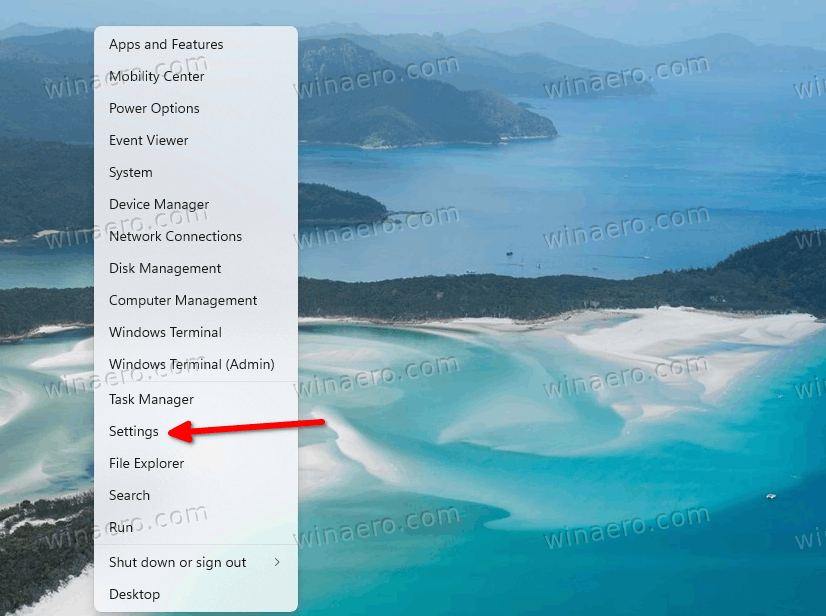
- Right-click the Start button and select Settings from its context menu.
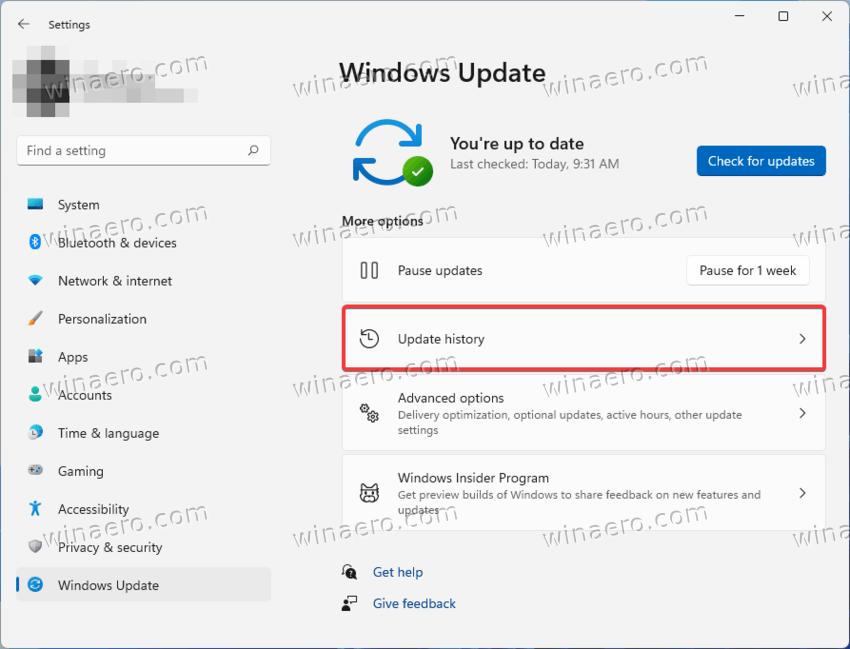
- Select Windows Update on the left.
- In the right pane, click the Update history item.
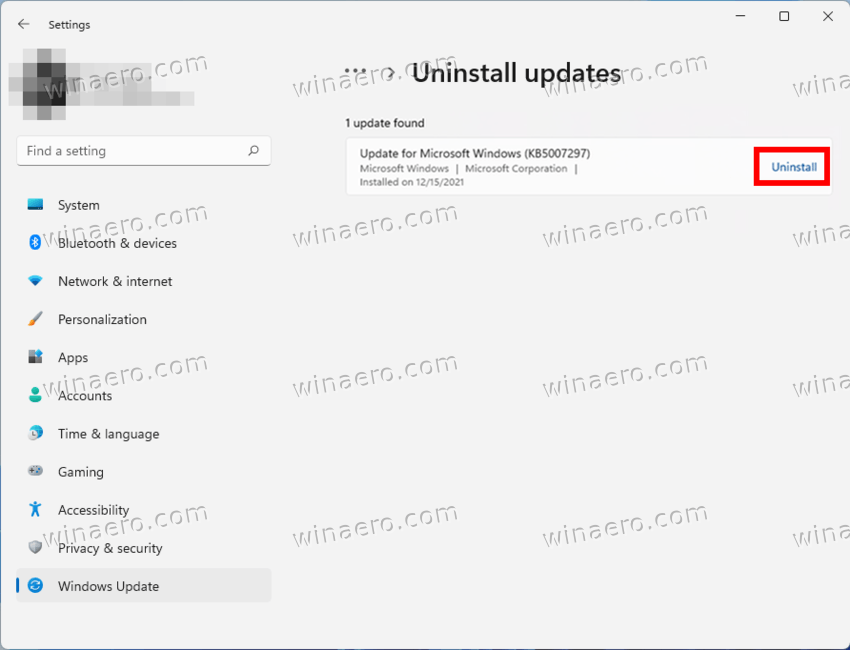
- On the next page, click on Uninstall updates.

- Finally, click on the Uninstall link for the update in the list you want to uninstall.
Done!
Now, let's review the method that involves the classic Control Panel. This method only works in Windows 11 builds released prior to 22523, as in later builds Microsoft has removed the appropriate options from the Control Panel.
Uninstall Updates in the Control Panel
- Press Win + R and type
controlin the Run box to open the Control Panel.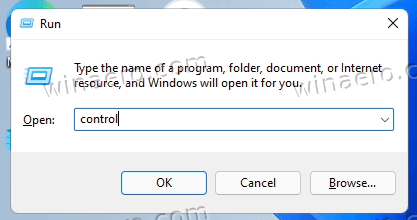
- Click on the Programs > Programs and Features icon.

- In the left pane, click the link View installed updates.

- Select the update in the list, and click on the Uninstall button.
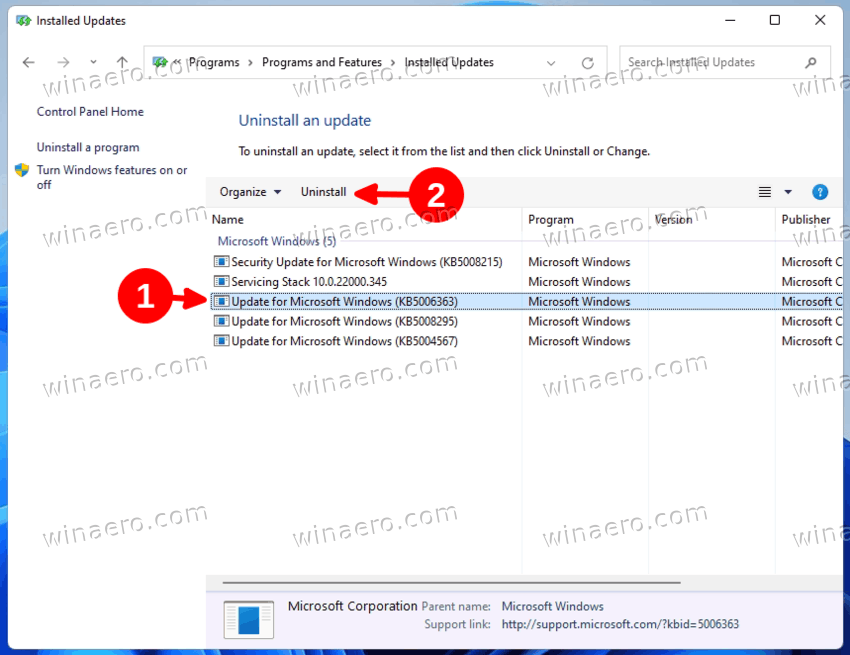
- Click on Yes to confirm the removal.

- If the update you have removed requires a restart, confirm it by clicking on the eponymous button.

You are done.
Now, let's see how to uninstall an update from Windows Terminal. This method works in all builds and versions of Windows 11, and involves the wusa command line tool.
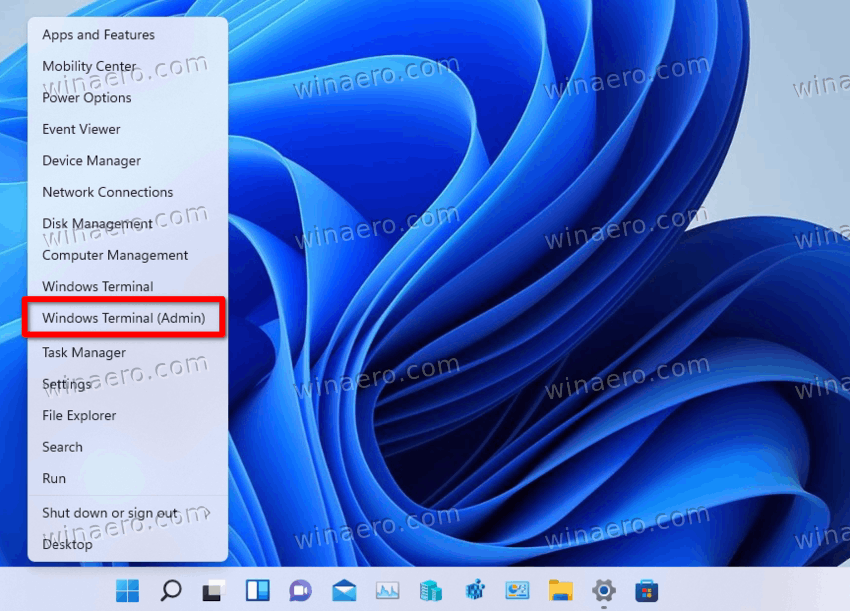
Uninstall Updates in Windows 11 in Windows Terminal
- Press Win + X on the keyboard and select Windows Terminal (Admin) from the menu.
- Enter the command
wmic qfe list brief /format:table. Copy the KB from the output for the update you want to uninstall.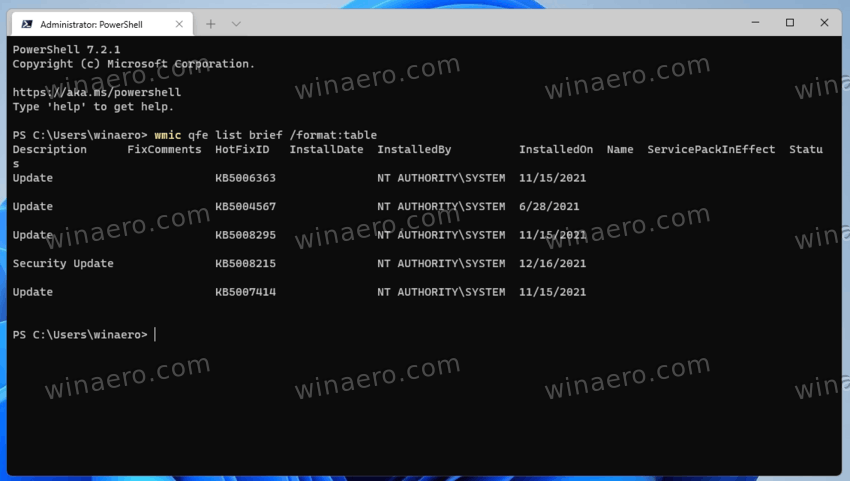
- Now, type the following command and press Enter.
wusa /uninstall /kb:updateID. - Substitute the updateID with the proper patch number (KB) you want to remove. For example, to remove KB5006363, run the command
wusa /uninstall /kb:5006363.
You are done.
Finally, you can uninstall the latest quality or feature update using the advanced boot options screen.
Uninstall Latest Update in Advanced Startup Options
- Open the Start menu using the Win key.
- Click the Power icon, and hold the Shift key.
- Without releasing the Shift key, click the Restart item. Your PC will restart directly to the Advanced Startup options.
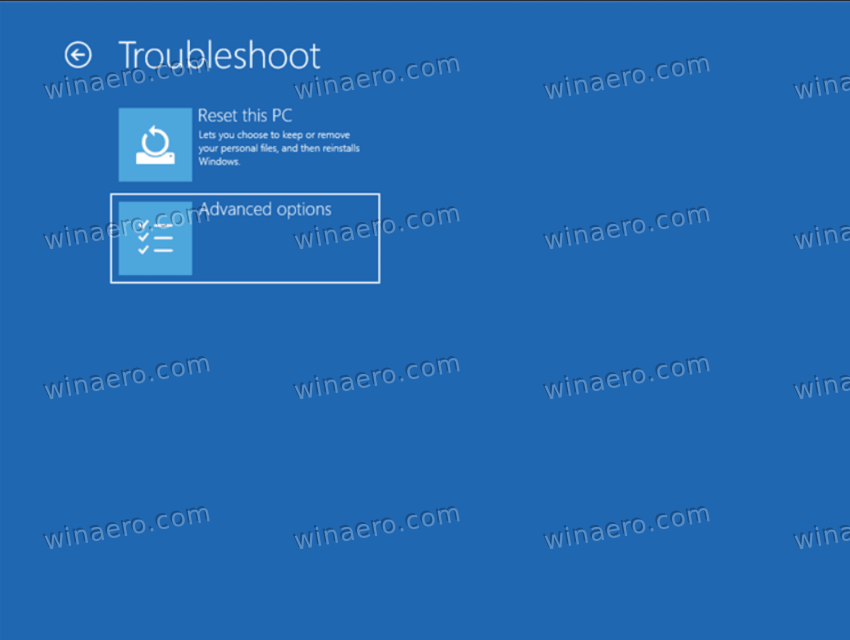
- Click on Troubleshoot.
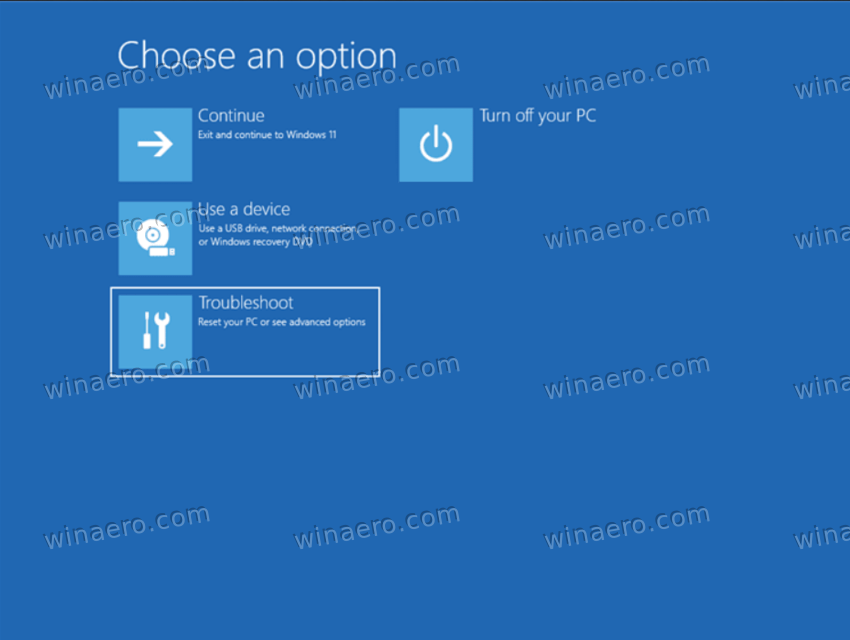
- On the next screen, select Advanced options.
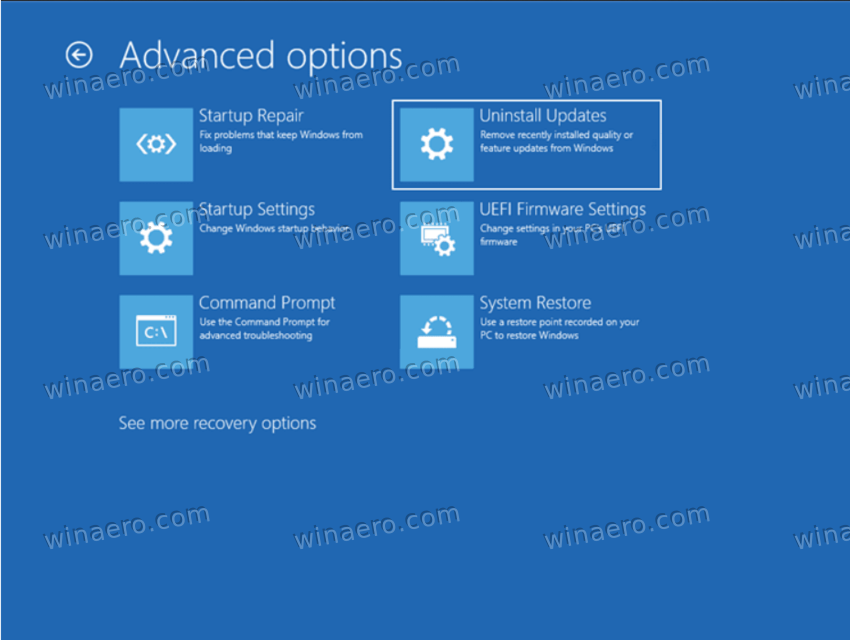
- On the Advanced options page, select the Uninstall Updates item.
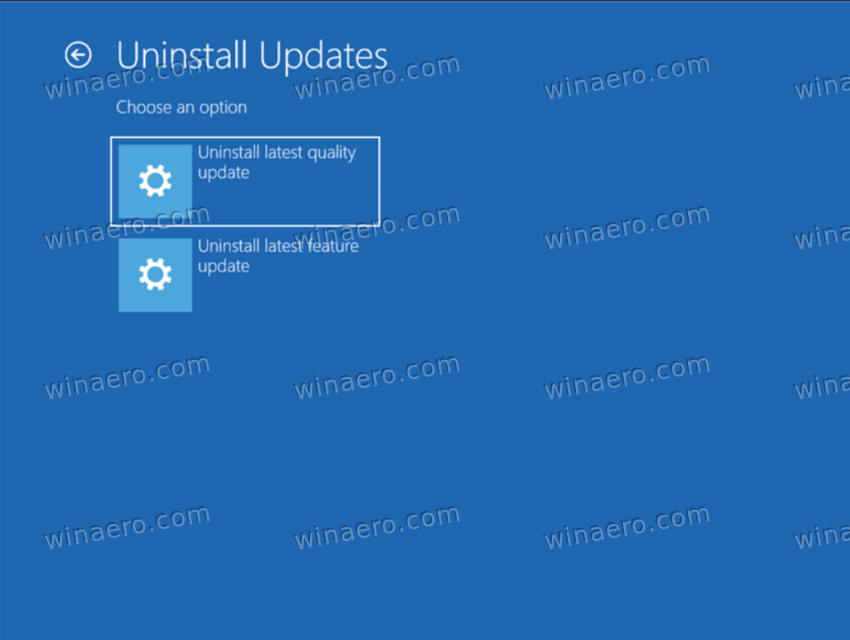
- Now, click on Uninstall latest quality update or Uninstall latest feature update for the update you want to remove.
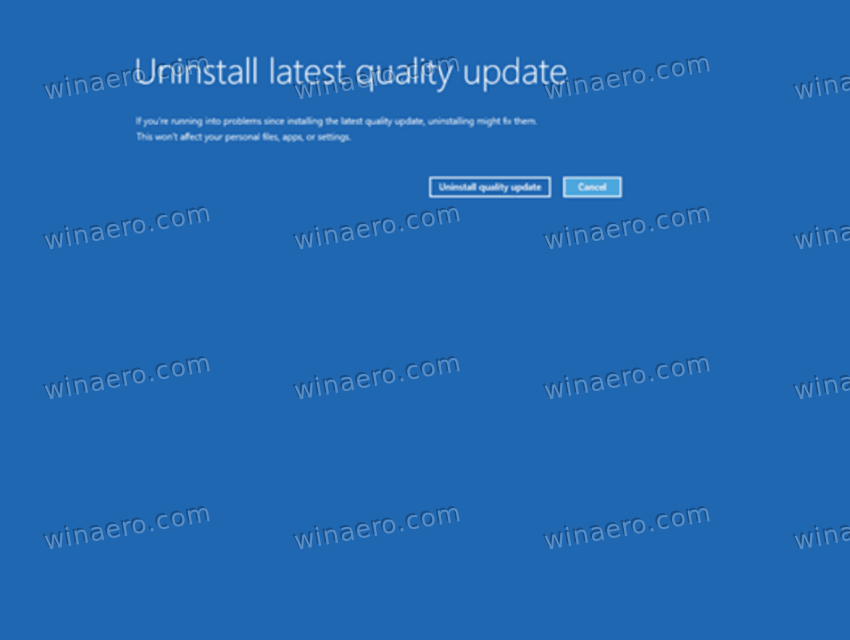
- Finally, confirm the update removal on the last page.
- Wait for Windows 11 to uninstall the update and click Done.
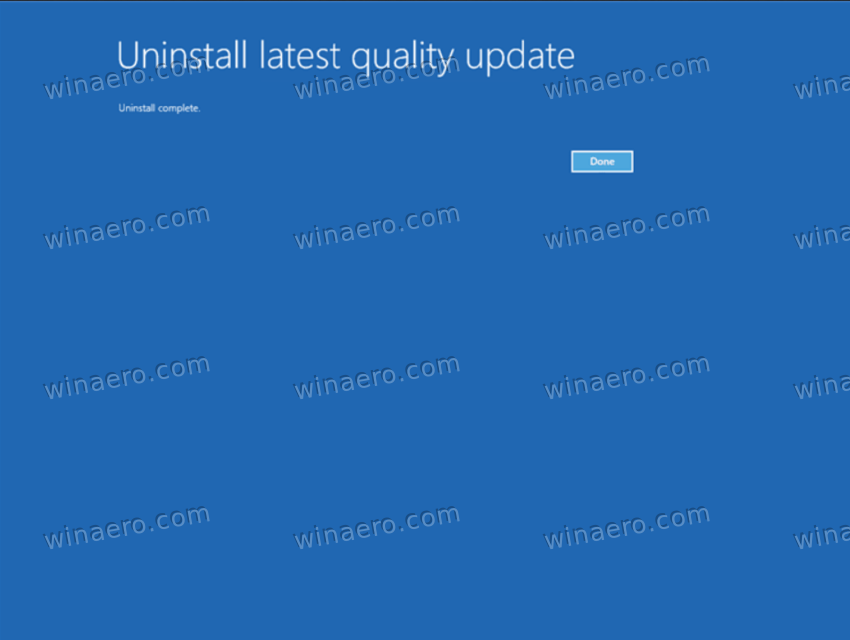
Done! Windows 11 will return back to the initial Choose an option screen. There, select Continue to start Windows 11 normally.
Support us
Winaero greatly relies on your support. You can help the site keep bringing you interesting and useful content and software by using these options:
