How to Add Change Owner Context Menu in Windows 10
Sometimes you need to get full access to some file or folder in Windows 10. It can be a system file or folder, or one which was created by a user account that no longer exists. In most cases, the Windows operating system will prevent you from doing any operation on such files and folders. In this case, it is very useful to see the current owner and be able to quickly change it.
Advertisеment
The concept of ownership was brought to Windows with NTFS. NTFS is the standard file system of the Windows NT operating system family. Starting with Windows NT 4.0 Service Pack 6, it supported the concept of permissions which can be configured to permit or restrict access to files, folders, and other objects locally and over a network.
File Ownership in Windows 10
By default, almost all system files, system folders and even Registry keys in Windows 10 are owned by a special built-in user account called "TrustedInstaller". Other user accounts are set to only read the files.
As a user accesses each file, folder, registry key, printer, or an Active Directory object, the system checks its permissions. It supports inheritance for an object, e.g. files can inherit permissions from their parent folder. Also every object has an Owner which is the user account that can set ownership and change permissions. If you are interested in managing NTFS permissions, refer to the following article: How to take ownership and get full access to files and folders in Windows 10
This post will show you how to add Change Owner to the context menu of files and folders in Windows 10.
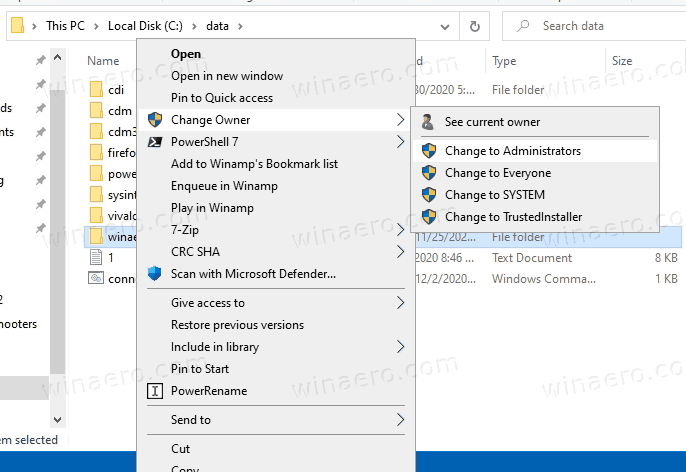
By adding a special Change Owner context menu, you can quickly view the current owner of a file or folder, and change the owner to one of the predefined system accounts, including Administrators, Everyone, SYSTEM, or TrustedInstaller when needed.
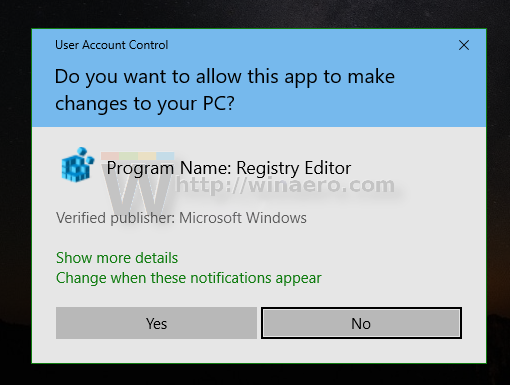
You must be signed in with an administrative account to add the menu. Also, to change the owner administrative privileges are required.
To Add Change Owner Context Menu in Windows 10
- Download the following ZIP archive: Download ZIP archive.
- Extract its contents to any folder. You can place the files directly to the Desktop.
- Unblock the files.
- Double click on the Add Change Owner To Context Menu.reg file to merge it.
- Alternatively, click on Add Shift Click Change Owner To Context Menu.reg to add the menu that appears when you press and hold the Shift key.
- To remove the entry from the context menu, use the provided file Remove Change Owner From Context Menu.reg.
You are done!
How it works
The above REG files add a number of entries under the following Registry branches.
-
HKEY_CLASSES_ROOT\*\shell\Change_Owner- these entries implement the menu for all files. -
HKEY_CLASSES_ROOT\Directory\shell\Change_Owner- these entries implement the menu for all folders -
HKEY_CLASSES_ROOT\Drive\shell\Change_Owner- these entries implement the menu for drives
Tip: See how to go to a Registry key with one click.
Change and view the owner of files and folders
Here's how the context menu entries work for the above context menu. Most commands require to be started as Administrator. The view current owner option doesn't require administrative privileges. All other entries use an elevated PowerShell instance to get their work done.
View current owner
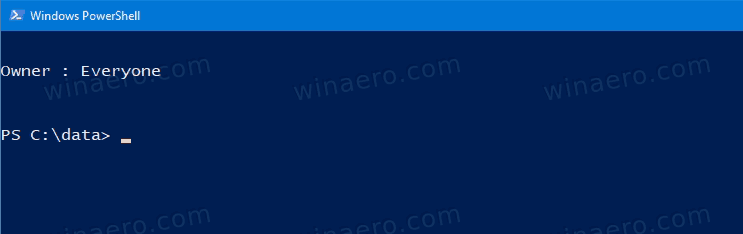
To view the current owner of a file or folder, the context menu calls the Get-ACL cmdlet. It populates the access control lists (ACLs) for the given files system object. The ACL specifies the permissions that users and user groups have to access the object. This is the only command in the context menu that runs with regular user privileges. The command syntax is
Get-ACL '<file path>'| Format-List -Property Owner
This will print the current owner of a file or folder on a new line.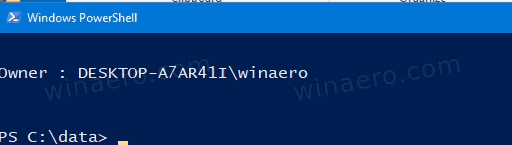
Change owner to Administrators
This command will run elevated (as Administrator). It calls the icacls command to change the file ownership to the built-in system group "Administrators". It exists in Windows 10 by default, so all members of this group will become the "owner" of that file, e.g. they will be able to further manage its permissions. The command for this context menu entry looks as follows.
icacls <file path> /setowner \"Administrators\" /t /c /l
Change owner to Everyone
The Everyone group is a system group that includes all users that were sucessfully authenticated when they logged on, along with a number of built-in accounts, such as the Guest account, and several other built-in security accounts like SERVICE, LOCAL_SERVICE, NETWORK_SERVICE, and others. To change the owner to Everyone, the following command is used:
icacls <file path> /setowner \"Everyone\" /t /c /l
Change owner to SYSTEM
The SYSTEM account, also known as LocalSystem, is a special account used by the service control manager. This account is used to run various services in Windows 10. The command is simple:
icacls <file path> /setowner \"SYSTEM\" /t /c /l
Change owner to TrustedInstaller
TrustedInstaller is a special system account that adds an extra protection layer to the critical system areas. Important Registry keys and system files are owned by it. It doesn't appear in the list of user accounts, and you cannot easily select it manually when changing ownership. Its name needs to be explicitly typed manually to set or restore the TrustedInstaller ownership. The following command is used to change the owner to TrustedInstaller.
icacls <file path> /setowner \"NT Service\TrustedInstaller\" /t /c /l
Keeping system file integrity and safety
It is possible to accidentally run these context menu commands on some important system directory or file. This may break the operating system or cause some unexpected behavior. In order to prevent this accident, the Registry files use extended metadata options to filter the commands for critical system objects. The following folders and files are protected, and the context menu won't work on them:
-
C:\- the system drive -
C:\Users- the user profile path -
C:\ProgramData- common user profile path -
C:\Windows- the Windows directory -
C:\Windows\System32- the directory with important files of the operating system. -
C:\Program Files- the directory with all installed programs -
C:\Program Files (x86)- the directory with all installed 32-bit programs in 64-bit Windows 10.
This is implemented by using well-known prop: values, also known as metadata from the Windows Property System that can be set for files, folders and other files system objects. You can get the full list of such values on the following MSDN page:
This ensures that you won't break the OS.
There is a Registry file named Add Shift Click Change Owner To Context Menu.reg. It makes the context menu only appear when you press and hold the Shift key while performing a right click on a file, folder, or drive. This can be useful to users who prefer to keep the File Explorer context menu clean and not cluttered. This option allows using the Change owner context menu on demand.
That's it.
Support us
Winaero greatly relies on your support. You can help the site keep bringing you interesting and useful content and software by using these options:

A very nice tool indeed. It is a pity it can’t be used to delete “WindowsApps” in “Program Files”. Never mind, many thanks.
You can edit the Reg files and remove the restriction.
Open them with Notepad and you will see.
Thanks for the tip Sergey, I shall have Look. Of course a little tool would be nice, no one has ever made one as far as I know. Regards Stephen.
One more post then Sergey, This is what I did. I went to Program Files, un-hid system files, went to WindowsApps, took ownership, and deleted everything the system would allow me, I left Edge alone. I got WindowsApps down to 284 mb. Now I am going to leave WindowsApps alone. I have gained a lot of disc space. Everything works, update, music, YouTube, start menu etc. A word of warning to other users – If you use an “Unlocker” software, and delete the entire WindowsApps folder, you will break the O.S. – I have done this myself. Thanks for your help Sergey, regards, Stephen. Out.