How to Configure Mode of Automatically Sign In and Lock After Restart in Windows 10
Windows 10 allows you to enable or disable a special policy that which makes an automatic sign in and sign on and lock occurs after a restart or cold boot. This can be useful from the privacy point of view, as your user account will be instantly loaded, but the PC will still remain locked.
Advertisеment
The policy Sign-in and Lock Last Interactive User Automatically After a Restart, which was named Configure the mode of automatically signing in and locking last interactive user after a restart or cold boot prior to Windows 10 version 1903, is located under Computer Configuration > Administrative Templates > Windows Components > Windows Logon Options in the Local Group Policy Editor (gpedit.msc). It controls the configuration under which an automatic restart and sign on and lock occurs after a restart or cold boot. If you chose “Disabled” in the “Sign-in and lock last interactive user automatically after a restart” policy, then automatic sign on will not occur and this policy does not need to be configured.
If you enable this policy setting, you can choose one of the following two options:
- “Enabled if BitLocker is on and not suspended” specifies that automatic sign on and lock will only occur if BitLocker is active and not suspended during the reboot or shutdown. Personal data can be accessed on the device's hard drive at this time if BitLocker is not on or suspended during an update. BitLocker suspension temporarily removes protection for system components and data but may be needed in certain circumstances to successfully update boot-critical components.
- “Always Enabled” specifies that automatic sign on will happen even if BitLocker is off or suspended during reboot or shutdown. When BitLocker is not enabled, personal data is accessible on the hard drive. Automatic restart and sign on should only be run under this condition if you are confident that the configured device is in a secure physical location.
If you disable or don't configure this setting, automatic sign on will default to the “Enabled if BitLocker is on and not suspended” behavior.
To configure the option, you can either use a Group Policy option, or a Group Policy Registry tweak. The first method can be used in editions of Windows 10 that come with the Local Group Policy Editor app. If you are running Windows 10 Pro, Enterprise, or Education edition, then the Local Group Policy Editor app is available in the OS out of the box. Windows 10 Home users can apply a Registry tweak.
To Configure Automatic Sign In and Lock After Restart in Windows 10,
- Open the Local Group Policy editor app, or launch it for all users except Administrator, or for a specif user.
- Navigate to Computer Configuration > Administrative Templates > Windows Components > Windows Logon Options on the left.
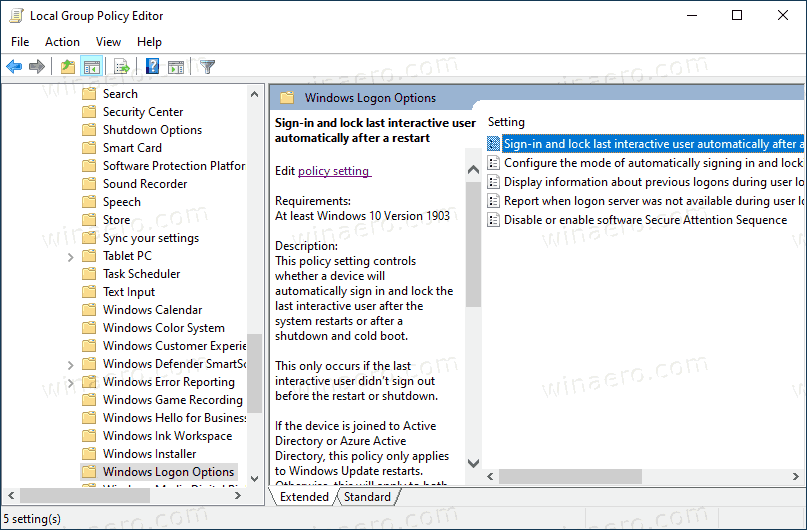
- On the right, find the policy setting Sign-in and lock last interactive user automatically after a restart. Note: Prior to Windows 10 version 1903 it was named Configure the mode of automatically signing in and locking last interactive user after a restart or cold boot.
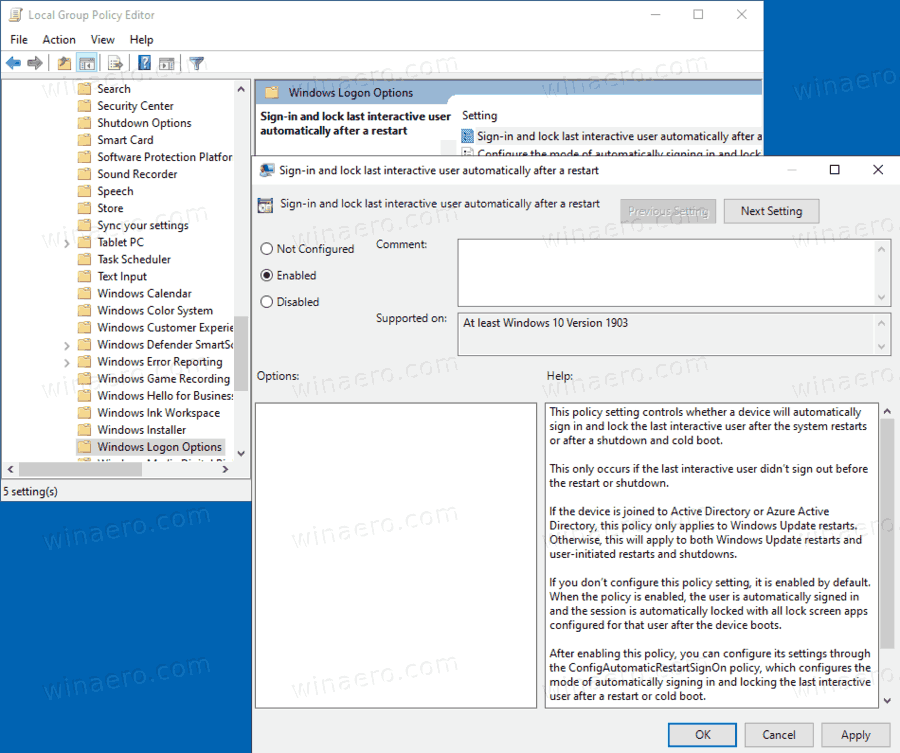
- Double-click on it and set the policy to Enabled to activate the feature.
- Set it to Disabled to force disable it.
- Set it to Not configured to restore defaults.
You are done.
Tip: See How to Reset All Local Group Policy Settings at once in Windows 10.
Now, let's see how the same can be done with a Registry tweak.
Configure Automatic Sign In and Lock After Restart in Registry
- Open Registry Editor.
- Go to the following Registry key:
HKEY_LOCAL_MACHINE\SOFTWARE\Microsoft\Windows\CurrentVersion\Policies\System. Tip: See how to jump to the desired Registry key with one click.If you do not have such a key, then just create it. - Here, create a new 32-bit DWORD value DisableAutomaticRestartSignOn. Note: Even if you are running 64-bit Windows, you still need to use a 32-bit DWORD as the value type.
- Leave its value data as 0 to Enable Automatic Sign In and Lock after a restart.
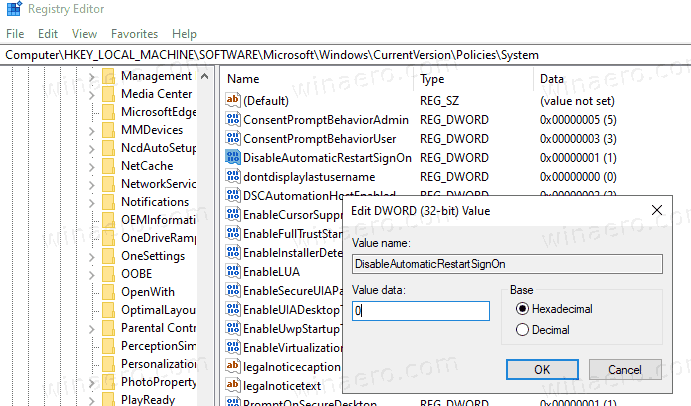
- Set its value data as 1 to Disable Automatic Sign In and Lock after a restart.
- Delete the DisableAutomaticRestartSignOn value to restore the default behavior.
- Restart Windows 10.
Later, you can delete the DisableAutomaticRestartSignOn value to allow the user to use both Control Panel and Settings.
To save your time, you can download the following ready-to-use Registry files:
The undo tweak is included.
Tip: You can try to enable GpEdit.msc in Windows 10 Home.
Articles of interest:
- How To See Applied Group Policies in Windows 10
- All Ways To Open Local Group Policy Editor in Windows 10
- Apply Group Policy to All Users Except Administrator in Windows 10
- Apply Group Policy to a Specific User in Windows 10
- Reset All Local Group Policy Settings at once in Windows 10
- Enable Gpedit.msc (Group Policy) in Windows 10 Home
Support us
Winaero greatly relies on your support. You can help the site keep bringing you interesting and useful content and software by using these options:
