How to Reset the Windows Security app in Windows 10
Recent Windows 10 version come with is a new app called Windows Security. The application, formerly known as "Windows Defender Dashboard" and "Windows Defender Security Center", has been created to help the user control his security and privacy settings in a clear and useful way.
Advertisеment
It includes all the settings related to the Defender antivirus, and much more. The application unifies many useful security options you might want to track and control. The user interface of the Windows Security app comes with a toolbar on the left and the main area which occupies the rest of window area. Once you open the application, it shows a special start page, that organizes settings into categories like Virus & threat protection, Device performance & health, Firewall & network protection, Family options, and more.

You can launch Windows Security from the Start menu or with a special shortcut. Alternatively, you can access it using its tray icon.
![]()
If the Windows Security app doesn't open, is crashing, or doesn't work properly, you can try to reset it using one of the following methods.
To Reset the Windows Security app in Windows 10,
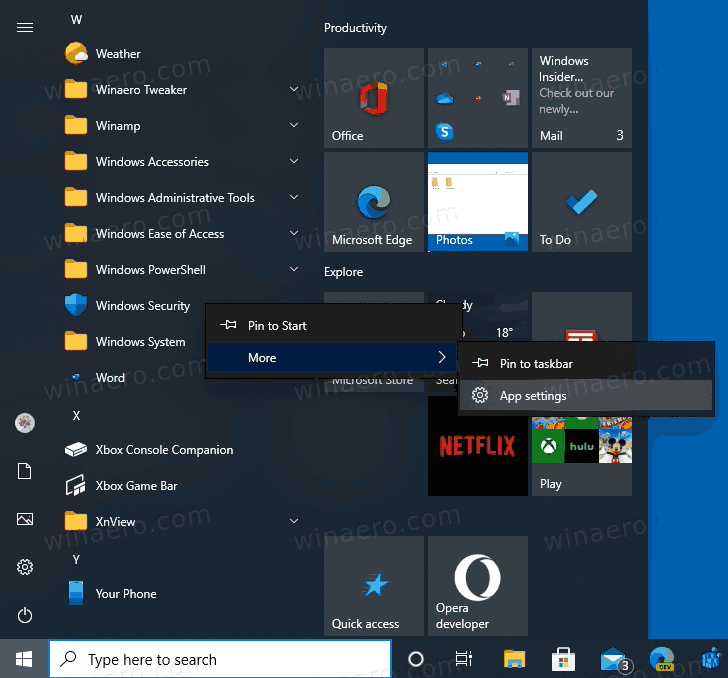
- Open the Start menu.
- Locate the Windows Security shortcut and right-click on it.
- Select More > App Settings from the context menu.
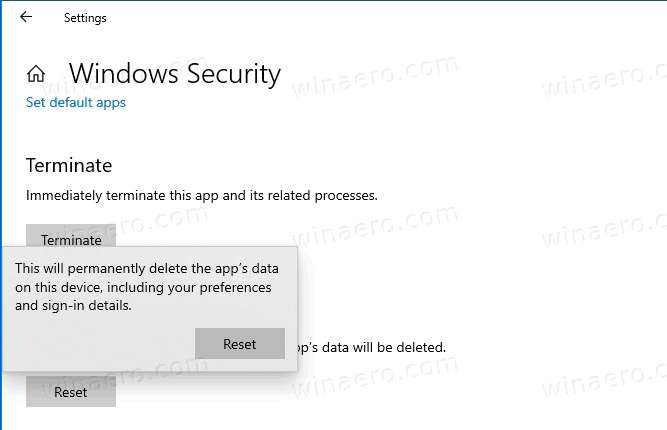
- The Advanced options page for the Windows Security app will open. There, go to the Reset section.
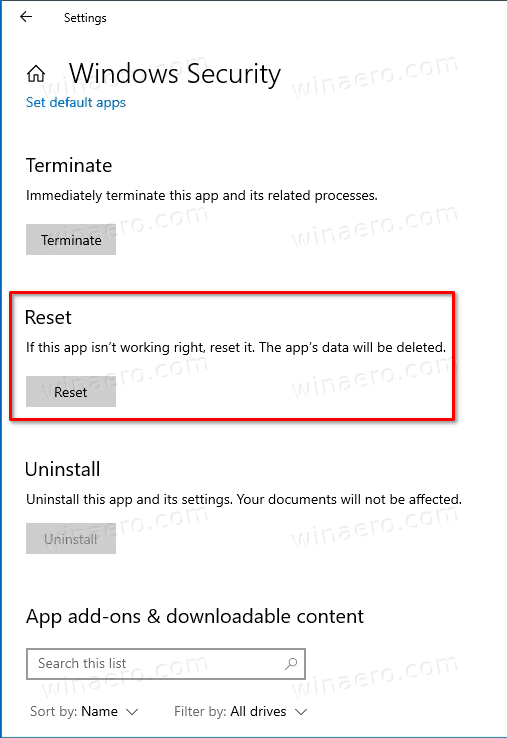
- There, click on the Reset button, and confirm the operation.
- You can now close the Settings app.
You are done.
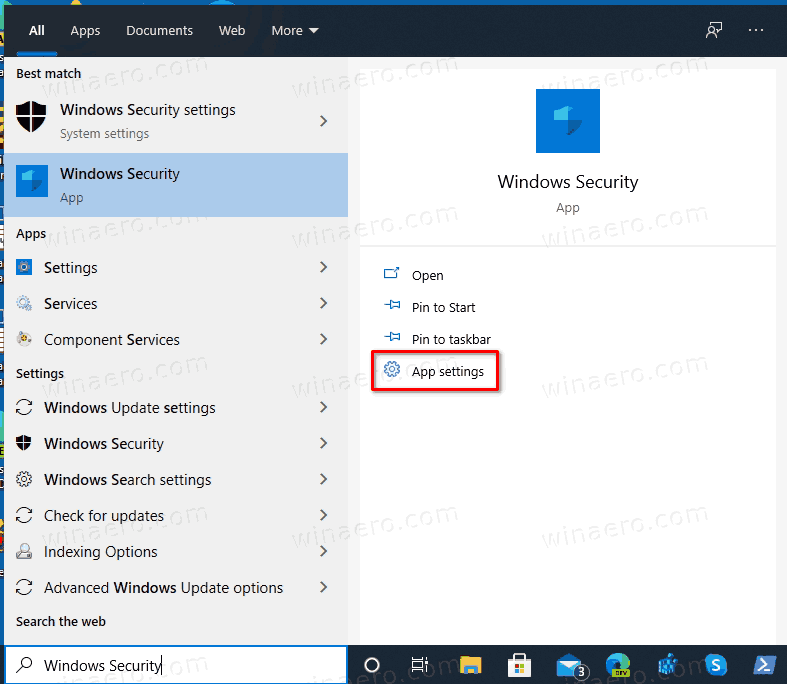
Tip: If you type Windows Security in the search box in the taskbar, you will be able to directly open the Advanced options page for the app by clicking on the App settings link.
Alternatively, you can use PowerShell to reset the Windows Security app.
Reset Windows Security in Windows 10 using PowerShell
- Open PowerShell as Administrator. Tip: You can add "Open PowerShell As Administrator" context menu.
- Type or copy-paste the following command:
Get-AppxPackage *Microsoft.Windows.SecHealthUI* | Reset-AppxPackage. - The above command works starting in Windows 10 Build 20175, so if it is not available in your Windows 10, use the following alternative:
& {$manifest = (Get-AppxPackage *Microsoft.Windows.SecHealthUI*).InstallLocation + '\AppxManifest.xml' ; Add-AppxPackage -DisableDevelopmentMode -Register $manifest}. - Restart Windows 10. Actually, both the commands should work without restarting the PC.
That's it.
Support us
Winaero greatly relies on your support. You can help the site keep bringing you interesting and useful content and software by using these options:

“Get-AppxPackage *Microsoft.Windows.SecHealthUI* | Reset-AppxPackage”
only gives an “Reset-AppxPackage not recognised….” error, and when I try to
open the settings for “Windows Securtiy” I get a “stack overflow” error :-(