Windows 10, Windows 8.1 and Windows 8 come with Client Hyper-V so you can run a supported guest operating system inside a Virtual Machine. Hyper-V is Microsoft's native hypervisor for Windows. It was originally developed for Windows Server 2008 and then ported to Windows client OS. It has improved over time and is present in the latest Windows 10 release as well. Today, we will learn how to rename an existing Hyper-V virtual machine.
Advertisеment
Note: Only Windows 10 Pro, Enterprise, and Education editions include the Hyper-V virtualization technology.
What is Hyper-V
Hyper-V is Microsoft's very own virtualization solution that allows creating virtual machines on x86-64 systems running Windows. Hyper-V was first released alongside Windows Server 2008, and has been available without additional charge since Windows Server 2012 and Windows 8. Windows 8 was the first Windows client operating system to include hardware virtualization support natively. With Windows 8.1, Hyper-V has got a number of enhancements such as Enhanced Session Mode, enabling high fidelity graphics for connections to VMs using the RDP protocol, and USB redirection which is enabled from the host to VMs. Windows 10 brings further enhancements to the native hypervisor offering, including:
- Hot add and remove for memory and network adapters.
- Windows PowerShell Direct – the ability to run commands inside a virtual machine from the host operating system.
- Linux secure boot - Ubuntu 14.04 and later, and SUSE Linux Enterprise Server 12 OS offerings running on generation 2 virtual machines are now able to boot with the secure boot option enabled.
- Hyper-V Manager Down-level management - Hyper-V manager can manage computers running Hyper-V on Windows Server 2012, Windows Server 2012 R2 and Windows 8.1.
Virtual Machine Generations in Hyper-V
When you create a new virtual machine with Hyper-V, you can choose between two generations of your virtual machine.
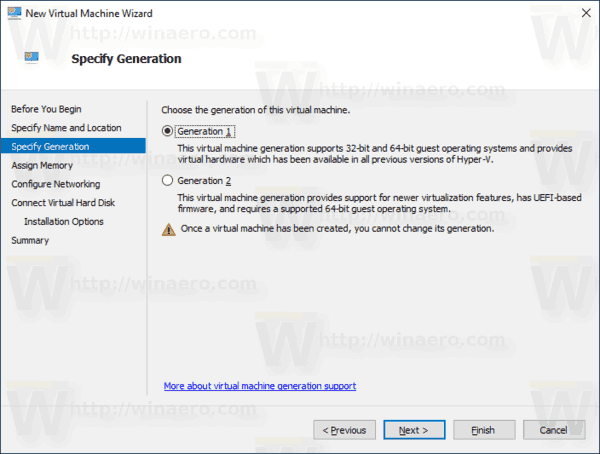
Generation 1 is a legacy BIOS/MBR machine. It supports 32-bit operating systems. Its virtual hardware is similar to hardware which was available in all previous versions of Hyper-V.
Generation 2 comes with modern features like UEFI and secure boot, but it doesn't support 32-bit OSes. It features extra features, such as PXE boot, Boot from a SCSI virtual hard disk
Boot from a SCSI virtual DVD, and more.
Note: If you are going to install a 32-bit guest OS in your VM, then choose Generation 1. Once a virtual machine has been created, you cannot change its generation.
Hyper-V Virtual Machine Files
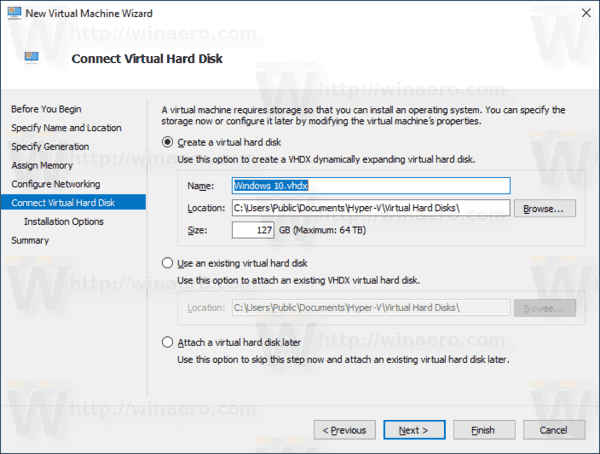
A virtual machine consists of several files, such as configuration files, and virtual disk files that store the guest operating system for a machine. By default, Hyper-V stores all files for your virtual machines on your system partition. You might want to store them on another disk or partition. Last time we reviewed how to set a new default folder for virtual disks. The same can be done for configuration files.
Note: When you create a virtual machine in Hyper-V Manager, you are able to specify a folder to store its files.
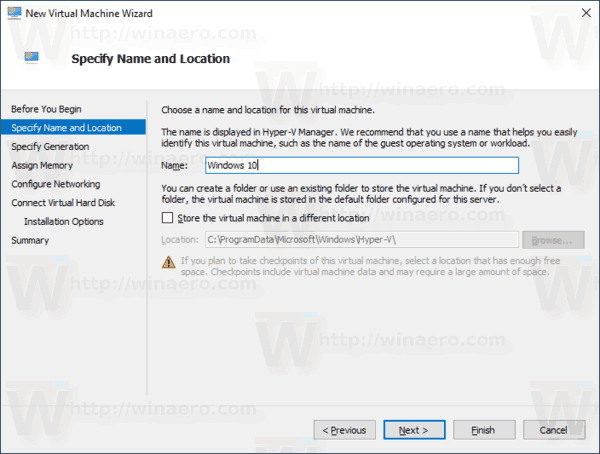
If you are not happy with the current name of a virtual machine you are using, you can quickly rename it. You can use either the Hyper-V Manager tool, or PowerShell.
To Rename a Hyper-V Virtual Machine in Windows 10,
- Open the Hyper-V Manager from the Start menu. Tip: See How to navigate apps by alphabet in Windows 10 Start menu. It can be found under Windows Administrative Tools > Hyper - V manager.
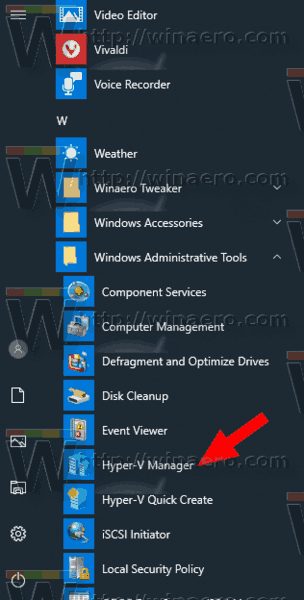
- Click on your host name on the left.
- In the middle pane, click on your virtual machine in the list to select it.
- If it is running, then turn off the VM.
- In the right pane, click on Rename under Actions.
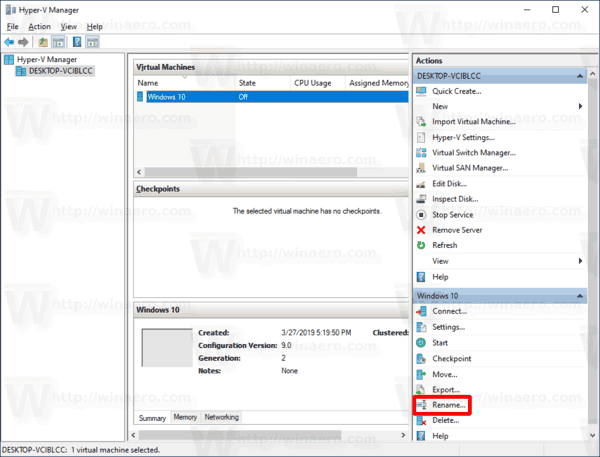
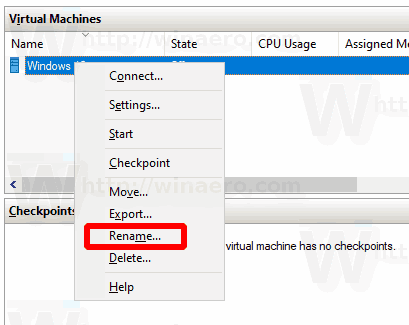
- Alternatively, you can select Rename from the right-click context menu of the machine, or press F2 in the list of the virtual machines.
- Type a new name and hit the Enter key.
You are done. The VM will be renamed. Now, you close the Hyper-V Manager app.
Alternatively, you can rename a Hyper-V VM with PowerShell.
Rename Hyper-V Virtual Machine with PowerShell
- Turn off the virtual machine you want to rename.
- Open PowerShell as Administrator. Tip: You can add "Open PowerShell As Administrator" context menu.
- Execute the next command to see the list of your machines and their generations.
Get-VM

- Type and execute the following command:
Rename-VM "VM name" -NewName "<New VM Name>". - Substitute the
VM nameportion with the actual virtual machine name from the step 3. - Replace "<New VM Name>" with the name want to assign to your virtual machine.

For example,
Rename-VM "Windows 10" -NewName "Win10"
That's it.
Related articles:
- Move Hyper-V Virtual Machine in Windows 10
- Find Generation of Hyper-V Virtual Machine in Windows 10
- Create Hyper-V Virtual Machine Connection shortcut in Windows 10
- Import Hyper-V Virtual Machine in Windows 10
- Export Hyper-V Virtual Machine in Windows 10
- Change Hyper-V Virtual Machine Default Folder in Windows 10
- Change Hyper-V Virtual Hard Disks Folder in Windows 10
- Remove Floppy Disk Drive in Windows Hyper-V Virtual Machine
- Change DPI of Hyper-V Virtual Machine (Display Scaling Zoom Level)
- Create Shortcut for Hyper-V Virtual Machine in Windows 10
- Enable or Disable Hyper-V Enhanced Session in Windows 10
- How to Enable and Use Hyper-V in Windows 10
- Create Ubuntu Virtual Machines with Hyper-V Quick Create
Support us
Winaero greatly relies on your support. You can help the site keep bringing you interesting and useful content and software by using these options:
