How to Make Windows 10 Start Menu Full Screen
In Windows 10, Microsoft has removed the Start screen which was available in both Windows 8 and Windows 8.1. Instead, Windows 10 offers a unified new Start menu, which can be used as the Start screen. A special option allows you to make the Start menu full-screen. Let's see how it can be done.
Advertisеment
By default, the Start menu in Windows 10 takes an area at the left edge of the screen. It is not big, and can be resized by the user. Here is how it looks by default.
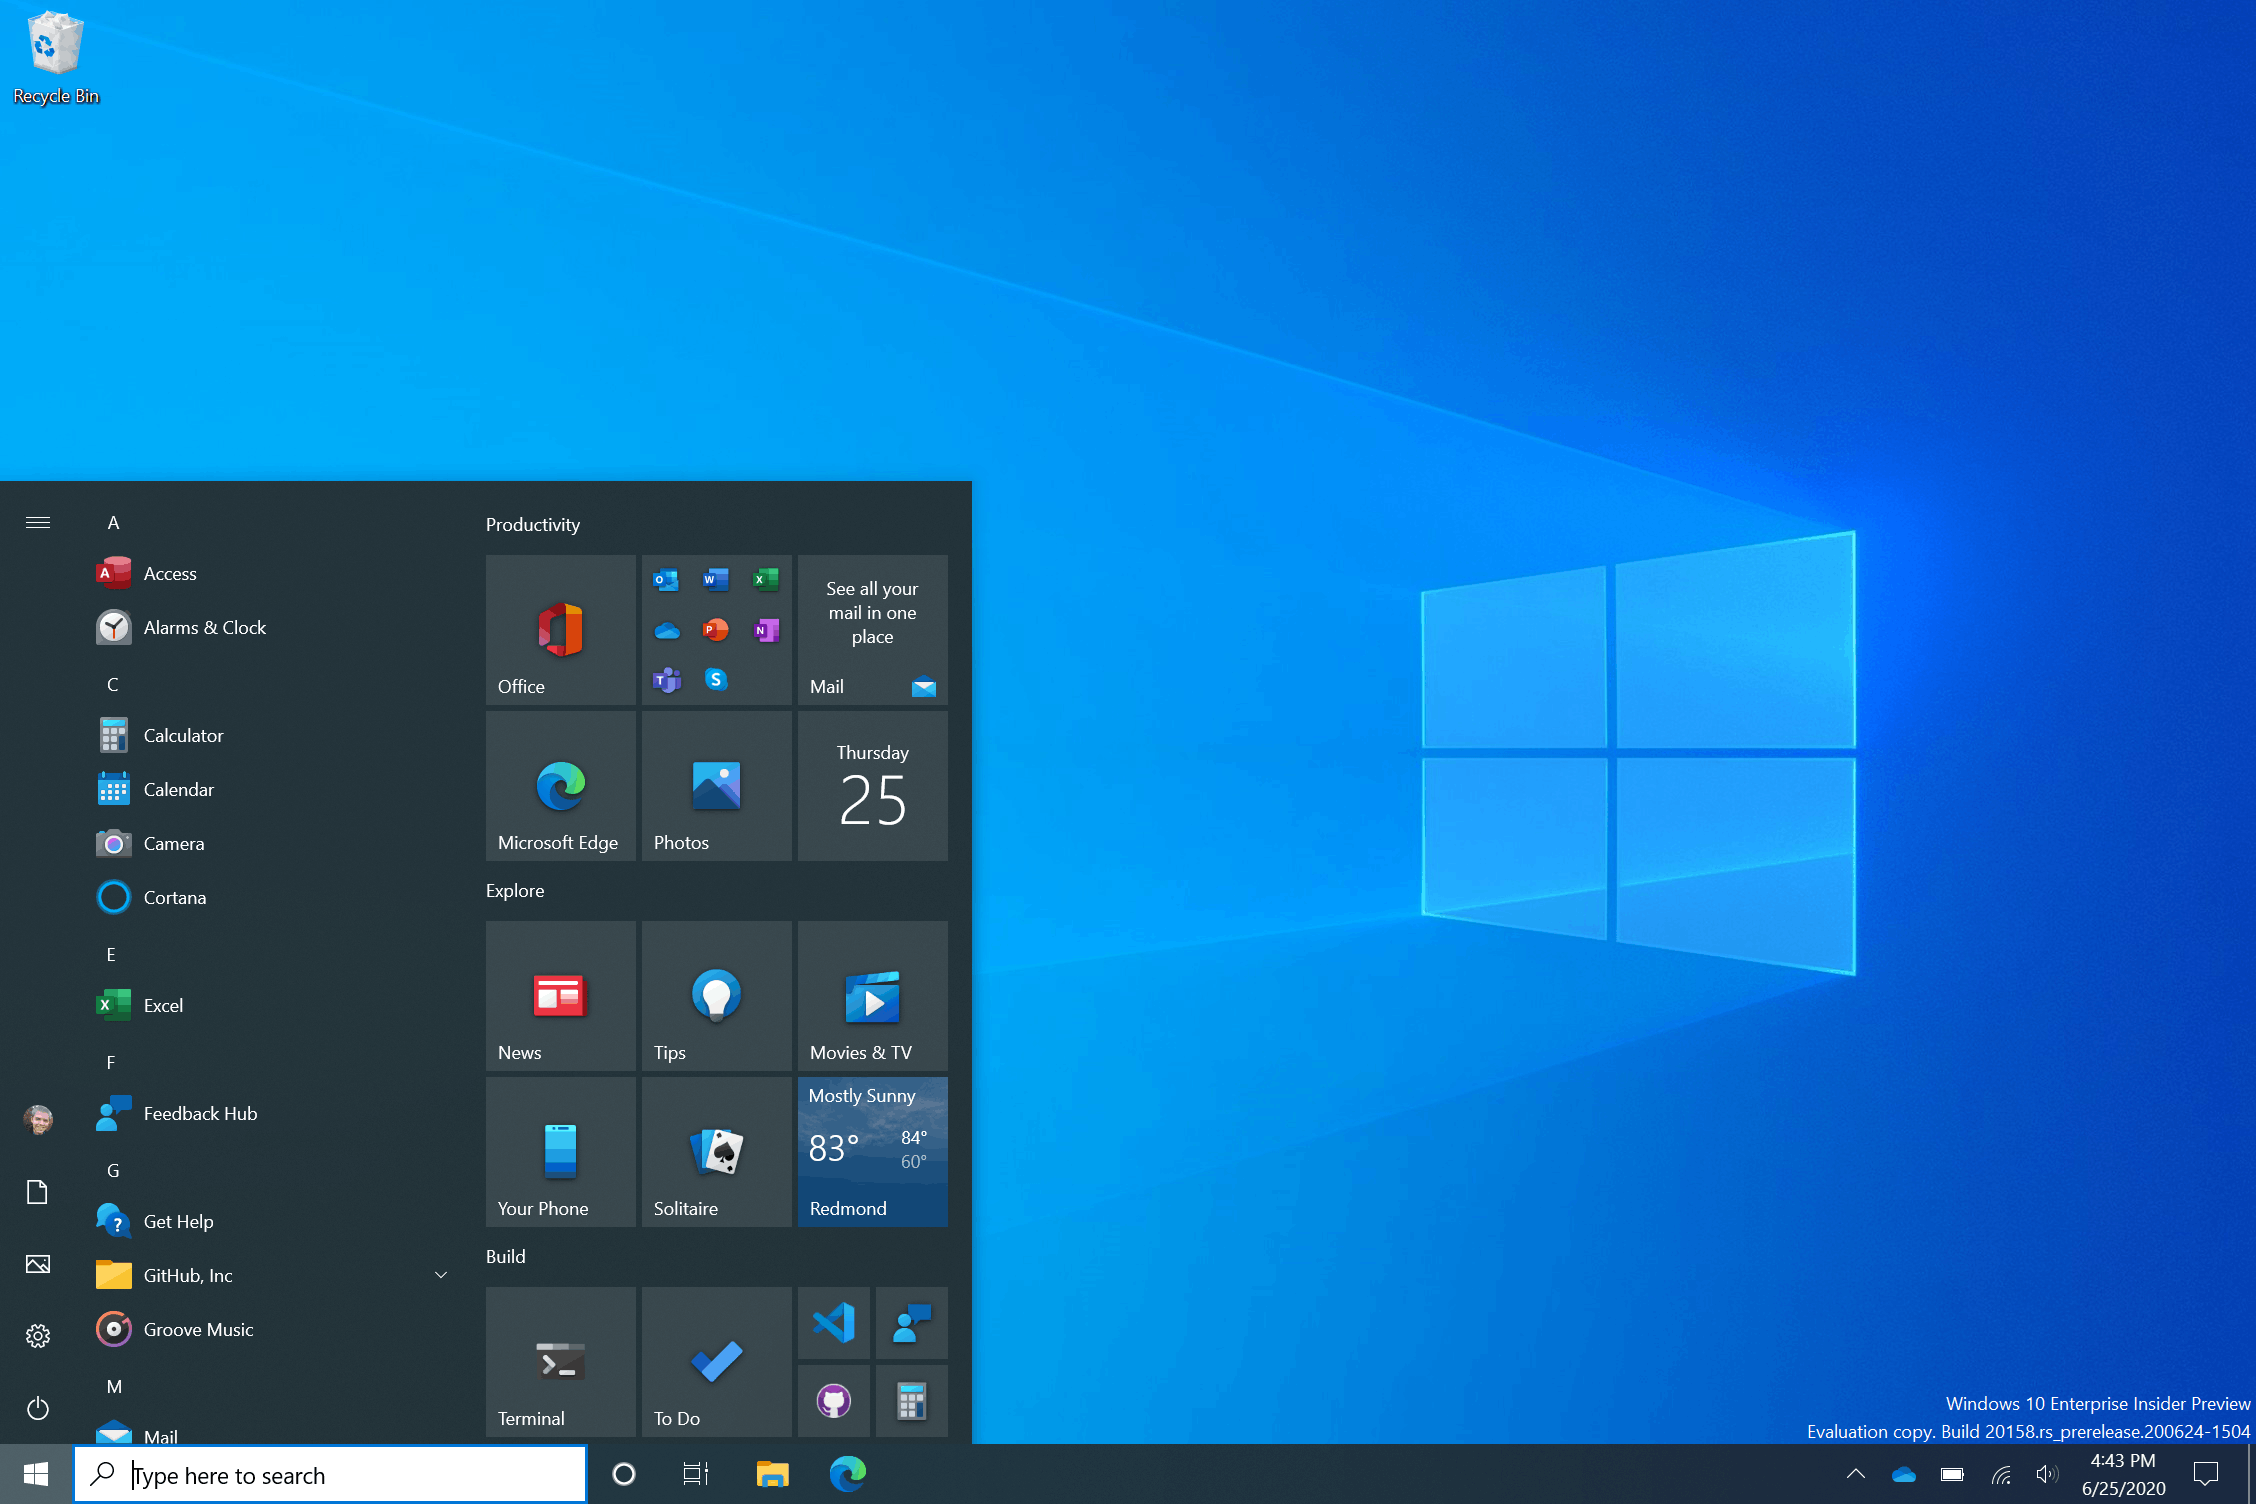
However, it is possible to make it full screen. Here is how it looks in full screen mode:
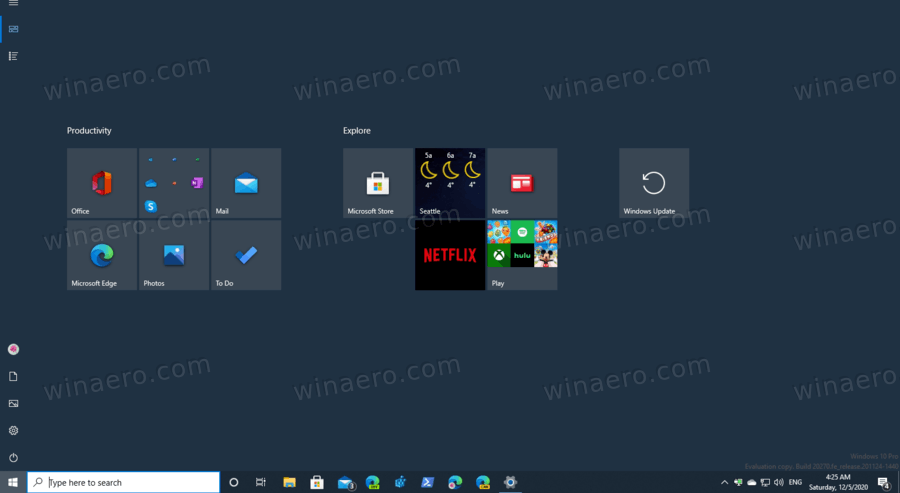
In full screen mode, the Start menu shows a special hamburger menu button in the top left corner. It expands items like All apps, the user account picture, app and folder icons, and the power icon. When collapsed, these items are displayed as tiny icons for faster access. In full screen mode, the Start menu looks more transparent without the blur effect.
This post will show you how to make the Start menu full screen in Windows 10.
A special option can be enabled in Settings in order to make Start open full-screen. Settings is the modern replacement for the classic Control Panel app.
- Open Settings.
- Go to Personalization > Start.
- On the right, find and enable the option Use Start full screen.
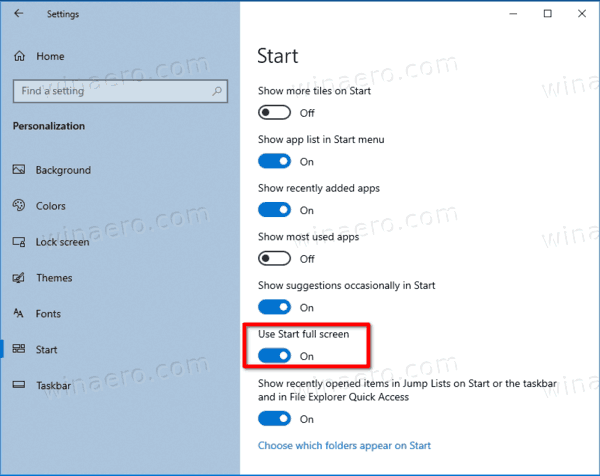
- You are done. You can now close the Settings app.
This will enable the full-screen Start menu in Windows 10.
Note: If you have enabled the Tablet Mode feature, the Start menu will always be full-screen until tablet mode is disabled.
The full-screen Start menu can also be enabled with a Group Policy tweak. This way, you can force it for all users. Here is how. Ensure that you are signed in as Administrator before proceeding.
Enable or disable the full screen Start Menu with Group Policy
- Open Registry Editor.
- Go to the following Registry key:
HKEY_LOCAL_MACHINE\SOFTWARE\Policies\Microsoft\Windows\Explorer. Tip: See how to jump to the desired Registry key with one click. - If you do not have such a key, then just create it.
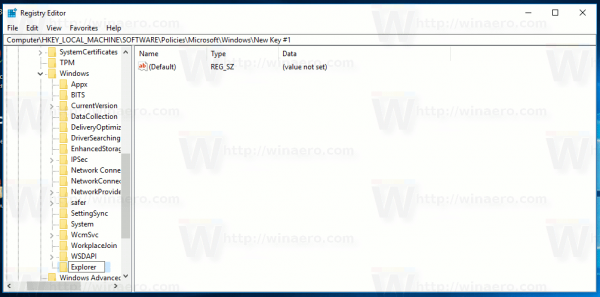
- On the right, create a new 32-bit DWORD value ForceStartSize. Note: Even if you are running 64-bit Windows, you still need to use a 32-bit DWORD as the value type.
- Set it to one of the following values:
1 = Force the default Start menu appearance, i.e. disable the full-screen Start menu.
2 = Force full-screen Start menu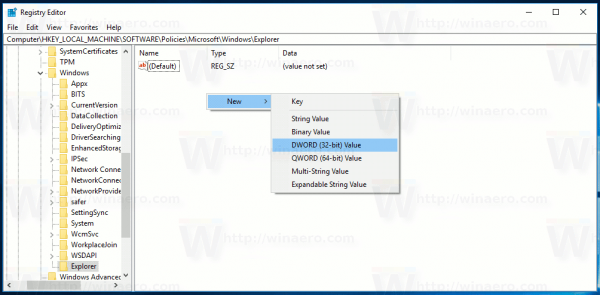
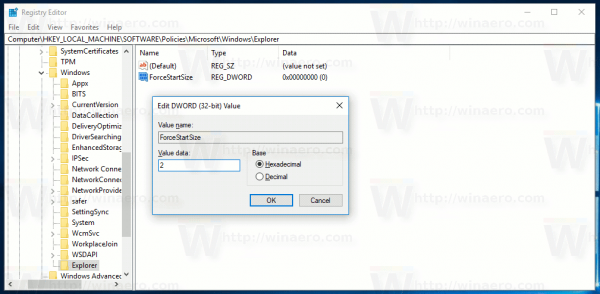
- Delete the above value to allow the user to choose the option in Settings as described above.
- Restart Windows 10.
You are done.
Note: If you create the ForceStartSize value under HKEY_CURRENT_USER\Software\Policies\Microsoft\Windows\Explorer instead of the HKEY_LOCAL_MACHINE key, the restriction will be applied to the current user account only.
That's it.
Support us
Winaero greatly relies on your support. You can help the site keep bringing you interesting and useful content and software by using these options:
