Here is how to delete a scheduled task in Windows 10. You may want to remove a task from the Task Scheduler if it has become redundant, or when it is related to an app you have uninstalled. There are a number of methods you can use for that.
Advertisеment
Task Scheduler is a special tool which comes bundled with all modern versions of Microsoft Windows. It allows the user to schedule the launch of apps, batch files, PowerShell scripts etc after specified time intervals or when certain system events occur. The Task Scheduler has a graphical MMC version (taskschd.msc) which is the most popular tool managing tasks.
If you are not familiar with creation of tasks in Task Scheduler, we have a good tutorial here: Create elevated shortcut to skip UAC prompt in Windows 10.
This post will show you how to delete a Scheduled Task in Windows 10. You can use the Task Scheduler app, Command Prompt, PowerShell, and the Registry editor for that.
To Delete Scheduled Task in Windows 10
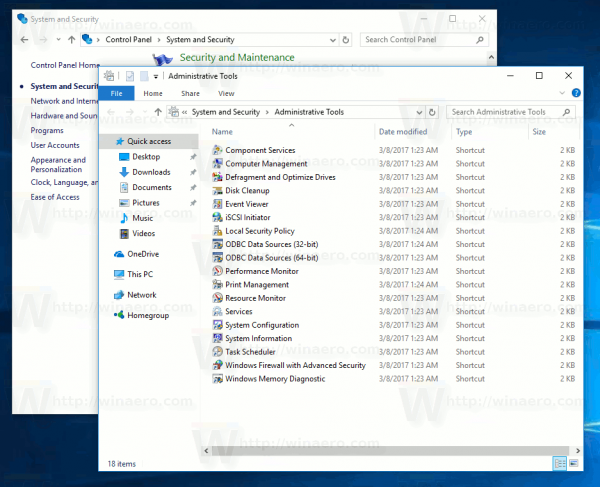
- Open Administrative Tools.
- Click the Task Scheduler icon.
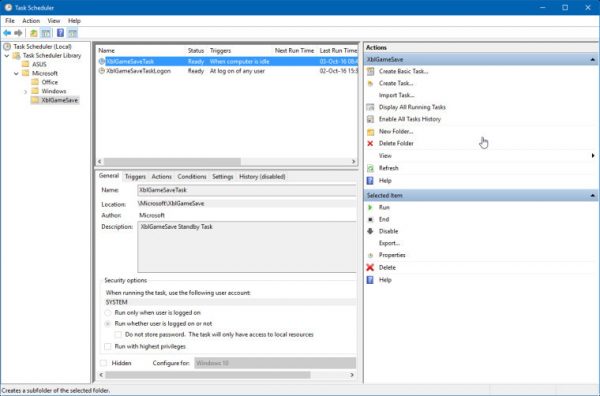
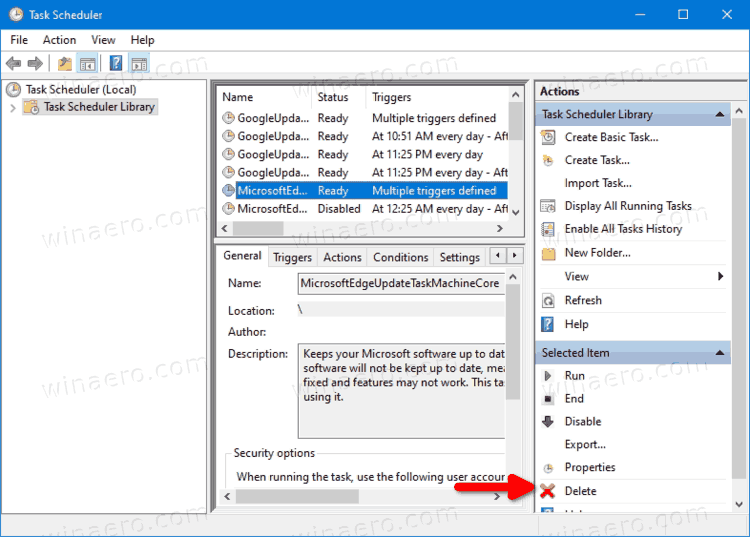
- In the Task Scheduler library, find a task you would like to remove. You may need to browse folders to find the task.
- Select the task, and click Delete in the right pane under Actions > Selected items.
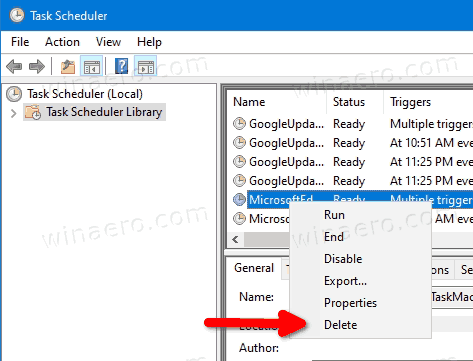
- Alternatively, you can right-click the task and select Delete from the context menu, or select Actions > Delete from the toolbar menu.
You have successfully deleted the task.
Alternatively, you can use the command prompt for the same. This can be done with schtasks, a console tool that allows managing scheduled tasks in Windows. It is also useful for various automation scenarios.
Remove a Scheduled Task in Command Prompt with Schtasks
- Open a new command prompt as Administrator.
- Type the following:
schtasks /Delete /TN "<task folder path>\<task name>" /Fto disable the task. Substitute the "<task name>" portion with the appropriate task name.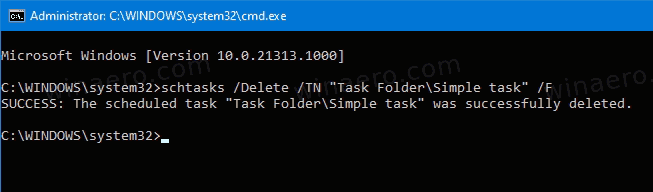
- If your task is located in the root folder of the task scheduler library, you can omit the
<task folder path>\string and specify only the task name. - The task is now removed. You can close the command prompt.
You are done.
Additionally, you can use PowerShell to remove a scheduled task. In includes a number of cmdlets that allow interacting with scheduled tasks.
Delete Scheduled Tasks with PowerShell
- Open PowerShell as Administrator.
- Type
Unregister-ScheduledTask -TaskName "<task name>" -Confirm:$falseto delete a task. Replace the "<task name>" portion with the actual task name you want to remove. - Similar to the above, run this command to remove a task in a folder:
Unregister-ScheduledTask -TaskPath "\<task folder full path>\" -TaskName "<task name>" -Confirm:$false. Specify the full task path and the task name.
- Additionally, there is a way to remove all tasks in a folder with this command:
Get-ScheduledTask -TaskPath "<task folder path>\" | Unregister-ScheduledTask -Confirm:$false - You can now close the PowerShell window.
You are done.
Note: You should specify the task folder location staring with a back slash and ending with the same. For example:
Unregister-ScheduledTask -TaskPath "\Task Folder\" -TaskName "Simple Task" -Confirm:$false
Finally, there is a way to delete a scheduled task in the Registry. Let's review it.
Delete a Scheduled Task in the Registry Editor
- Open the Registry Editor app.
- Go to the following Registry key.
HKEY_LOCAL_MACHINE\SOFTWARE\Microsoft\Windows NT\CurrentVersion\Schedule\TaskCache\Tree. See how to go to a Registry key with one click. - On the left, expand the Tree subkey. Task folders here are subkeys of Tree key, and root tasks are also similar subkeys, named as the task name.
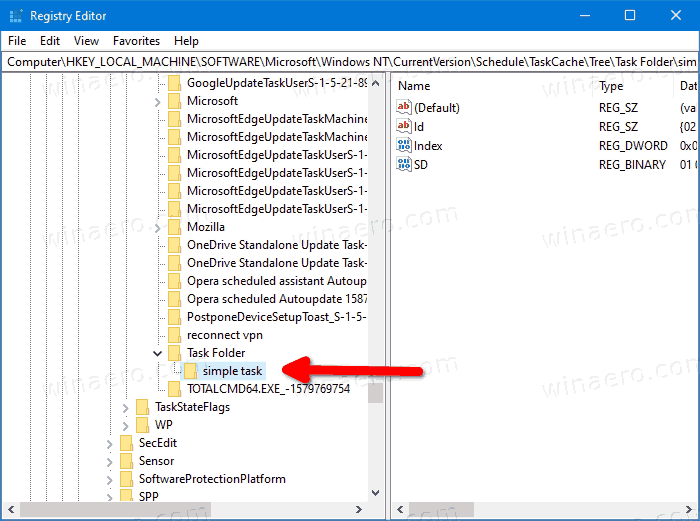
- Right-click on the task name you want to remove, and select Delete from the menu.
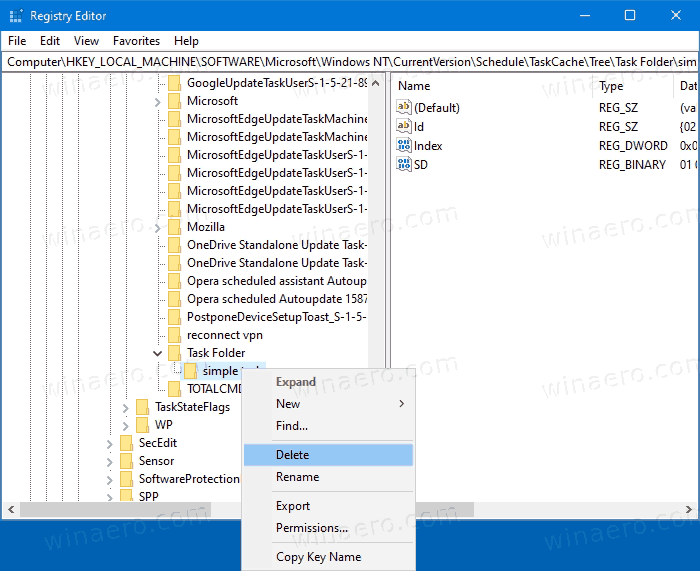
- Click on Yes to confirm the operation.
You have removed the task. You can close the Registry editor app.
That's it.
Support us
Winaero greatly relies on your support. You can help the site keep bringing you interesting and useful content and software by using these options:

I tried the method used, and I rebooted the computer. However, it only leaves behind an error message:
D:\ is unavailable. If the location is on this PC, make sure the device or drive is connected or the disk is inserted, and then try again. If the location is on a network, make sure you’re connected to the network or the Internet, and then try again. If the location still can’t be found, it might have been moved or deleted.
I use it to back up problematic software, so it would REALLY help if there was a work-around to this.
Whenever I delete the scheduled task it just comes back after a certain amount of time, it won’t stay deleted. I tried all the ways above
Some app on your PC re-creates it again and again for you.
What is the scheduled task you try to remove?