Here is how to change the screen off timeout in Windows 11. Windows 11 turns off the screen if your computer sits idle for a specific time. 30 minutes is the default option.
Advertisеment
You can customize that option and reduce the screen turn off timeout to preserve energy or increase it if needed. The latter is useful when you need to monitor what is happening in a specific application.
Change the screen turn off timeout in Windows 11
You can reduce or increase the screen turn off time in Windows 11 using the Settings app, Control panel, and Windows Terminal. Let's review all these methods.
Change the screen off timeout in Windows 11 with the Settings app
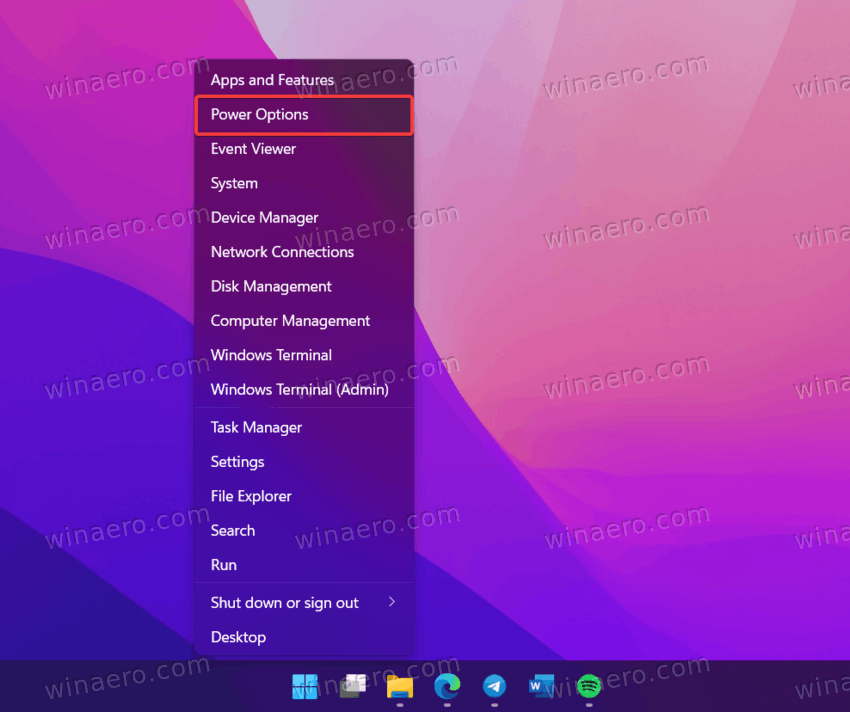
- Right-click the Start button or press Win + X. Select Power Options from the menu.
- Alternatively, open the Windows Settings app and go to System > Power.
- Click Screen and Sleep.
- Select a new timeout from the When plugged in, turn off my screen after drop-down list.
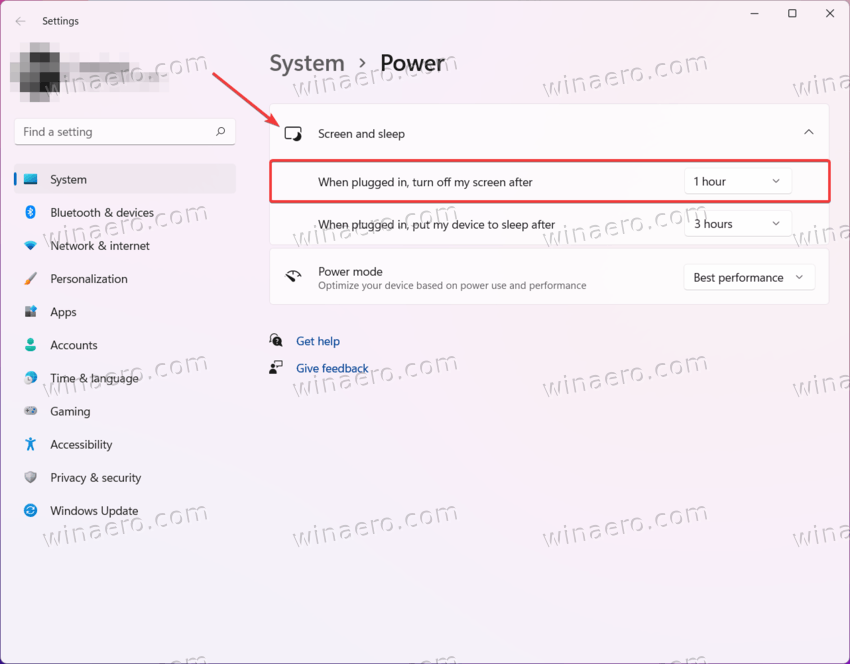
- Repeat the same for the On battery power, turn off my screen after option. Skip this step if you use a desktop computer.
- Close the Settings app.
You are done. Now, let's see how the same can be done using the classic Control Panel app. It still hosts all the required options for our tasks.
Using Control Panel
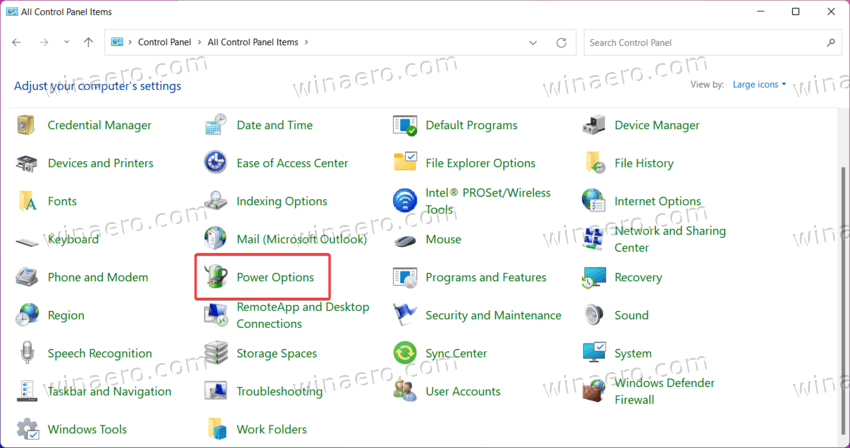
- Press Win + R and enter the
controlcommand. - Switch the view to Icons (large or small), then open the Power Options applet.
- Click the Choose when to turn off the display option on the left side of the window.
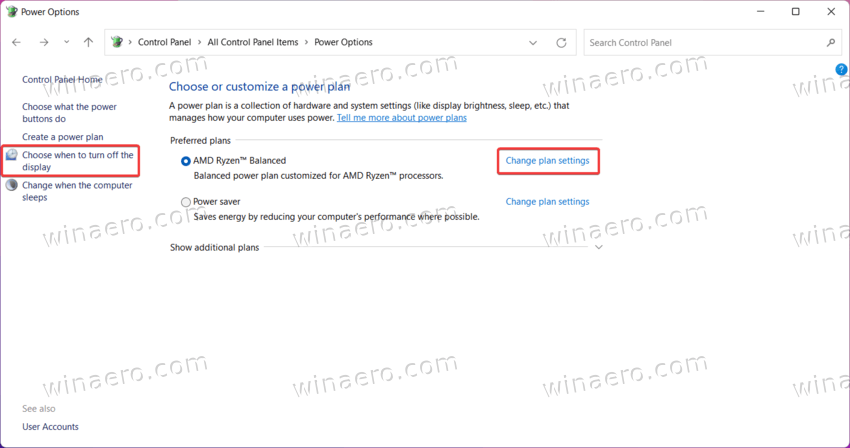
- Alternatively, click the Change plan settings link next to your current power plan. See the note below.
- Select a new timeout from the Turn off the display drop-down list.

- Click the Save changes button.
- Repeat the previous steps for other plans if necessary.
- Close Control Panel.
You are done.
Note: you can assign different timeouts for different plans, for example, 2 minutes for power saver and 1 hour for maximum performance.
Change the screen off timeout in Windows 11 using Windows Terminal
Finally, here is how to change the screen off period of time in Windows 11 using a simple command in Windows Terminal. Although this section might look intimidating for new users, it is one of the fastest ways to adjust the screen off value in Windows 11.
To change the Windows 11 screen turn off timeout from Windows Terminal, do the following.
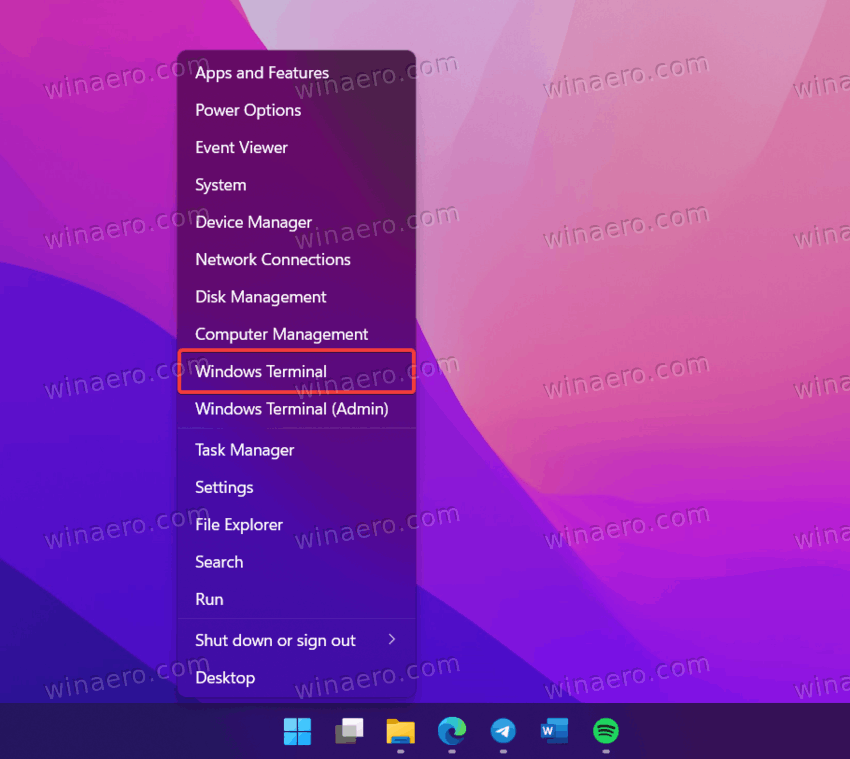
- Right-click the Start button and select Windows Terminal.
- Enter the following command to change the screen off time for when on battery mode:
powercfg -change -monitor-timeout-dc X. Replace X with a preferrable time specified in minutes. - The next command does the same for when plugged in:
powercfg -change -monitor-timeout-ac X.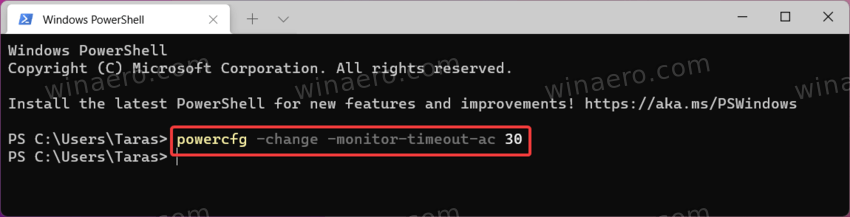
- Press Enter.
- Close Windows Terminal.
Here is the sample command that sets Windows 11 to turn off the display after 10 minutes of inactivity when plugged in:
powercfg -change -monitor-timeout-dc 10.
That is how you change the screen off timeout in Windows 11.
Support us
Winaero greatly relies on your support. You can help the site keep bringing you interesting and useful content and software by using these options:

very clear and good article easy to understand. Thank you
this information so good