You can enable Auto Switch for Wireless Network Connection in Windows 10. When it is enabled, and you have saved multiple wireless network profiles, the operating system will be able to connect to an alternative network which is in range while connected to the current one. This behavior depends on a few settings, which we will review today.
Advertisеment
By default, Windows 10 will connect automatically to Wi-Fi networks you have connected at least once. The operating system saves a profile for such a network, and the "Connect automatically" option is enabled by default.
Also, saved wireless networks have priority that defines to which Wi-Fi network to connect when it is available in range. In Windows 7, you could easily change the priority for a wireless network using the the Control Panel. However in Windows 10, that option is no longer available. Also, the Settings app does not offer any alternative to it as of this writing. But you still can change it using the netsh tool. Check out Change WiFi network priority in Windows 10.
Wireless Network Auto Switch
Besides the two factors mentioned above, there is also the autoSwitch parameter. It controls the wireless network switching behavior for known Wi-Fi profiles when such a network is available in range. It can be turned on for a specific wireless connection. When enabled, it makes Windows 10 to continue discovering for other wireless networks even when it is already connected to some. As soon as the OS detects a network with a higher priority, it will automatically disconnect from the current one and connect to the newly found Wi-Fi option.
This post will show you enable Auto Switch to a Wireless Network in Windows 10.
To Enable Auto Switch for Wireless Network Connection in Windows 10
- Open the Settings app.
- Go to Network and Internet > Status.
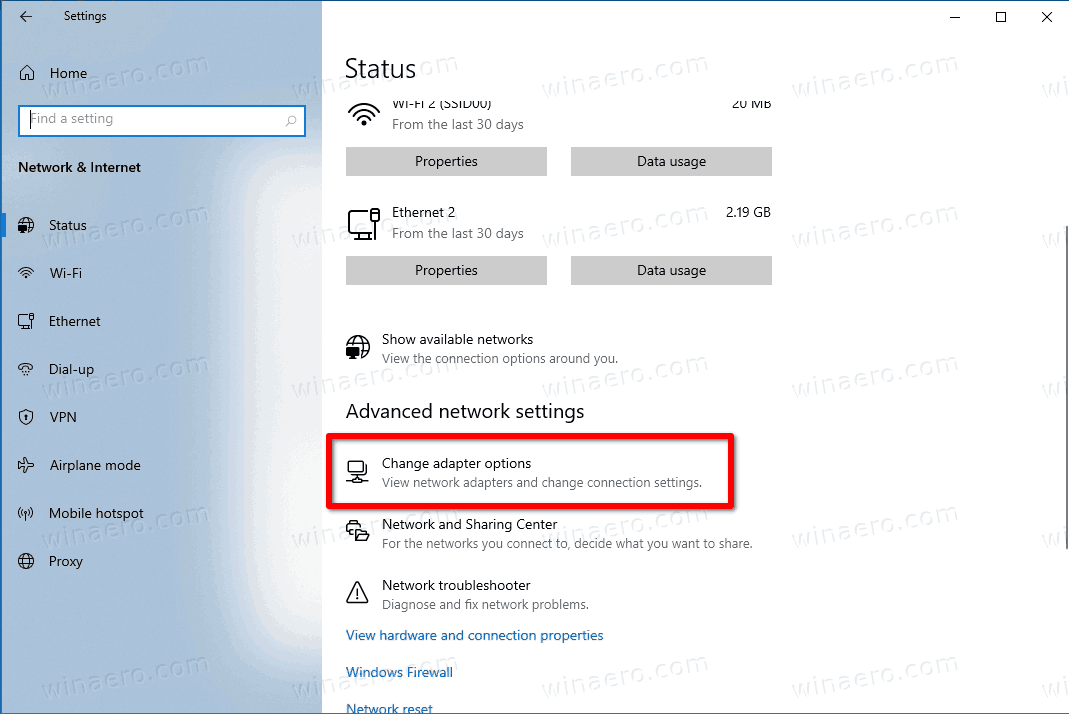
- On the right, click on Change adapter options to open the Network Connections folder.
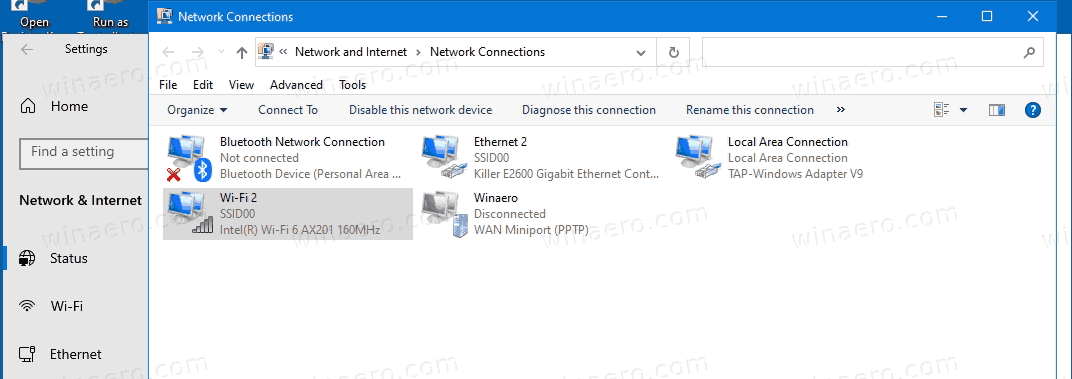
- In Network Connections, double-click on the wireless network connection you want to enable the Auto Switch option for.
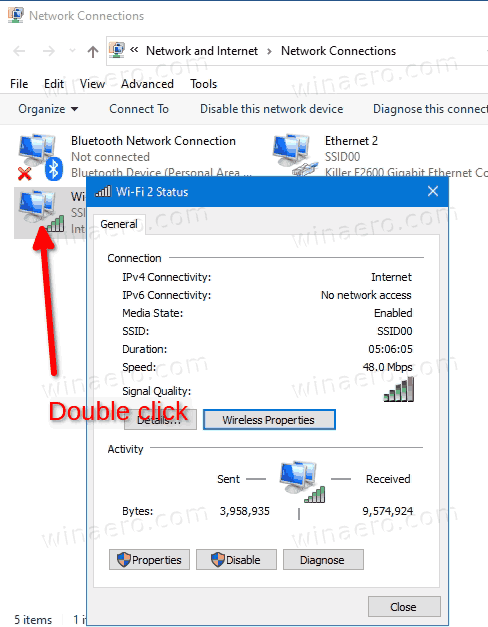
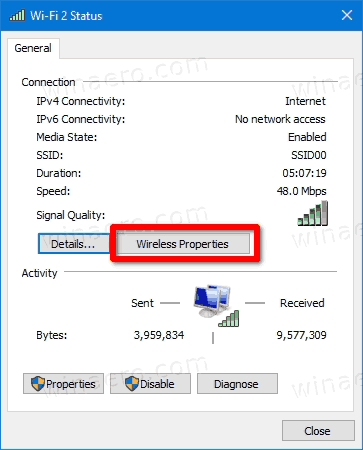
- Now, click on the Wireless Properties button.
- Turn on (check) the Look for other wireless networks while connected to this network option to enable the Auto Switch feature for the wireless network connection.
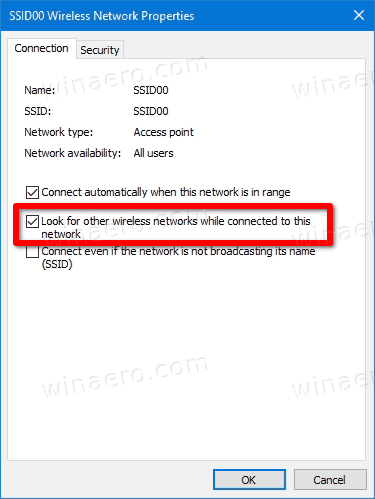
- Click on OK to apply the change.
You are done.
Note: By default, the Look for other wireless networks while connected to this network checkbox is turned off (unchecked). Once you enable it, you can undo this change at any moment of time.
Alternatively, you can enable or disable the Auto Switch feature from the command prompt using the netsh tool.
Enable or Disable Auto Switch in Command Prompt
- Open a new command prompt.
- Type or copy-paste the
netsh wlan show profilescommand, and hit the Enter key to see the available wireless network profiles and interfaces.
- Note of the wireless network profile name you want to enable or disable Auto Switch for.
- To enable the Auto Switch feature, run the command:
netsh wlan set profileparameter name="<Profile Name>" autoswitch=Yes. Substitute<Profile Name>with the actual profile name.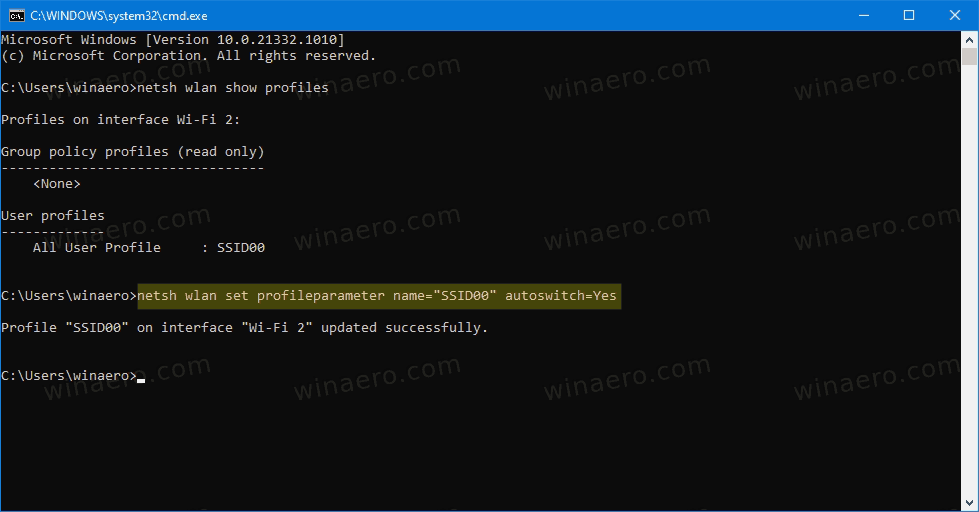
- Similarly, you can disable the Auto Switch option with the following command.
netsh wlan set profileparameter name="<Profile Name>" autoswitch=No.
- If you have a few wireless interfaces, you may want to apply the change to a specific interface only. In this case, you the following syntax:
netsh wlan set profileparameter name="<profile name>" interface="<Interface Name>" autoswitch=Yes|No. - Substitute
<Profile Name>and<Interface Name>with the actual values.
That's it.
Support us
Winaero greatly relies on your support. You can help the site keep bringing you interesting and useful content and software by using these options:
