How to Disable Automatic Deletion of BSOD Memory Dumps on Low Disk Space in Windows 10
With the default settings, Windows 10 performs an automatic restart when a blue screen of death (BSOD) crash happens. It show the crash code to the user, and then creates a minidump of the RAM, and then it restarts. Windows 10 automatically deletes old memory dumps, but you can change this behavior.
Advertisеment
Windows creates memory dump files for diagnostic purposes. Using them, it is often possible to find what caused the BSoD, e.g. a problematic driver of a device installed in your computer. The process of creation of memory dumps is enabled by default, and doesn't require the user to enable it.
Windows writes memory dumps under the following locations:
- Mini dumps go to the folder c:\Windows\minidump.
- A full memory dump, when enabled, goes to the file C:\Windows\MEMORY.DMP.
If your device has less than 25GB free space on the system partition, Windows will erase dumps automatically. The operation can be spotted under the Event Viewer with Event ID 1018.
Memory dumps are often required by developers. They can create them intentionally by manually enabling Crash on Ctrl+Scroll Lock. In this case, it can be a good idea to leave them in place instead of having them deleted automatically.
To Disable Auto Deletion of Memory Dumps on Low Disk Space in Windows 10,
- Press the Win + R keys on the keyboard to open the Run dialog.
- Type
systempropertiesadvancedinto the Run box.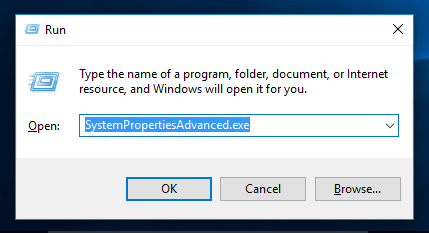
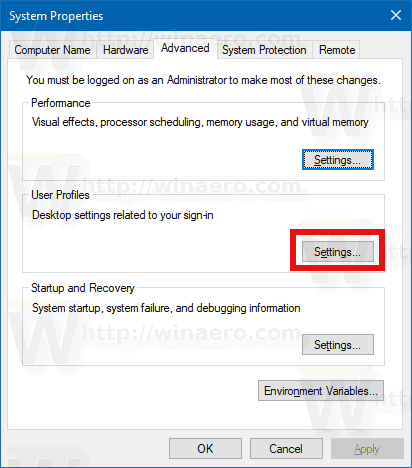
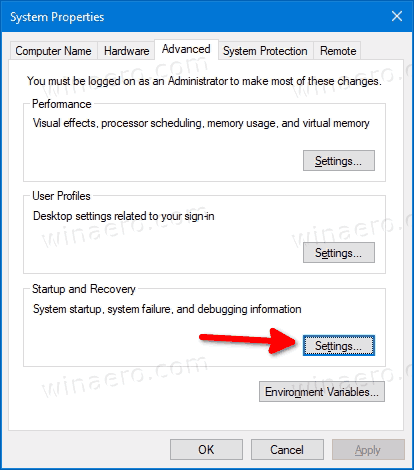
- On the Advanced tab of System Properties, click on the Settings button under Startup and recovery.
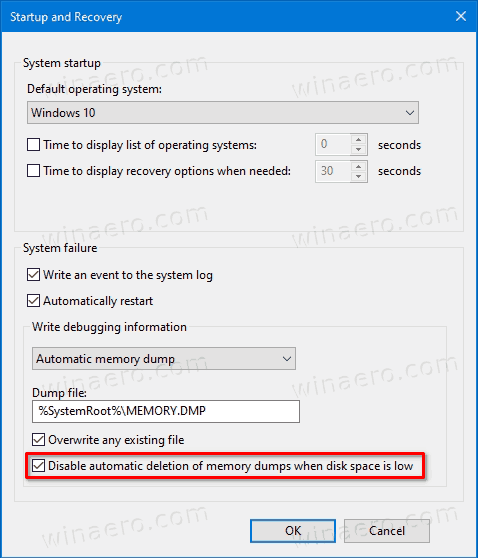
- On the next page, turn on (check) the option Disable automatic deletion of memory dumps when disk space is low.
- You are done!
The option can be re-enabled at any time later.
Alternatively, you can enable or disable it using a Registry tweak. Here's how it can be done. You can also download ready-to-use Registry files.
Disable Auto Deletion of Memory Dumps on Low Disk Space in Registry
- Open the Registry editor.
- Navigate to the following registry key:
HKEY_LOCAL_MACHINE\System\CurrentControlSet\Control\CrashControl. Tip: See how to open the desired registry key with one click. - Modify or create a new 32-bit DWORD value named
AlwaysKeepMemoryDumpand set to 1. Note: Even if you are running 64-bit Windows you must still create a 32-bit DWORD value.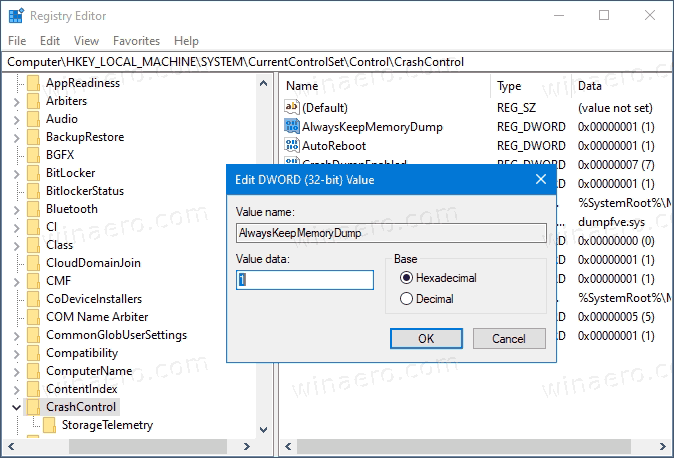
- This will prevent Windows 10 from removing memory dumps on the low disk event.
You are done! To undo the change, set the AlwaysKeepMemoryDump value to 0.
Finally, here are the ready-to-use Registry files, including the undo tweak.
That's it!
Support us
Winaero greatly relies on your support. You can help the site keep bringing you interesting and useful content and software by using these options:
