How to Change Where to Keep Mouse Cursor while using Magnifier in Windows 11 and Windows 10
Magnifier is an accessibility tool bundled with all modern Windows version, such as Windows 11/10/8.1/7/, etc. You can launch it directly with the magnify command. When enabled, Magnifier makes part or all of your screen bigger so you can see words and images better. In recent Windows 10 builds, Magnifier has an ability to keep the mouse cursor in the center of the screen, or within its edges while using it in full-screen view.
Advertisеment
Accessibility options are part of Mirosoft Windows operating system for decades. They are included so people with impaired vision, hearing, speech or other challenges find it easier to work with Windows. Accessibility features improve with every release.
Magnifier is one of the classic accessibility tools that allows you to temporarily enlarge a portion of the screen in Windows 10. Formerly known as Microsoft Magnifier, it creates a bar at the top of the screen that greatly magnifies where the mouse pointer is.
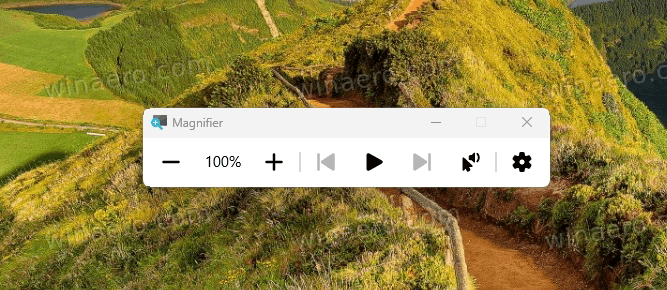
When the toolbar is active, you can press the Plus and Minus buttons to zoom in and out the screen area. It also support global hotkeys for that, Win + + and Win + -.
In Windows 11 and 10, you can use different methods to start and stop Magnifier. Also, you can start it automatically before you sign in to your user account.
You can choose to keep the mouse cursor centered on the screen or at the edges of the screen while using Magnifier in full screen view. Note: This feature was first introduced in Windows 10 build 17643.
Here is how it can be done.
Change Where to Keep Mouse Cursor for Magnifier in Windows 11
- Open the Settings app by pressing Win + I.
- On the left, click on Accessibility.
- In the right pane, select Magnifier.
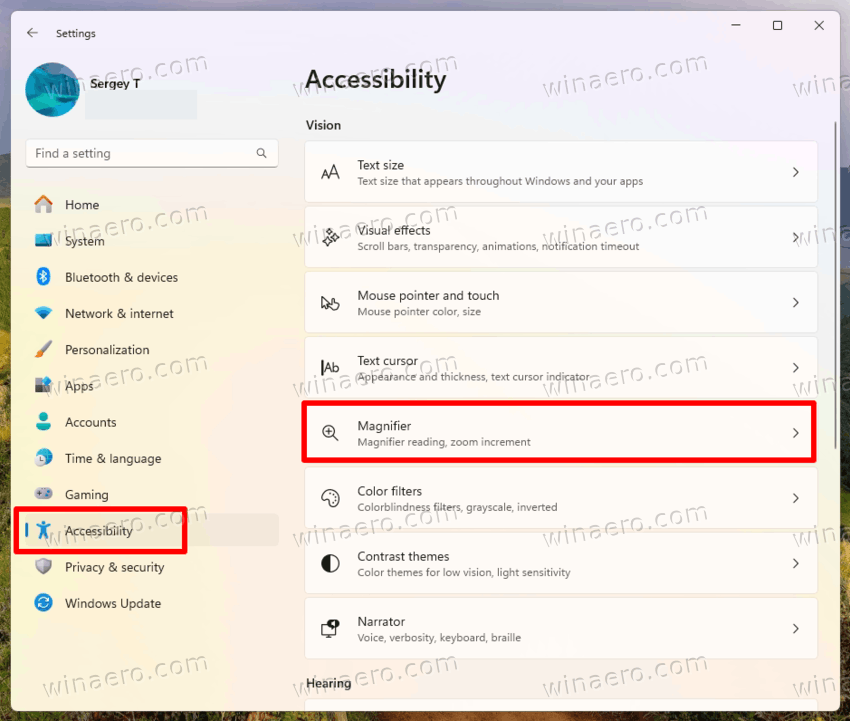
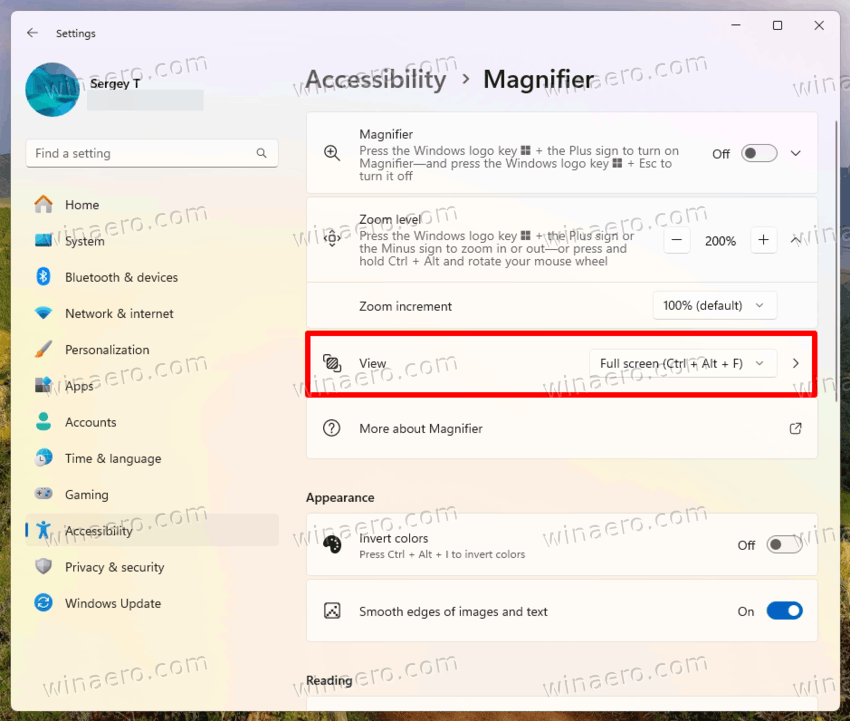
- On the next page, click the arrow button next to the View section.
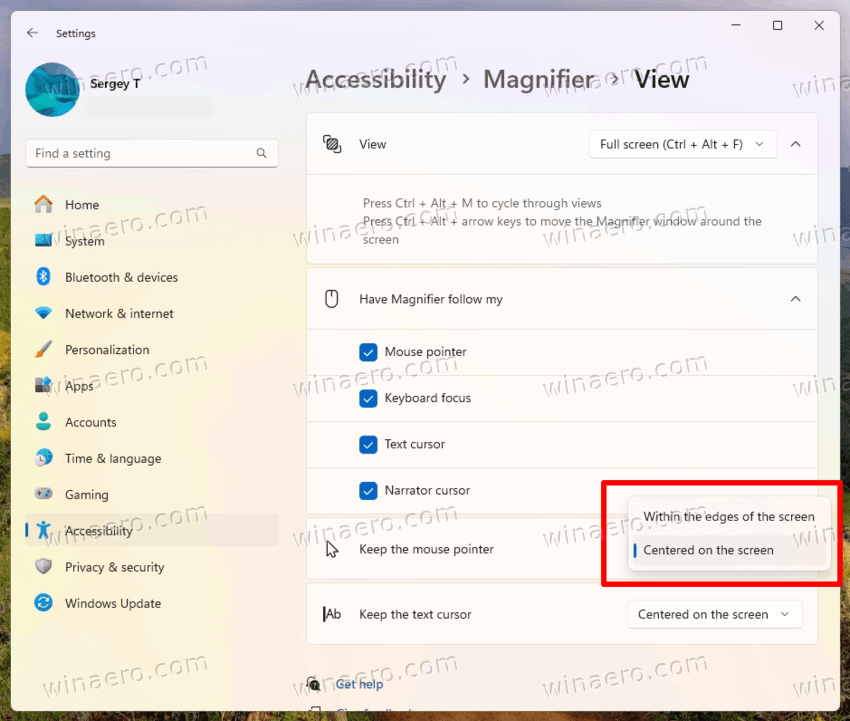
- Finally, keep the desired location for the Keep the mouse pointer option, that is Centered on the screen or Within the edge of the screen.
- You can now close the Settings app.
You are done!
In Windows 10
In Windows 10, changing where to keep the cursor screen position for magnifier is almost the same. The difference is in the look of the Settings app, which doesn't include a dedicated "View" section. It allows accessing the option directly.
To change the cursor position for Magnifier on Windows 10, do the following.
- Open the Settings app.
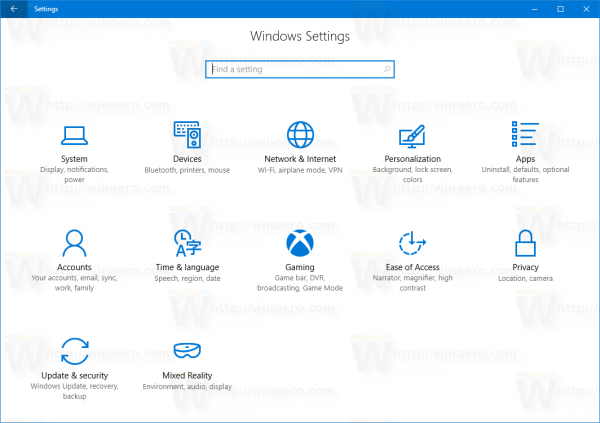
- Go to Ease of Access > Magnifier.
- Find the Keep the mouse pointer drop-down list under Change Magnifier view on the right.
- Select Centered on the screen or Within the edge of the screen for what you want.
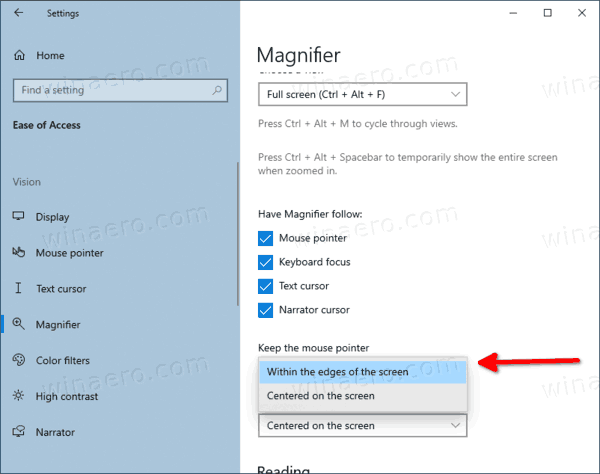
- You are done.
Alternatively, you can configure this feature with a Registry tweak.
Choose Where to Keep Mouse Cursor in Magnifier in Registry
- Open the Registry Editor app.
- Go to the following Registry key.
HKEY_CURRENT_USER\Software\Microsoft\ScreenMagnifierSee how to go to a Registry key with one click. - On the right, modify or create a new 32-bit DWORD value
FullScreenTrackingMode.
Note: Even if you are running 64-bit Windows you must still create a 32-bit DWORD value.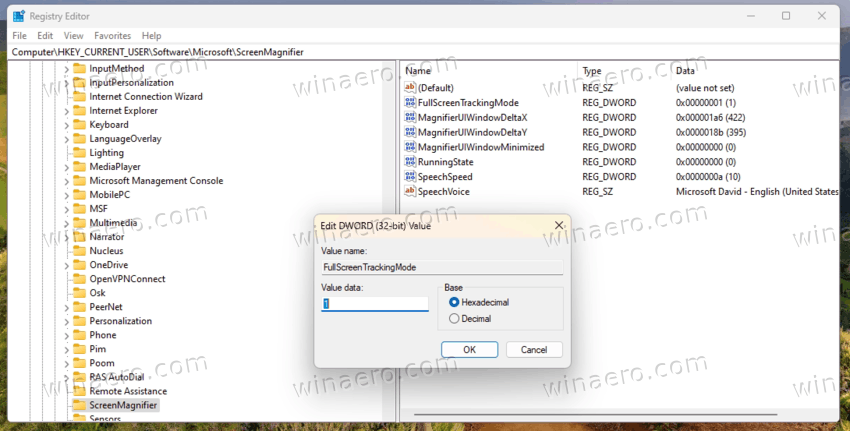
- Set its value data as follows:
- 0 = Within the edge of the screen
- 1 = Centered on the screen
- To make the changes done by the Registry tweak take effect, you need to sign out and sign in to your user account. Alternatively, you can restart you computer.
You can save your time by downloading the following Registry files.
The undo tweak is included.
Command prompt method
In various automation scenarios, you may prefer console commands, e.g. to include them in a batch file. For that purpose, you can use the built-in REG tool.
Open cmd.exe and issue one of the following commands.
- To keep the cursor in the screen center:
reg add HKCU\Software\Microsoft\ScreenMagnifier /v FullScreenTrackingMode /t REG_DWORD /d 1 /f.
- To keep the cursor at a screen edge:
reg add HKCU\Software\Microsoft\ScreenMagnifier /v FullScreenTrackingMode /t REG_DWORD /d 0 /f
Using PowerShell
Finally, you can perform this Registry modification with PowerShell. It can be of help of users who change Windows settings via PS1 scripts. In case of PowerShell, you need to include the following commands in your script.
- For the screen center option:
New-ItemProperty -Name FullScreenTrackingMode -PropertyType Dword -Value 1 -Path HKCU:\Software\Microsoft\ScreenMagnifier -Force - Cursor at screen edges mode:
New-ItemProperty -Name FullScreenTrackingMode -PropertyType Dword -Value 0 -Path HKCU:\Software\Microsoft\ScreenMagnifier -Force
That's it.
Support us
Winaero greatly relies on your support. You can help the site keep bringing you interesting and useful content and software by using these options:

I have used the magnifier the other day. I was trying to pull up smiley face fonts (Emojy?) with
Win + well, I could not use the mouse, even after unplugging it and waiting about 10 seconds,
and then plugging back into the USB port. even tried a differnet port, Win Esc didn’t work at all.
I pressed CTRL ALT DEL that didn’t help either, it just went to blue screen with signout options
and I still couldn’t move the mouse… I haven’t seen your page until now (3/25/2020) so it is
nothing you have written about which caused this.
I was wonder if anyone else has had this happen?
P.S. Love your articles.
I forgot to add, the Magnifier was just a tiny window about 300px X 300px from the top , the mouse was stuck anywhere on the screen. It stuck in place when the Magnifier opened. I tried it two times and both times, same thing.
Thank you.