This article will show you how to enable Screen Magnifier in Windows 11. Screen Magnifier is the default accessibility tool in Windows 11 that increases the image on the screen without changing system scaling or other settings. You can enlarge the entire screen or just a portion of it using Lens or Docked modes.
Advertisеment
The following screenshot demonstrates the screen magnifier feature in action.
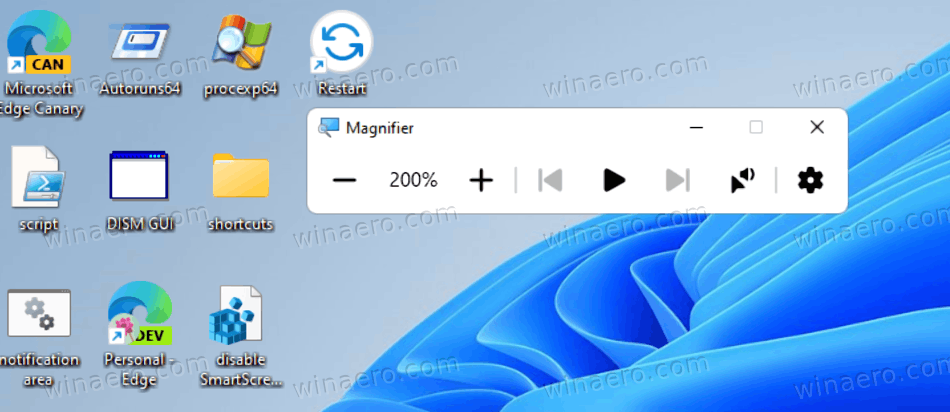
You can go through screen areas that aren't visible by moving the mouse cursor to the screen edge. It will be automatically scrolled to reveal the missing area. It also integrated with Narrator. There is a button "Read from here" to start it.
Let's see how to enable it.
Enable Screen Magnifier in Windows 11
To enable Screen Magnifier in Windows 11, you can use a variety of methods. You can use the Start menu shortcut, a hotkey, Quick Settings, the Settings app and Control Panel. You can also customize it in Windows Settings.
Let's review these methods in detail.
Screen Magnifier shortcut key
The quickest way to turn on Screen Magnifier in Windows 11 is to press Win and Plus (+) buttons simultaneously. By pressing the same sequence you will further zoom in the screen area.
To zoom out the screen in Screen Magnifier, press Win + Minus (-).
Finally, you can use a few more keyboard shortcuts to manage with Screen Magnifier. Pressing Ctrl + Alt + Enter you will make it read the current file name or button text via Narrator. Alternatively, you can do the same with the Ctrl + Alt + left mouse click.
Enable Screen Magnifier in Windows 11 using Quick Settings
- Press Win + A to open Quick Settings. Alternatively, you can click one of the following buttons in the notification area in the bottom-right corner of the screen: volume, network, or battery.
- Click the Accessibility button.
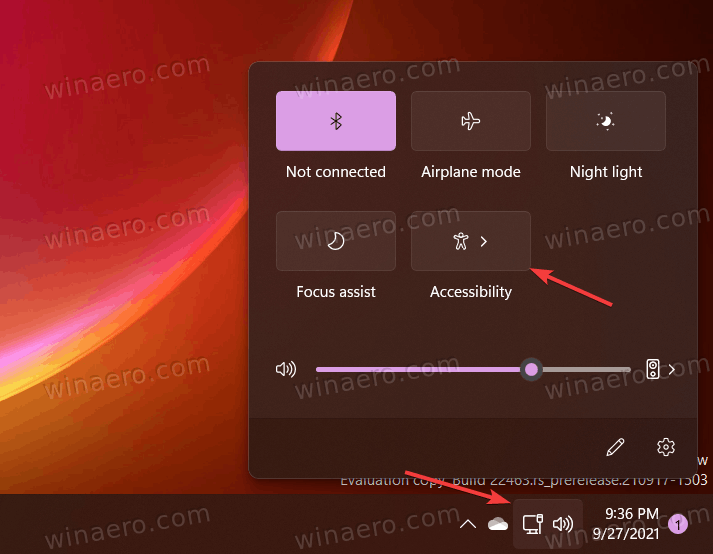
- Turn on Magnifier.

You are done. Note that Windows uses a full-screen magnifier by default, which means its options panel might appear off-screen. Move the cursor around to locate its options panel and change the settings, such as magnification level.
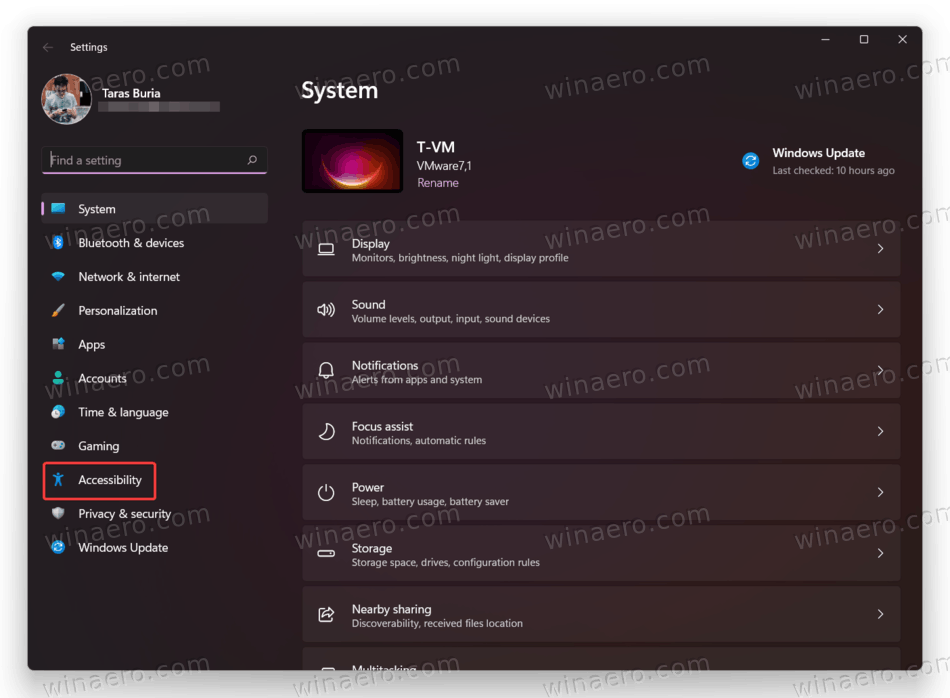
You can also enable Screen Magnifier in Windows 11 using the Windows Settings app.
Using the Settings app
- Press Win + I to open Windows Settings.
- Go to the Accessibility section.
- Click the Magnifier button.
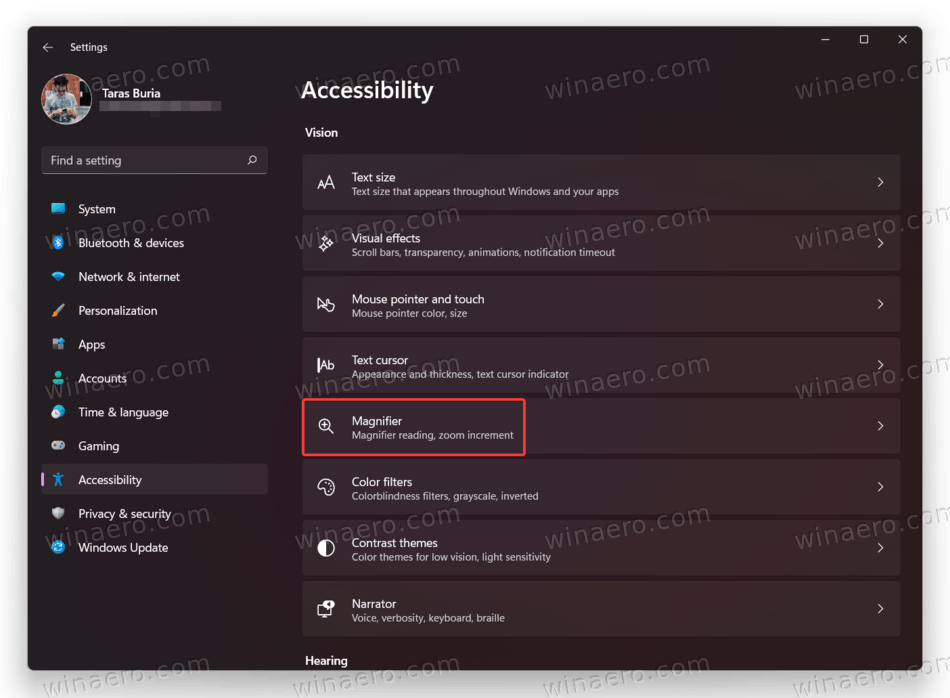
- Enable the Magnifier toggle option. The same toggle switch disables the screen magnifier in Windows 11.
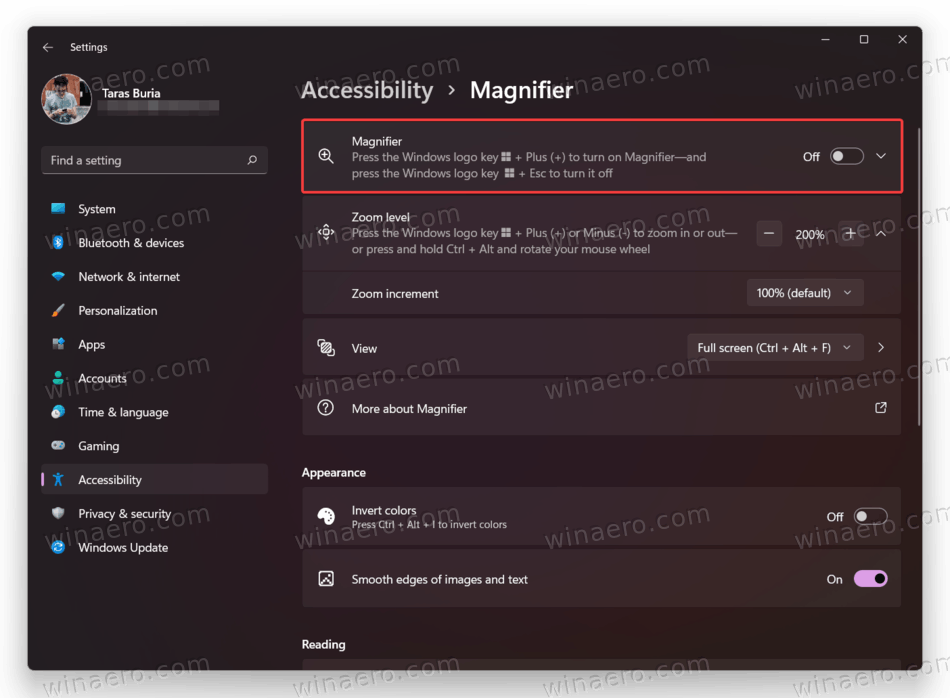
You are done.
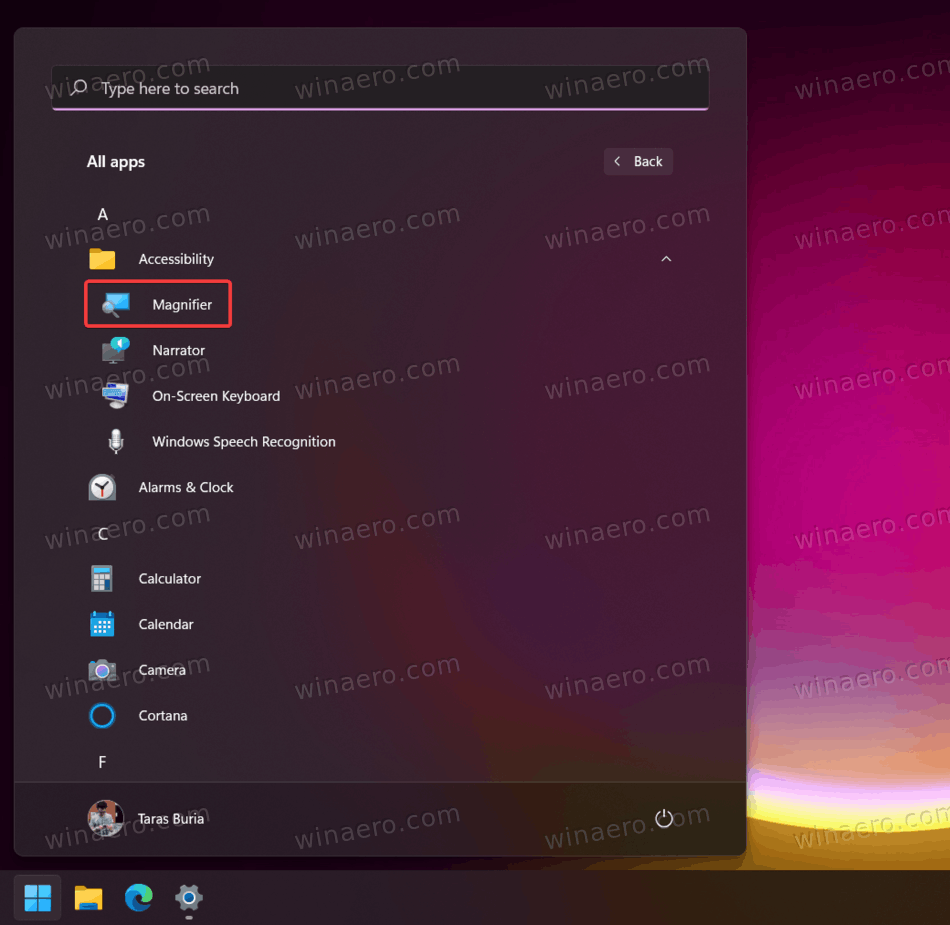
Additionally, you can start the Screen Magnifier tool right from the Start menu. Finally, Windows Search can also be used for the same.
- Open the Start menu and click the All Apps button.
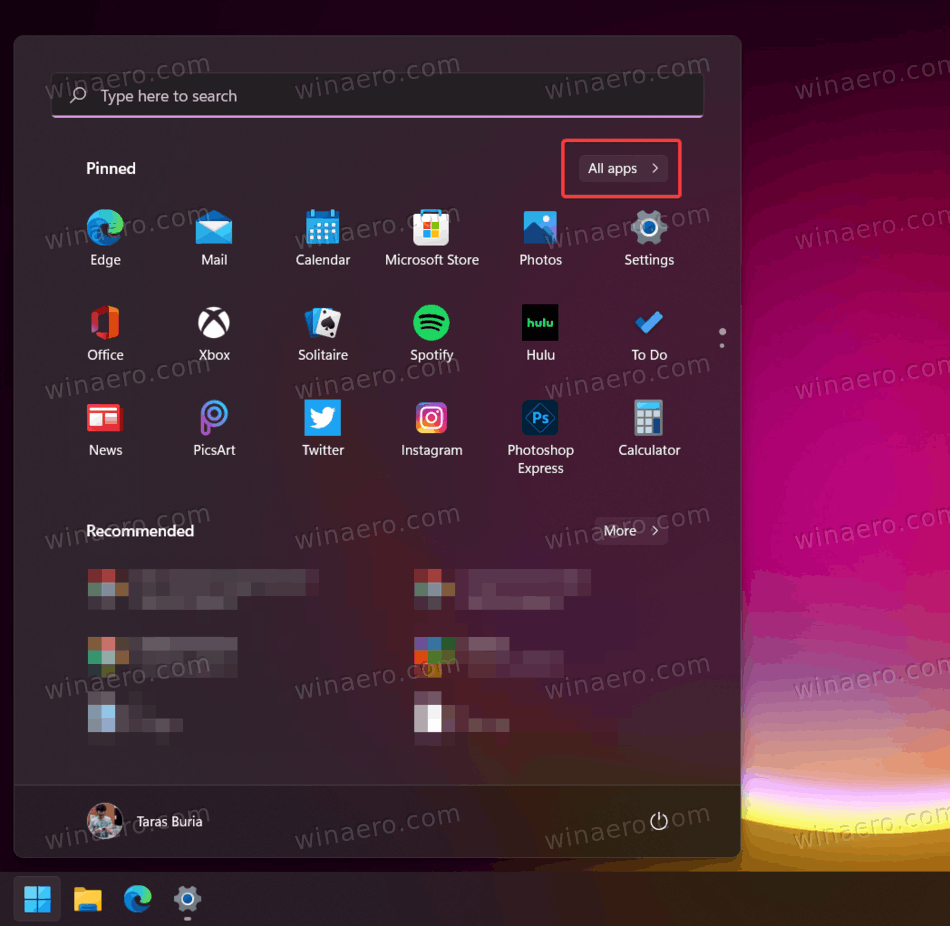
- Find the Accessibility folder.
- Launch the Magnifier app.
- You can also right-click the app and select More > Pin to taskbar to launch Magnifier without opening additional menus or folders.
Using Windows Search
To open Screen Magnifier from Windows Search, press Win + S to open Windows Search. Start typing Magnifier, then launch the app from the search results.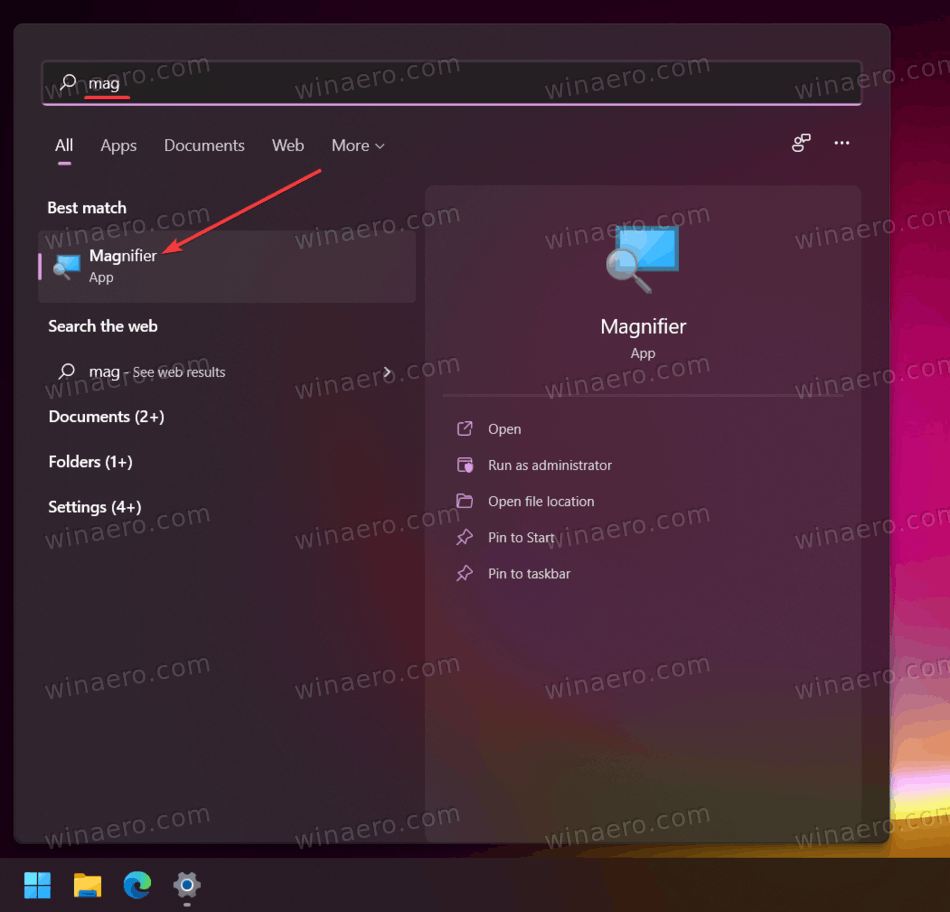
Like most built-in utilities, Magnifier can also be launched by typing its executable file in the run dialog.
Open Screen Magnifier from the Run dialog
- Press Win + R, or right-click the Start button and select Run from the menu,
- In the Run box, type the
magnifycommand.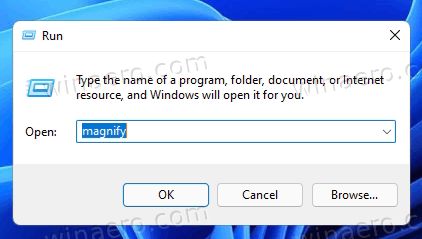
- Press the Enter key.
This launches Screen Magnifier with no difference to any other method reviewed in this article.
Just to note, the magnify.exe file is located in the C:\windows\system32 folder. That's why you can launch it from the Run dialog without specifying the full path to the file.
Although Windows Settings is the main app to control various parameters in the operating system, the classic Control Panel is still out there. That means you can turn on Screen Magnifier using Control Panel.
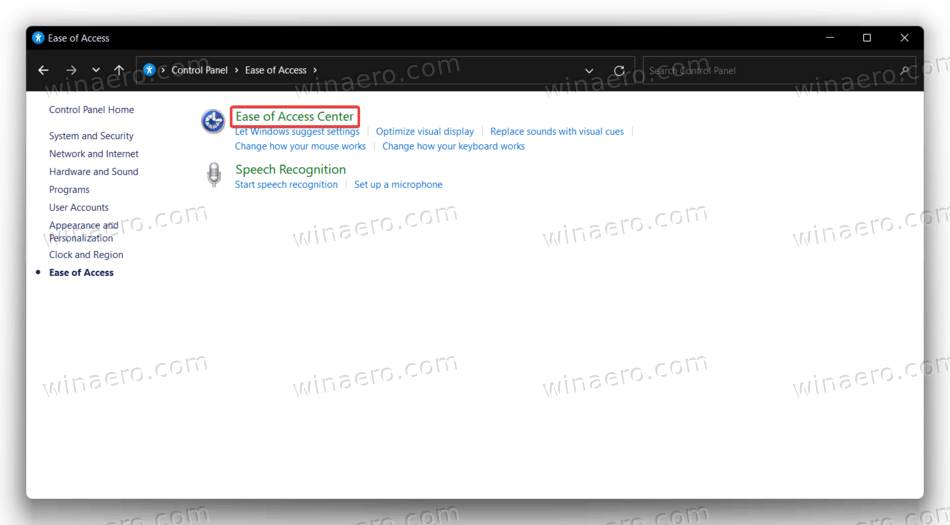
Turn on Magnifier in the Control Panel
- Press Win + R and enter the following command:
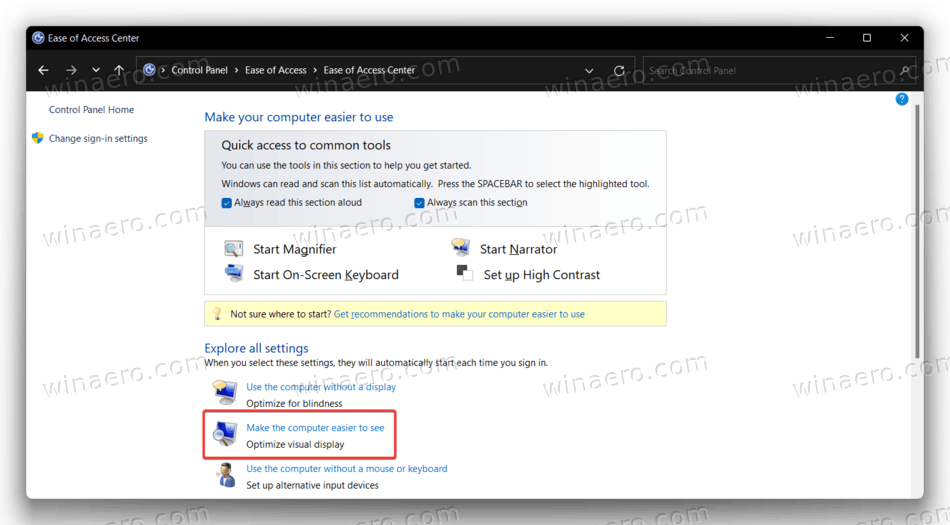
control. - Go to Ease of Access > Ease of Access Center.
- Click the Make the computer easier to see link.
- Place a checkmark next to the Turn on Magnifier option.
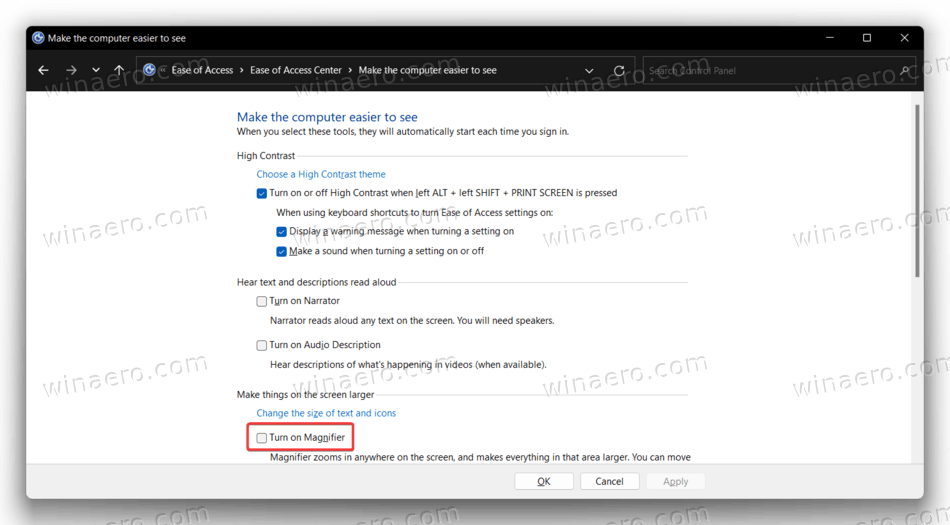
- Click OK to save changes.
Change Screen Magnifier View in Windows 11
Magnifier supports three different views.
- Full screen view magnifies the entire screen. You won’t be able to see the whole screen at the same time when it’s magnified, but as you move around the screen, you can see everything.
- Lens view is like moving a magnifying glass around the screen. You can change the size of the lens in Magnifier settings.
- Docked view works on the desktop. In this view, Magnifier is anchored to a portion of your screen. As you move around the screen, parts of the screen are magnified in the docking area, even though the main part of the screen is unchanged.
If you prefer other magnifier modes rather then the default one, such as the lens or docked, here is how to enable them.
To change the Screen Magnifier view in Windows 11, do the following.
- Open Screen Magnifier in Windows 11 using one of the previously described methods.
- Next, press the following keys to change modes:
- Lens: Ctrl + Alt + L.
- Docked: Ctrl + Alt + D.
- Full-screen (default): Ctrl + Alt + F.
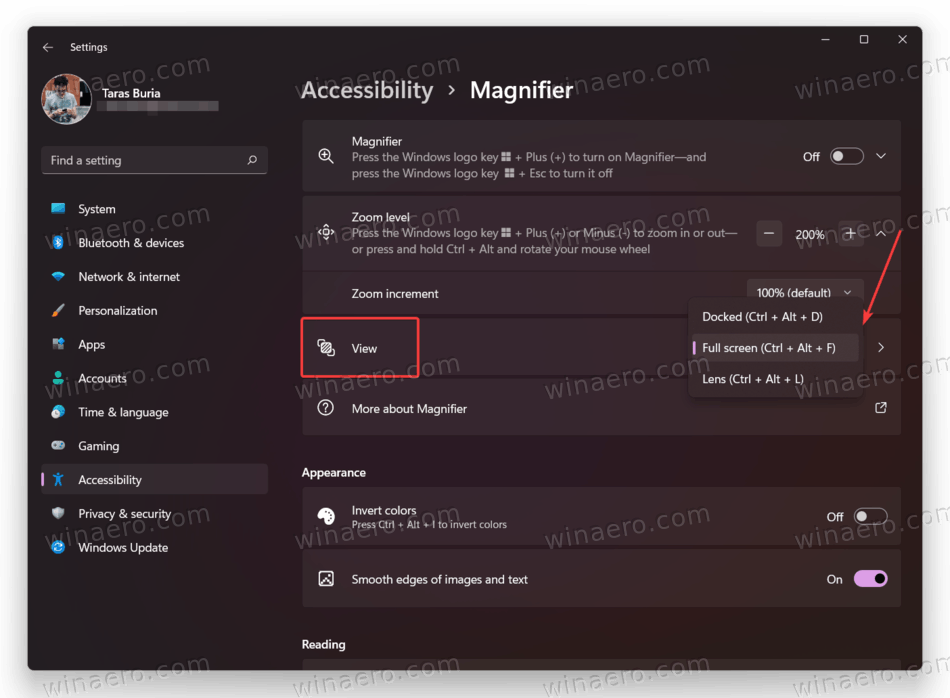
Change Screen Magnifier view using Settings
- Open Windows Settings by right-clicking the Start menu button and selecting Settings, or using any other method.
- Go to the Accessibility section.
- Click the Magnifier button.
- Find the View setting and select "Full-screen," "Lens," or "Docked" from the drop-down list.
How to disable Screen Magnifier in Windows 11
To disable Screen Magnifier in Windows 11, press Win + Esc.
Alternatively, locate its option flyout on the screen and press the close (X) button in its window.
You are done.
Magnifier is the classic accessibility app that remains available in all Windows releases. It is greatly helpful not only for users with vision dysfunction, but also allows to read the text in apps that are not optimized for your HiDPI screen. So, now you know all the necessary things to manage Magnifier in Windows 11.
That's it
Support us
Winaero greatly relies on your support. You can help the site keep bringing you interesting and useful content and software by using these options:
