Here are three methods to enable Mobile Hotspot in Windows 10. It is an easy way to share your Internet from a Windows 10 device to PCs and other devices around you over Wi-Fi. Read this article to learn how to enable and use this feature.
Advertisеment
The ability to create a Mobile Hotspot is present in Windows for a long time. The first version of Windows which had such capabilities was Windows 7. Earlier, you had to run some console commands to start a wireless hosted network.
Starting in Windows 10 build 14316 or above, Microsoft has added the options that allow you to easily setup and turn on or off mobile hotspot right in the Settings app.
Before you proceeding keep in mind that the network name (SSID) for your mobile hotspot can't be hidden in the list of available networks, so it will be visible to all devices in a range around you.
This post will show you how to enable the mobile hotspot to share your Internet connection from your Windows 10 device with other PCs, smartphones, and laptops.
Enable Mobile Hotspot in Windows 10
- Open the Settings app.
- Now open the Network & internet > Mobile hotspot page.
- Select the network connection to share under Share my Internet connect from.
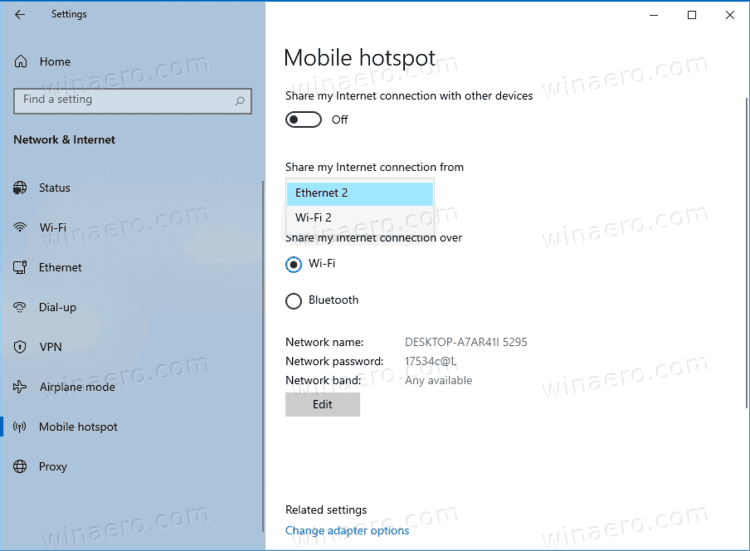
- If available, select Wi-Fi (default) or Bluetooth for what you want under Share my Internet connection over.
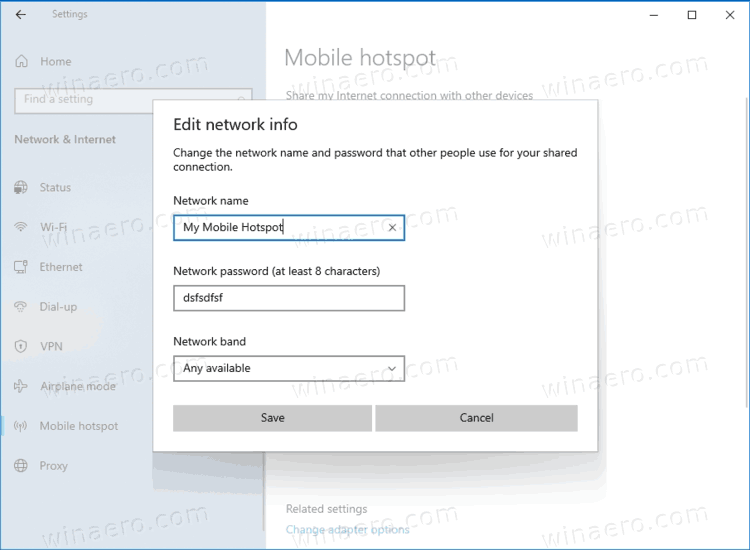
- In case of Wi-Fi, click on the Edit button and specify the network name, password, and network band for your hotspot.
- Finally, turn on the Share your Internet with other devices option to enable the mobile hotspot.
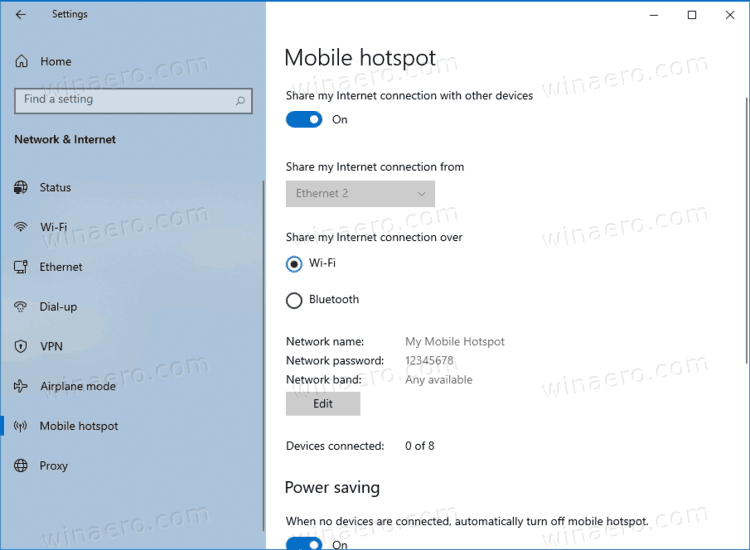
You are done.
Alternatively, you can enable the mobile hotspot from the Action Center. It doesn't allow you to configure it directly, however, you can instantly turn on or off the hotspot with one click.
The next chapter assumes that you have already configured your hotspot as described above, and it is ready to use.
Enable or Disable Mobile Hotspot from the Action Center
- Open the Action Center (Win+A).
- Click on the Mobile Hotspot quick action button to enable it.
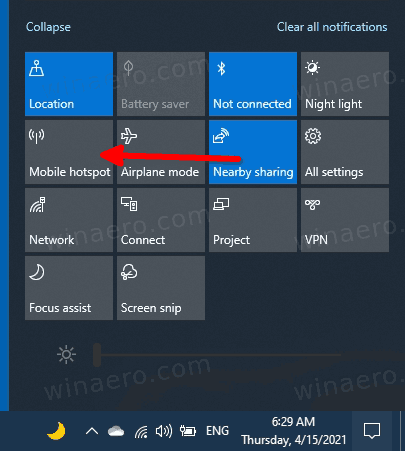
- When enabled, click on the same button once again to toggle on and off for what you want.
- You are done.
Finally, there is a way to start or stop the Hotspot from the command prompt.
Turn on or off Mobile Hotspot in the command prompt
- Open a command prompt as Administrator.
- Type the following command to turn on the mobile hotspot.
netsh wlan set hostednetwork mode=allow. - This command disables the hotspot:
netsh wlan set hostednetwork mode=disallow.
- Finally, this command allows you to see the settings for the hotspot.
netsh wlan show settings.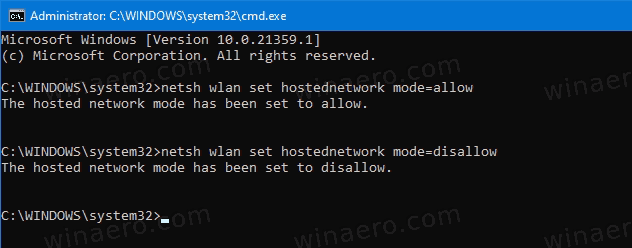
That's it.
Support us
Winaero greatly relies on your support. You can help the site keep bringing you interesting and useful content and software by using these options:
If you like this article, please share it using the buttons below. It won't take a lot from you, but it will help us grow. Thanks for your support!
Advertisеment

Hi
dear any way to add shortcut of Mobile hotspot in quick action center like WiFi (on – off ) , I’m trying but still I can’t add
How can I share my 3g modem connection?
It worked, thankyou.
Mobile hotspot is not being shown in action center.
what to do?