In case you don't know, Windows 10 reduces the quality of JPEG images you set as the desktop background. If you compare the original image and the wallpaper, you can see that the wallpaper has minor JPEG artifacts. The issue is not new to Windows 10 - Windows 8 and Windows 7 are also affected by this issue. But Windows 10 is the first version where a solution is available. Let's see how to disable wallpaper JPEG quality reduction in Windows 10.
Advertisеment
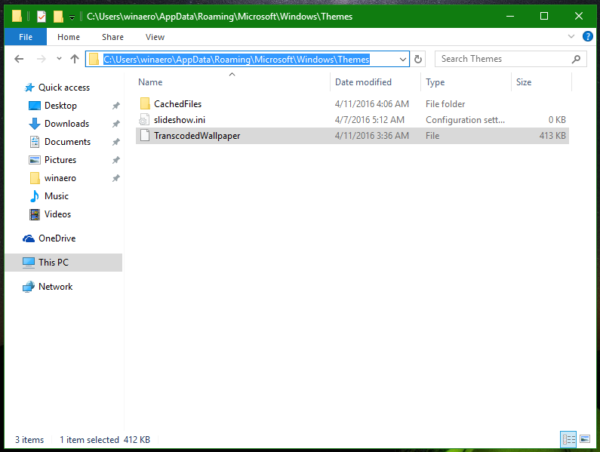
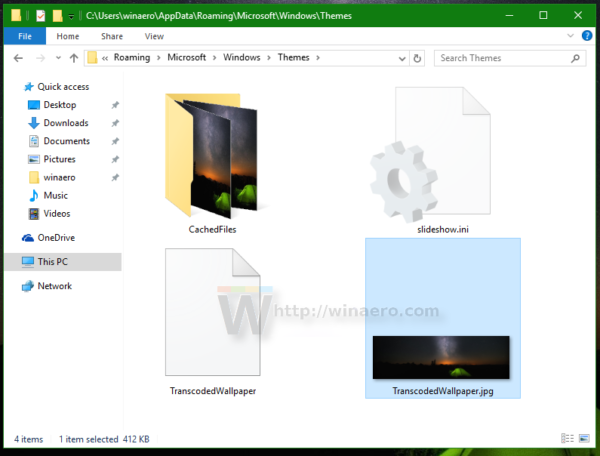
First, let me explain why Windows does this. When you are setting a JPEG image as the Desktop background, Windows reduces its quality to 85%. This allows the operating system to save RAM while showing the Desktop background image, when cycling wallpapers during the Desktop slideshow. It also saves disk space and the image will be processed faster because it's smaller in size. The processed image will be stored in the following file:
C:\Users\your_user_name\AppData\Roaming\Microsoft\Windows\Themes\TranscodedWallpaper
You can add a JPG extension to the file name and open it in your favorite image viewer to see it.
 By default, the processed image quality is reduced to 85%. Microsoft considers this value as a compromise between the image quality and the file size.
In Windows 10, this value can be changed. While there is no GUI for this feature, it can be done via a Registry tweak.
How to disable wallpaper JPEG quality reduction in Windows 10
To disable wallpaper JPEG quality reduction in Windows 10, do the following.
- Open Registry Editor.
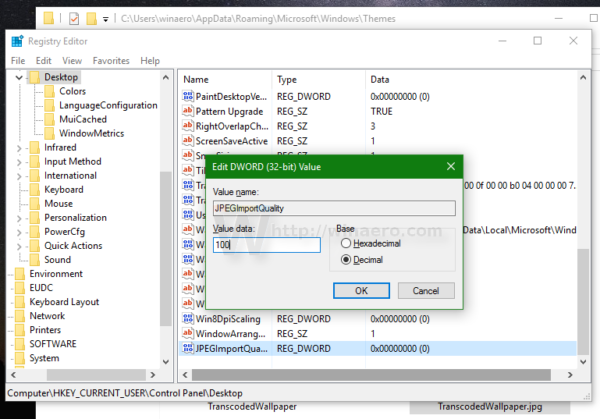
- Go to the following Registry key:
HKEY_CURRENT_USER\Control Panel\Desktop
Tip: See How to jump to the desired Registry key with one click.
- Create a new 32-bit DWORD value here called JPEGImportQuality and set its value data from anywhere between 60 to 100 in decimals. A lower value means lower image quality. A value of 100 means maximum quality without any compression. 100 is the most suitable value for users who are not happy with the default image quality, which is 85.
 Note: Even if you are running 64-bit Windows, you still need to create a 32-bit DWORD value.
 - Sign out from your user account and sign in back in Windows 10.
- Now, set the desired wallpaper once again to make Windows 10 use the new image quality setting.
You are done. To avoid manual Registry editing, you can do the following.
You can either download ready-to-use Registry files from here:
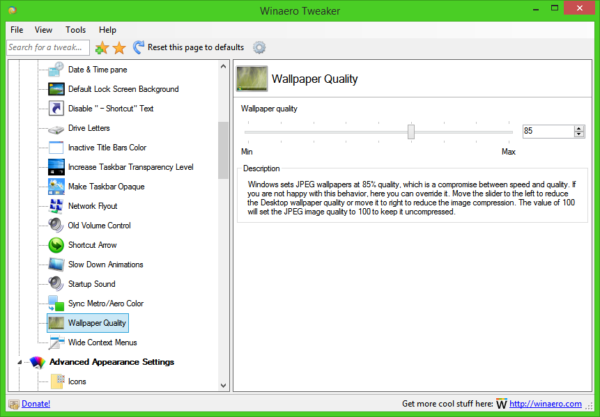
Or an easier way is to use my freeware app Winaero Tweaker. With Winaero Tweaker 0.5.0.5, you will be able to adjust the wallpaper image quality easily using the following user interface:
That's it.
Support us
Winaero greatly relies on your support. You can help the site keep bringing you interesting and useful content and software by using these options:

What about .png images? Should I create PNGImportQuality instead?
The mentioned parameter in the article is enough. You need no extra steps in case of PNG images.
I really appreciate Winaero Tweaker and this latest update. I’ll next be using it on a customer’s computer later today.
Thank you for this.
Desktop looks much better.
:-))
you are welcome
Planning to get my cousin’s old computer soon that came with windows 7, does it work on windows 7?
this works only in Windows 10. Windows 7 has no such registry option.
Aww thanks for the reply
Did this, and few minutes later screen started glitching green, black screen, now Windows barely starts, even glitches in the menu. Any chance they are related?
There are no side effects connected with this feature.
Using this tweak with high resolution wallpapers that make transcodedwallpaper excede 20mb will corrupt the transcodedwallpaper with black screen.
I am loving this program. It’s been a while since I put effort into customizing the deeper parts of Windows and this allows me to hit all the right notes. Thanks for the dedication and hard work. Stay blessed.
Doesn’t work for me it deletes the file as soon as I restart
Does this work for Win 11? I have tried many different things but the image always ends up getting compressed.