Windows 10 comes with a completely reworked Start menu, which combines Live Tiles introduced in Windows 8 with classic app shortcuts. It has an adaptive design and can be used on displays with various sizes and resolutions. Today, we'll see how to force a specific Start menu layout for users in Windows 10.
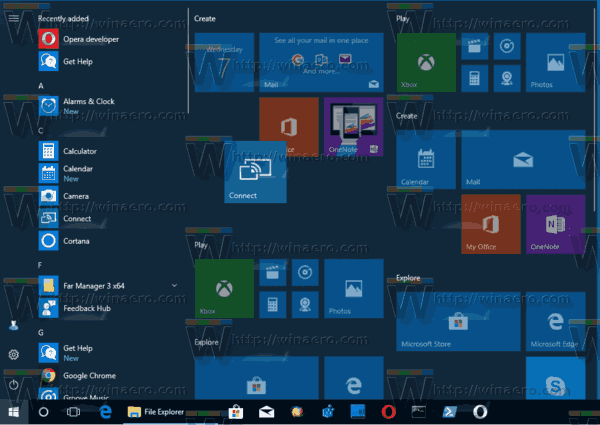
The user can customize the Start menu in Windows 10 by pinning various app tiles, creating tile folders, and changing its height by resizing the menu pane. Alternatively, it is possible to set a default Start menu and prevent users from changing it in Windows 10.
Advertisеment
Preparation
First of all, we need to export a Start menu layout which will be set as the default layout for users. This can be done with a special PowerShell cmdlet called Export-StartLayout. For example, the command Export-StartLayout -Path "$env:UserProfile\Desktop\StartLayout.xml" allows exporting the Start menu layout of the current user to the file StartLayout.xml and writing it to the Desktop folder.
Microsoft recommends the following scenario:
- Set up a test computer on which to customize the Start screen. Your test computer should have either Windows 10 Enterprise or Windows 10 Education. Install all the applications and services that the Start screen should display.
- Create a new user account that you will use to customize the Start screen layout.
- Sign in to your test computer with the user account that you created.
- Customize the Start screen as you want users to see.
- Open a new PowerShell console.
- Run the command Export-StartLayout -Path "$env:UserProfile\Desktop\StartLayout.xml".

Set Default Start Menu Layout for Users in Windows 10
- Open Registry Editor.
- Go to the following Registry key:
HKEY_LOCAL_MACHINE\SOFTWARE\Policies\Microsoft\Windows\Explorer
Tip: See how to jump to the desired Registry key with one click.
If you do not have such a key, then just create it.
- Here, create a new 32-bit DWORD value LockedStartLayout. Note: Even if you are running 64-bit Windows, you still need to use a 32-bit DWORD as the value type.
Set it to 1 to prevent users from changing the default Start menu layout. Leave its value data as 0 to allow users to customize the Start menu.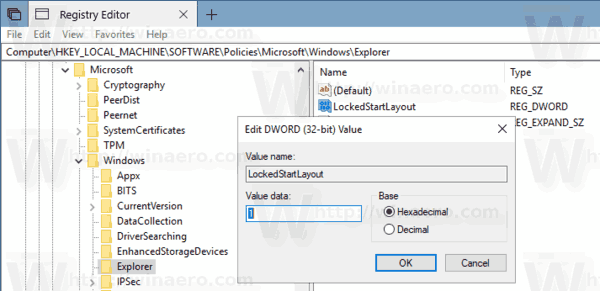
- Modify or create a new expandable string (REG_EXPAND_SZ) value named StartLayoutFile. Set its value data to the full path to the StartLayout.xml you created earlier.
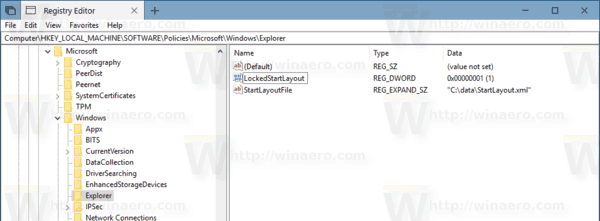
- To make the changes done by the Registry tweak take effect, you need to restart Windows 10.
Using the Local Group Policy Editor app
If you are running Windows 10 Pro, Enterprise, or Education edition, you can use the Local Group Policy Editor app to configure the options mentioned above with a GUI.
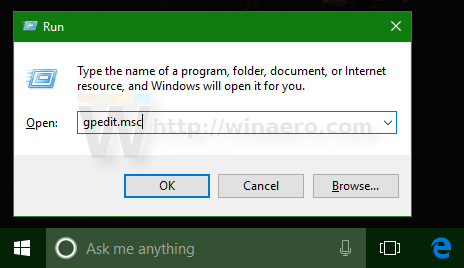
- Press Win + R keys together on your keyboard and type:
gpedit.msc
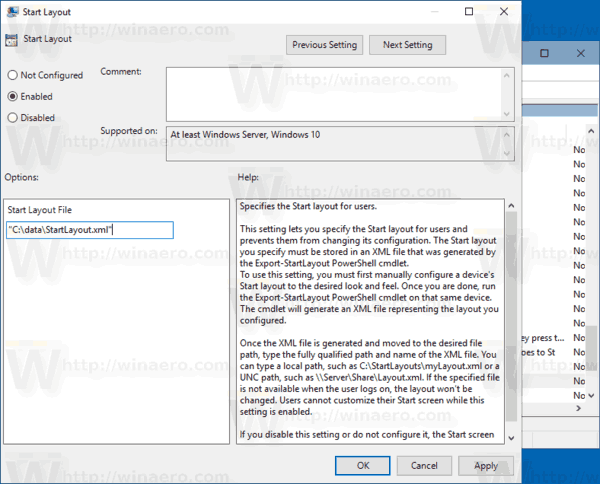
- Group Policy Editor will open. Go to Computer Configuration\Administrative Templates\Start Menu and Taskbar. Enable the policy option Start Layout.
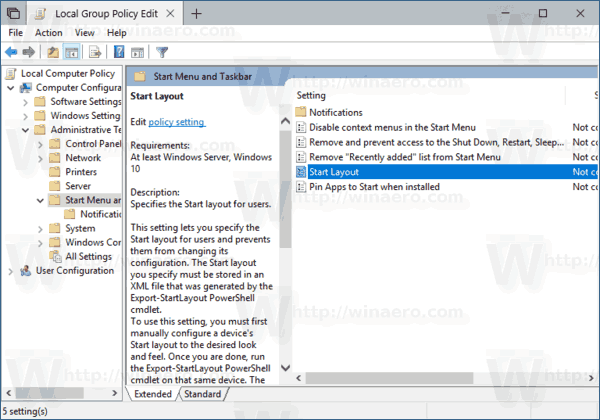
- Set the Start Layout File parameter to the full path to your StartLayout.xml file and you are done.
That's it.
Related articles:
- Rename Start Menu Items in All Apps in Windows 10
- Move favorite apps to the top of Start Menu in Windows 10
- Add Items to All Apps in Start Menu in Windows 10
- How To Pin Regedit To Start Menu in Windows 10
- Add Run as different user to Start Menu in Windows 10
- How many Start menu shortcuts you have in Windows 10
- Backup and Restore Start Menu Layout in Windows 10
Support us
Winaero greatly relies on your support. You can help the site keep bringing you interesting and useful content and software by using these options:

This is incredibly useful, thank you!
Please do you know if there’s a command to import the layout from the .xml file using PowerShell as well?
As a one-off, instead of forcing it via policy basically.