You can lock your screen to protect your PC from unauthorized use when you walk away for a short time and do not want to sign out from your user session or turn off your computer. In Windows 10, there is a special Interactive logon: Machine inactivity limit security policy setting that can be used to set how many seconds of inactivity to wait for before your user session will be locked.
Advertisеment
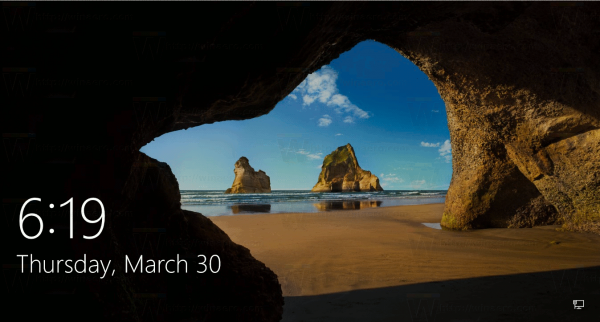
When Windows 10 is locked, it shows the lock screen.
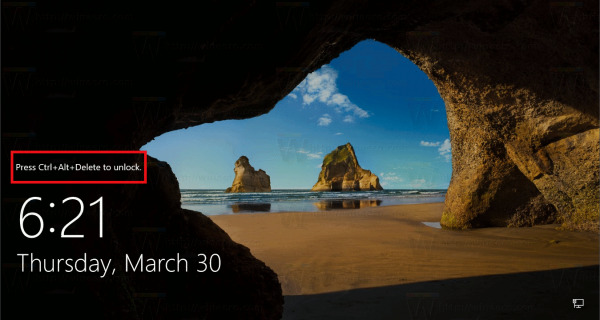
If you have disabled the lock screen, then a sign-in screen will be displayed instead.

If a CTRL+ALT+DEL security screen is enabled, the user must press Ctrl + Alt + Del before signing in to unlock it.
When your account is password protected, other users won't be able to unlock your user session without knowing your password. However, if they have their own accounts on your PC, they will be able to sign in with them from the lock screen. Your account will remain locked and your data will stay private.
By default, Windows 10 is set to not automatically lock your computer. Here is how to change this behavior.
To Automatically Lock a Windows 10 Computer,
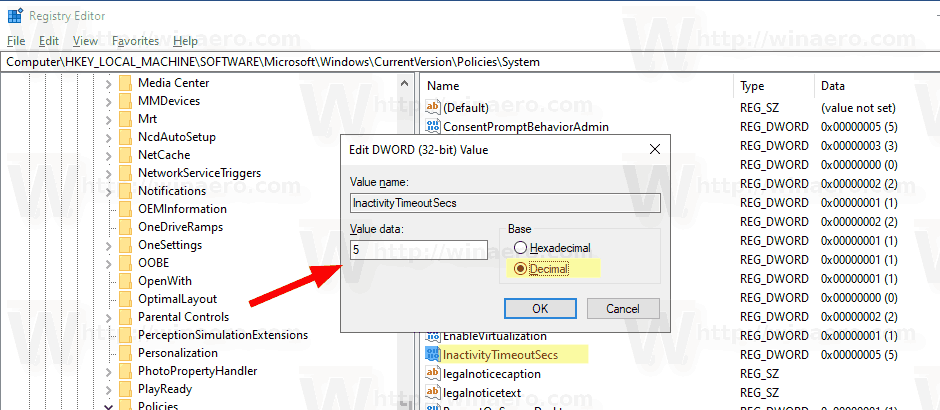
- Open Registry Editor.
- Go to the following Registry key:
HKEY_LOCAL_MACHINE\SOFTWARE\Microsoft\Windows\CurrentVersion\Policies\System
Tip: See how to jump to the desired Registry key with one click.
If you do not have such a key, then just create it.
- Here, modify or create a new 32-bit DWORD value InactivityTimeoutSecs. Note: Even if you are running 64-bit Windows you must still create a 32-bit DWORD value.
- Set its value data to a number between 0 to 599940 to set how many seconds of inactivity the OS will wait before locking your session. Enter the value in decimals.
- Restart Windows 10.
Note: The default value data of the InactivityTimeoutSecs value is 0, means the automatic lock feature is disabled.
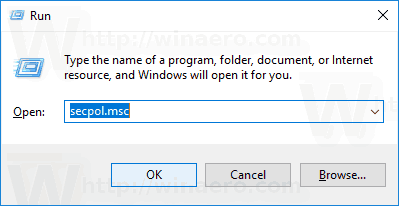
If you are running Windows 10 Pro, Enterprise, or Education edition, you can use the Local Security Policy app to configure the options mentioned above with a GUI.
Enable Automatic Lock in Windows 10 using Secpol.msc
- Press Win + R keys together on your keyboard and type:
secpol.msc
Press Enter.
- Local Security Policy will open. Go to User Local Policies -> Security Options.
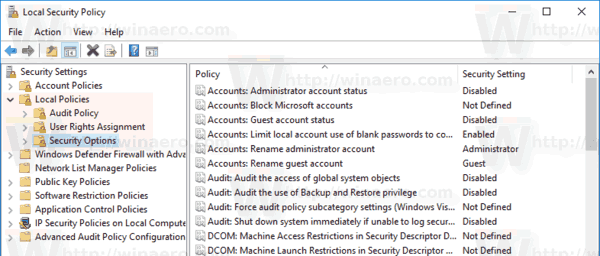
- On the right, scroll to the option Interactive logon: Machine inactivity limit.
- Set it to a number between 0 to 599940 to specify how many seconds of inactivity the OS will wait before locking your session.
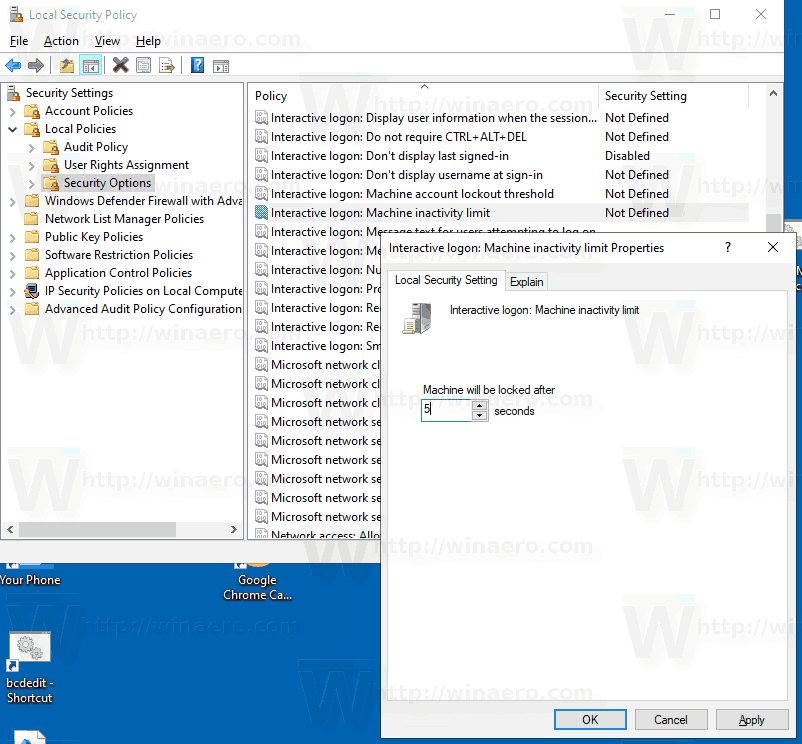
- Restart Windows 10.
That's it.
Articles of interest:
- How to Add a Sign-in Message in Windows 10
- How to Lock Screen in Windows 10 (Lock Your Computer)
- How to enable Dynamic Lock in Windows 10
Support us
Winaero greatly relies on your support. You can help the site keep bringing you interesting and useful content and software by using these options:
