In 2018, Microsoft introduced a new feature called Nearby Share. Similar to Airdrop in iOS and macOS, Nearby Share in Windows 10 allows transferring files between files within the same network. It is a great and somewhat underrated feature that will let you ditch third-party sharing apps and slow USB thumb drives. Being integrated into the OS, Nearby Share ensures the best compatibility with almost any Windows 10 device.
Advertisеment
Here is how you can share files wirelessly between Windows 10 computers using Nearby Sharing.
It is important to note that Nearby Sharing does not work literally on any Windows 10 PC. The feature requires a PC with Wi-Fi and Bluetooth 4.0 or better and Windows 10 version 1803 or higher.
Although not necessary, make sure both computers are within the same network; otherwise, Nearby Sharing would use Bluetooth with radically slower transfer speeds.
Enable Nearby Sharing in Windows 10
- Begin with turning on both Wi-Fi and Bluetooth.
- Next, open Windows Settings > System > Shared Experiences.
- Turn on Nearby Sharing.
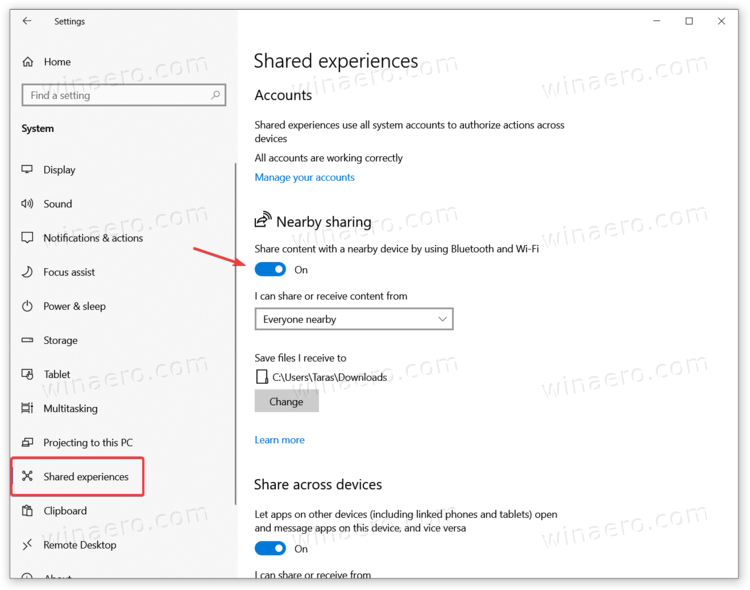
- Also, check privacy settings. You can set Nearby Sharing to receive and send files to just devices with your Microsoft Account or from everyone nearby. If you want to receive a file from someone else's computer, set that parameter to Everyone nearby.
That is how you turn on Nearby Sharing in Windows 10, which is unofficially known as Airdrop for Windows.
Tip: You do not need to open Windows Settings every time. Windows allows enabling and disabling Nearby Sharing from the control center. Press Win + A and tap Nearby Sharing.
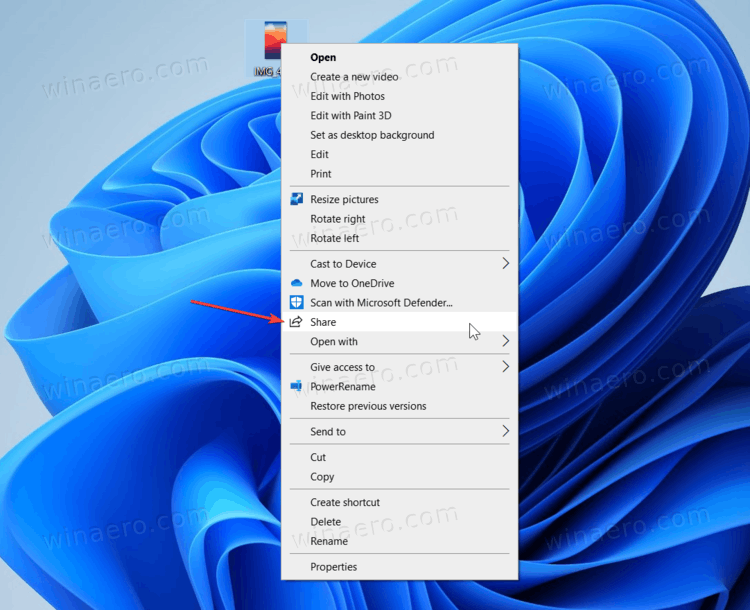
Now, here is how you transfer files between Windows 10 computers via Wi-Fi.
- Select a file or several files you want to transfer via Wi-Fi. Right-click those files and select Share.
- Windows will automatically start scanning your network for Windows 10 devices with Nearby Sharing. The system will list all available devices in the middle of the sharing UI.
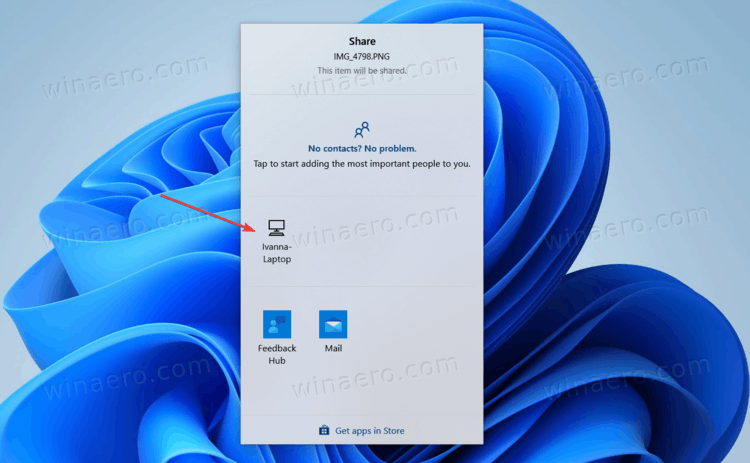
- Select a device.
- Now, confirm receiving a file or files on the destination computer.

- Wait for the systems to transfer files.
Once Windows finishes sending files, you can find them using a notification or within the default Downloads folder.
How to receive a file via Wi-Fi with Nearby Sharing
Make sure you have Nearby Sharing enabled and set to receive files from everyone around. Windows will show you a push notification with a receiving file name and a sender's name. You can click Save and Open to immediately open the file after receiving, Save to save it in the default location or Decline to cancel.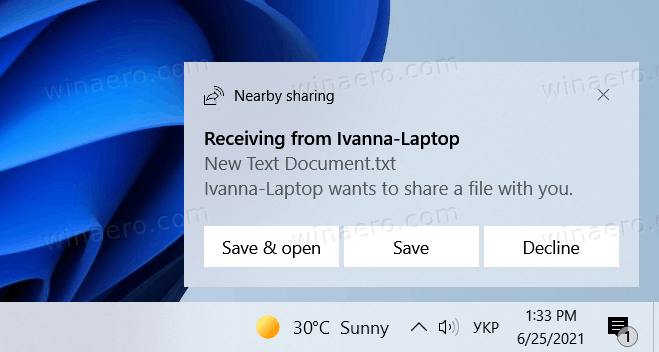
Change the default folder for Nearby Sharing
The C:\Windows\Users\User\Downloads folder is your default location for any downloads and files received using Nearby Sharing. You can change that location to any other folder. Here is how to change the default folder for Nearby Sharing in Windows 10.
- Open Windows Settings using the Win + I hotkey.
- Go to System > Shared Experiences.
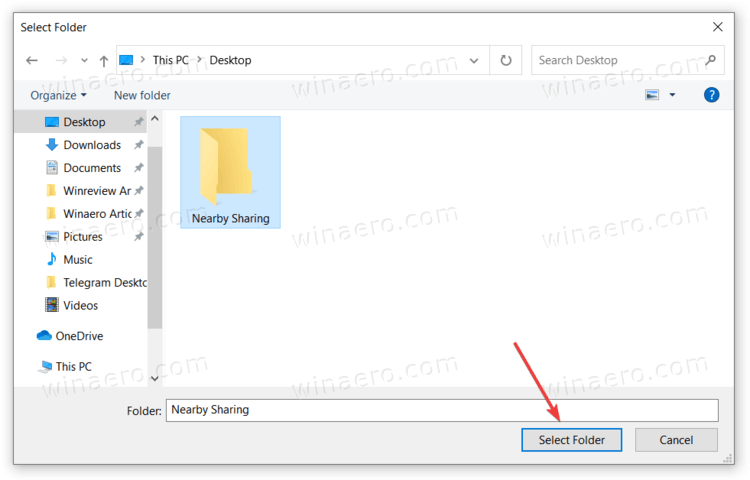
- Find Save files I receive to and click Change.
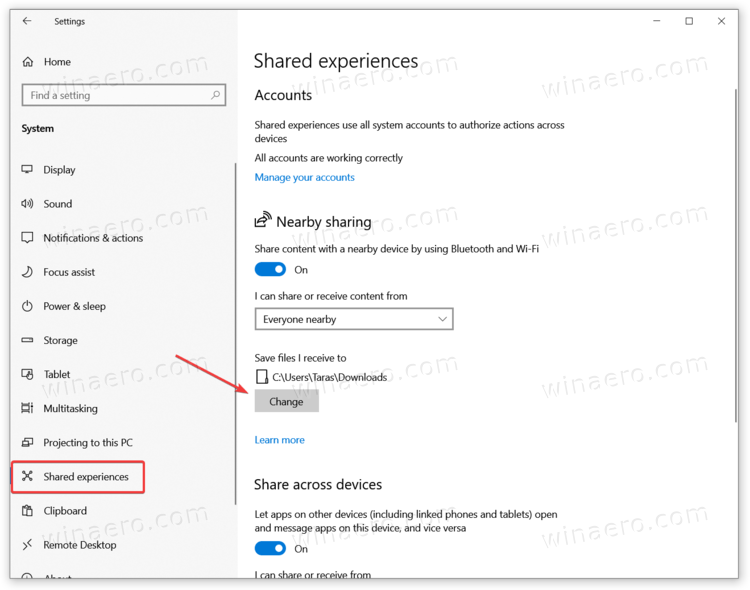
- Select a new folder and click Select folder.
Done.
Support us
Winaero greatly relies on your support. You can help the site keep bringing you interesting and useful content and software by using these options:
