How to Set Target Windows 10 Version to Stay on or Upgrade To
With Windows 10 version 2004, Microsoft has introduced a new group policy, which allows the user to lock down the OS to a specific feature upgrade. Eagle-eyed users have already spotted it in screenshots in my previous article. Here's how to activate and use it.
Advertisеment
If you are following Windows 10 version 2004 development, you may be aware of the updated Group Policy templates for Windows 10, and the Group Policy Settings Reference spreadsheet. The latter document is really useful, as it highlights policies first introduced with Windows 10 May 2020 Update. Advanced users and system administrators may apply them with Local Group Policy Editor, or in the Registry.
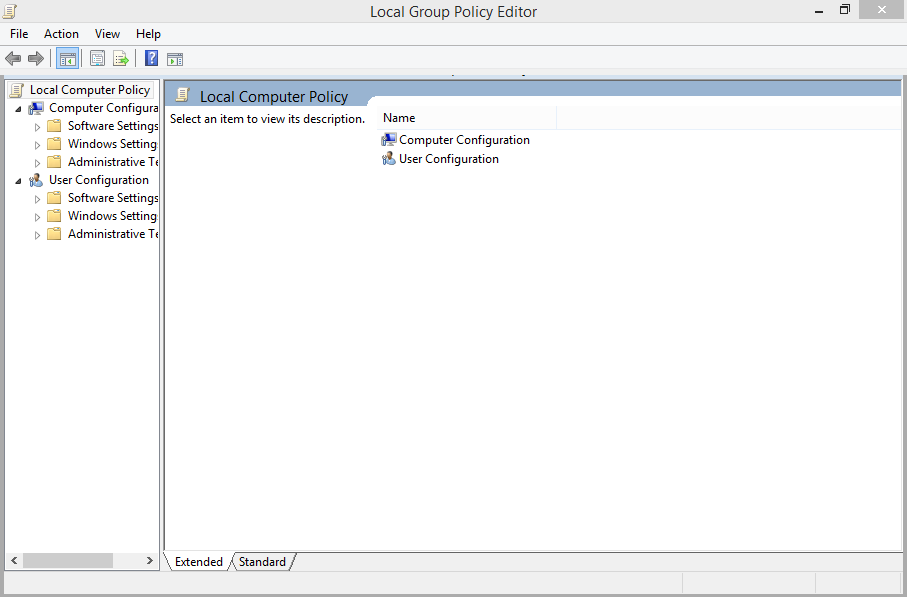
Local Group Policy and its GUI
The Local Group Policy Editor is a Microsoft Management Console (MMC) snap-in that provides a single user interface through which all the settings of Local Group Policy objects can be managed.
Local Group Policy Editor is not available in certain editions of Windows 10. Only Windows 10 Pro, Enterprise, or Education edition include the Local Group Policy Editor app.
Local Group Policy Editor includes objects that apply to a computer (all users) and users (a specific user account, group, or per-user software software settings). It consists of two parts.
- Computer Configuration is used to set policies that will be applied to a computer. The change software settings, Windows settings, and administrative templates for all users. They typically change Registry keys under the HKEY_LOCAL_MACHINE Registry branch and require restarting the computer to make the change to take effect.
- User Configuration is a set of policies that apply to users. User Configuration comes with options for software settings, Windows settings, and administrative templates stored in the per-user Registry branch (HKCU).
Note: Certain options can be configured for both User Configuration and Computer Configuration. Such values can be stored in both HKCU and HKLM Registry branches. When both parameters are set, User Configuration takes precedence over the Computer Configuration value.
TargetReleaseVersion and TargetReleaseVersionInfo
There are two new policies, TargetReleaseVersion and TargetReleaseVersionInfo, which allow the user to specify the target feature upgrade for Windows 10. The information tells the OS that it is allow to upgrade to, or stay with, the specific release. The policy works starting in Windows 10 version 1803, and uses the two-number version format for the target release to stick with.
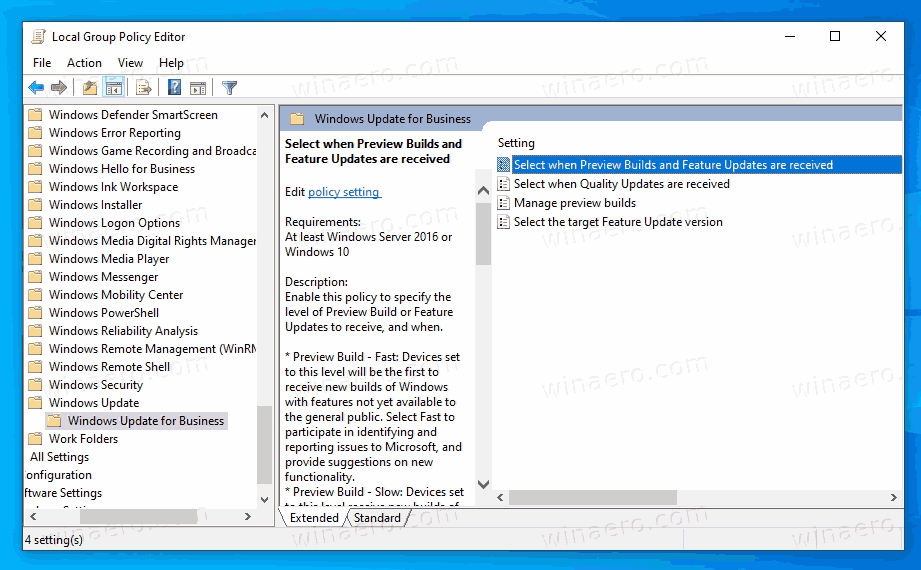
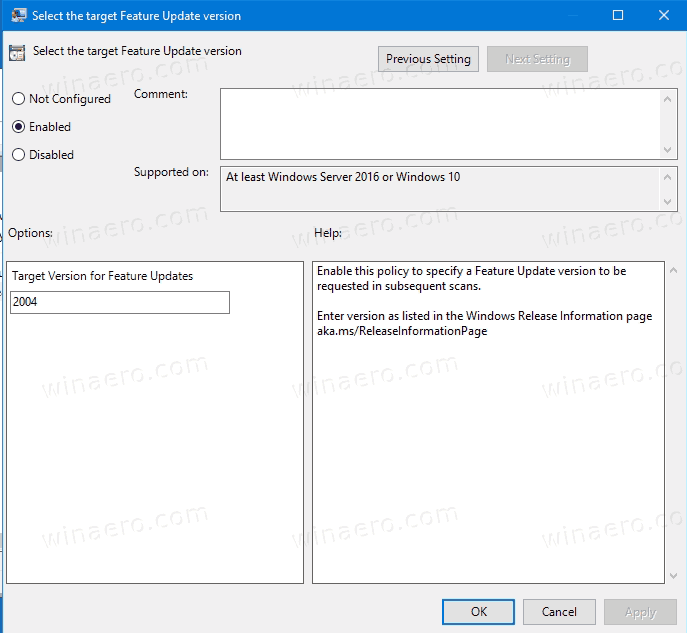
In Windows 10 version 2004, it can be found in gpedit.msc under Computer Configuration \ Administrative Templates \ Windows Components \ Windows Update \ Windows Update for Business. See the last parameter, Select the target Feature Update version.
Here's how to use them.
To Set Target Windows 10 Version to Stay on or Upgrade To,
- Open the Local Group Policy editor app.
- Navigate to Computer Configuration > Administrative Templates > Windows Components > Windows Update > Windows Update for Business on the left.
- On the right, find the policy setting
Select the target Feature Update version. - Double-click on it, and set it to
Enabled.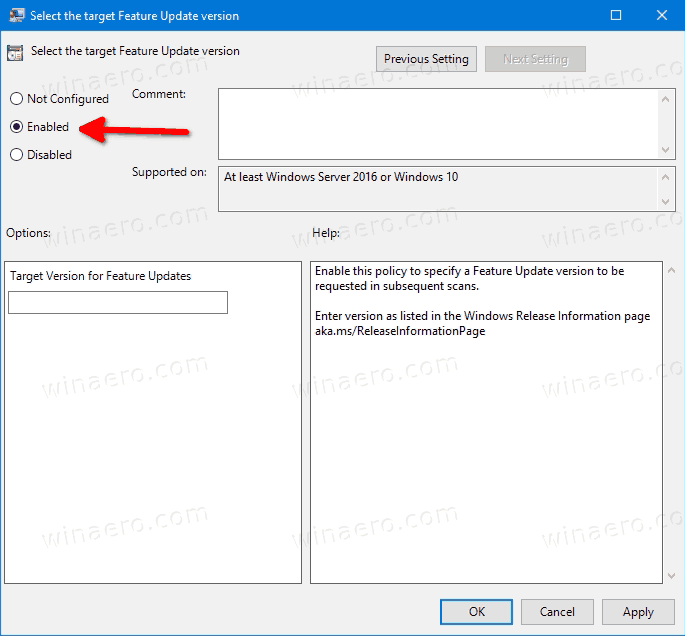
- Under Options, set the 'Target Version for Feature Updates' box to one a value as it listed in the following table, in the Version column, e.g.
1909or2004.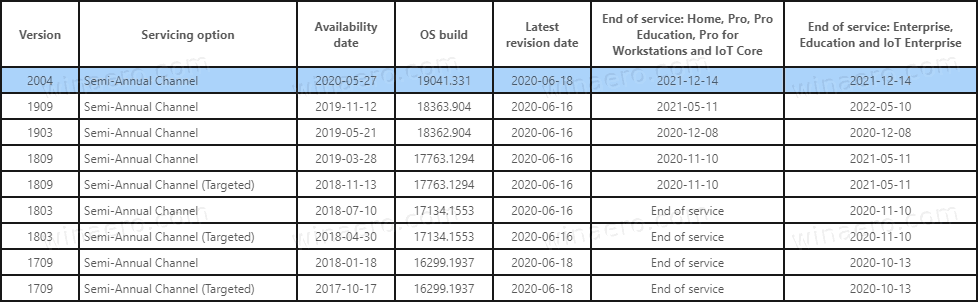
- Restart Windows 10.
You are done! In the screenshot above, my Windows 10 won't receive any feature update after version 2004.
There are also the appropriate Registry tweaks behind these Policy options. As Windows 10 Home doesn't include gpedit.msc, Windows 10 Home users may try to apply them in order to make this upgrade lockdown feature work. However, I was not able to test these options in Windows 10 Home. If you have done it, please drop a comment if the tweaks work or not in your Home edition.
To Set Target Feature Upgrade Version in Windows 10 with a Registry Tweak,
- Open the Registry Editor app.
- Go to the following Registry key
HKEY_LOCAL_MACHINE\Software\Policies\Microsoft\Windows\WindowsUpdate. See how to go to a Registry key with one click. - If you don't have such a key, then create it manually.
- On the right, create or modify the
TargetReleaseVersion32-Bit DWORD value and set it to 1.
- Now, modify or create a new string (REG_SZ) value
TargetReleaseVersionInfoand set its value data to the desired version number you want to upgrade to or stick with.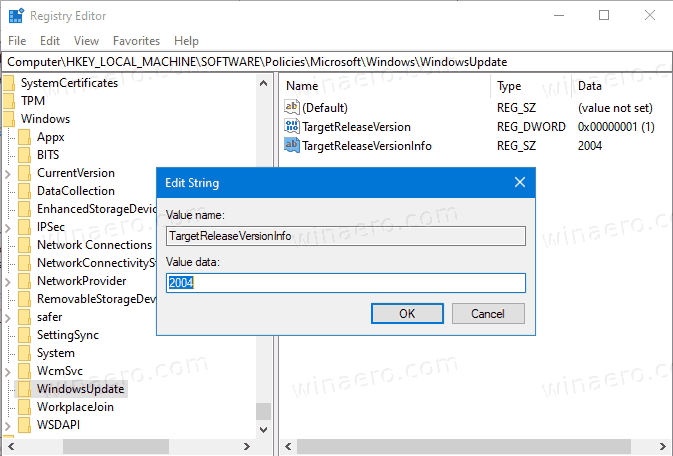
- You can use the following table for reference.
You are done!
Note: Setting the TargetReleaseVersionInfo value to a lower version than Windows 10 version you already have won't downgrade the operating system. It won't also stop the OS from receiving newer feature updates, so such settings are just ignored.
Support us
Winaero greatly relies on your support. You can help the site keep bringing you interesting and useful content and software by using these options:

This does the trick, thanks a lot for this tip! Very helpful for system administrators
Hi Sergey,
What if I want to lock version 20H2 that I have now? It is not in your reference list.
Does it work to enter the value 20H2 in the value data field, or should it be converted to a numeric value?
Hello.
You must use the 20H2 value.
Okay, as I suspected then. Thanks!
how to set it on active directory if i have windows 10 and 11 machine?
let say 22H4 for windows 10 and Windows 11, version 24H2