A default WSL Linux distro is a distro that runs when you issue the "wsl" command without parameters. Also, it opens from the "Open Linux here" context menu command. Today, we will see how to change this distro.
Advertisеment
The ability to run Linux natively in Windows 10 is provided by the WSL feature. WSL stands for Windows Subsystem for Linux, which initially, was limited to Ubuntu only. Modern versions of WSL allow installing and running multiple Linux distros from Microsoft Store.
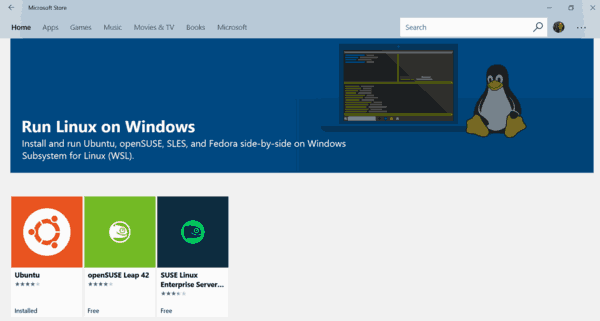
After enabling WSL, you can install various Linux versions from the Store. You can use the following links:
and more.
The default WSL distribution is the one that runs when you run wsl on a command line. It opens when you are using the context menu command "Open Linux Here" in File Explorer. Tip: You can remove that context menu entry.
To set the default WSL Linux distro in Windows 10,
- Open a new command prompt.
- Find available WSL distros by executing the following command:
wsl --list --all, or simplywsl -l --all.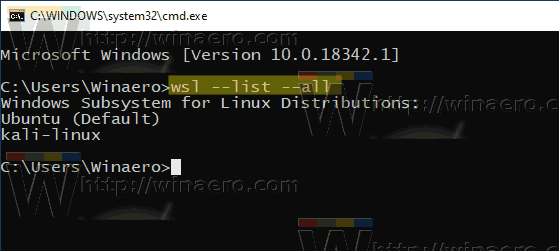
- The current default WLS distro is labeled (Default). To set a new default WSL distro, execute the command:
wsl --setdefault <DistributionName>, orwsl -s <DistributionName>. - Substitute
<DistributionName>with the actual name of the a WSL distro installed on your computer, for example kali-linux.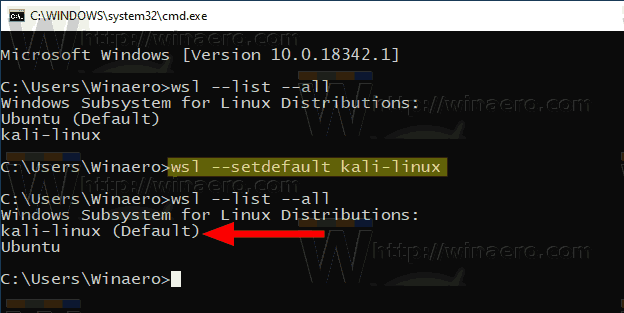
You are done!
Windows 10 Versions Earlier Than Version 1903
If you are running a Windows 10 version earlier than Windows 10 version 1903, you should use the wslconfig utility instead of wsl.
- Open a new command prompt.
- To see the available Linux distros, run
wslconfig /list /allorwslconfig /l /all.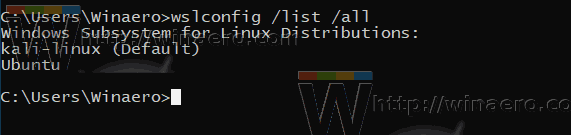
- To set a new default WSL distro with wslconfig, execute the command:
wslconfig /s <DistributionName>orwslconfig /setdefault <DistributionName>. - Substitute the
<DistributionName>portion with the actual name of the a WSL distro installed on your computer, for example Ubuntu.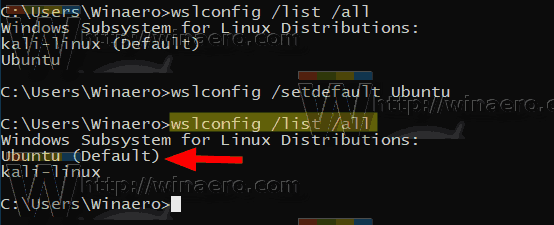
That's it.
Articles of interest:
- Find Running WSL Linux Distros in Windows 10
- Terminate Running WSL Linux Distro in Windows 10
- Remove Linux from Navigation Pane in Windows 10
- Export and Import WSL Linux Distro in Windows 10
- Access WSL Linux Files from Windows 10
- Enable WSL in Windows 10
- Set Default User for WSL in Windows 10
- Windows 10 Build 18836 Shows WSL/Linux File System in File Explorer
Support us
Winaero greatly relies on your support. You can help the site keep bringing you interesting and useful content and software by using these options:

typo, line 2. `wls –list –all`
thank you!