How to Set Default Shut Down Windows Dialog Action with Group Policy in Windows 10
In Windows Vista, Microsoft changed the way you shut down Windows. They made the classic Shutdown Windows dialog less prominent. Instead, they implemented a dropdown menu for the shutdown button in the Start menu. Although Windows 10 comes with a lot of ways to shutdown your PC, the classic shutdown dialog is accessible only with the help of a hotkey. Windows 10 does not provide any way to change the default Shutdown command in the classic Shutdown dialog.
Advertisеment
To open the classic Shut Down Windows Dialog, you have to minimize all windows, then click to focus on the Desktop and finally press Alt+F4 to make it appear.
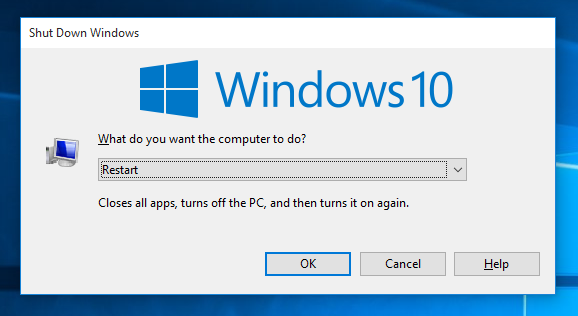
Personally, I like the classic Shutdown dialog more than the other possible ways to shutdown Windows 10 because it gives me a confirmation. Thankfully it is still possible to create a shortcut to open it.
To set the default Shut Down Windows dialog action, you can use a Registry tweak. Also, Windows 10 still supports a Group Policy option which use can also use to configure the action. The policy was available in previous versions of Windows, but remains available in Windows 10 and works properly. Users of Windows 10 Pro, Enterprise, or Education editions can use the Local Group Policy Editor app (gpedit.msc) to configure the option with the GUI. If your Windows 10 edition doesn't support gpedit.msc, you can apply a Group Policy Registry tweak instead.
To Set Default Shut Down Windows Dialog Action with Group Policy,
- Press Win + R keys together on your keyboard and type:
gpedit.msc, then Press Enter.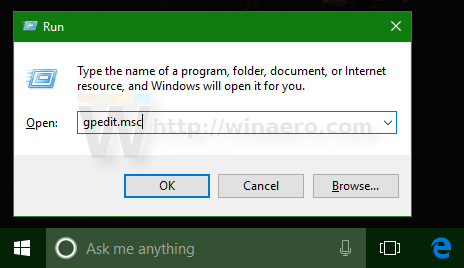
- Group Policy Editor will open. Go to User Configuration\Administrative Templates\tart Menu and Taskbar.
- On the right, double-click the policy option Change Start Menu power button.
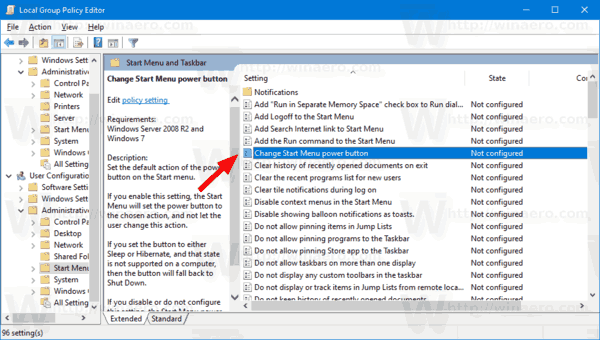
- In the next dialog, set the option to Enabled.
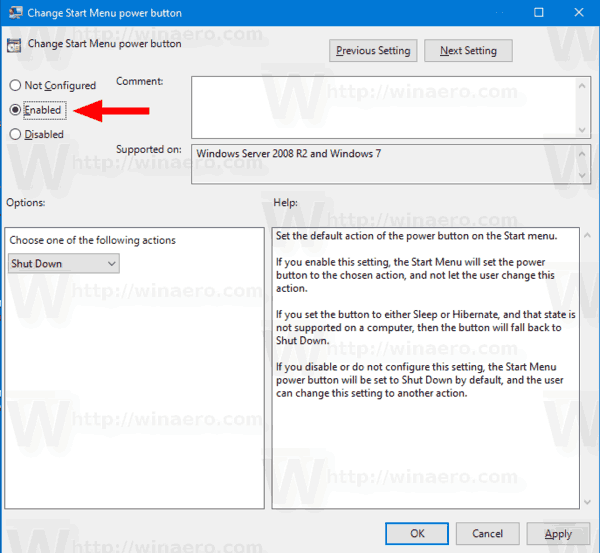
- Select the desired action from the Choose one of the following actions drop down list. Note that Lock is not supported as a default action in Windows 10, the OS will use Shut Down instead.
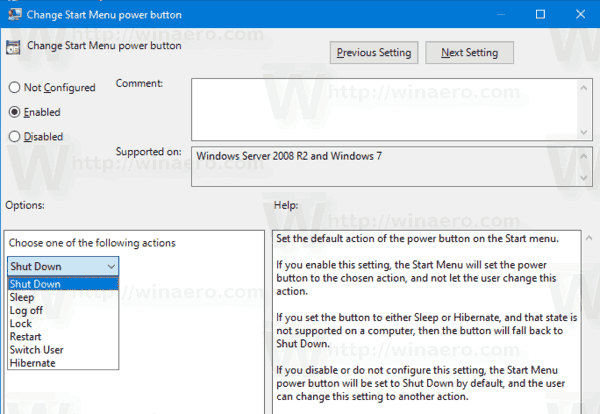
- Click Apply and then OK.
You are done.
Now let's review the alternative way to force the desired shutdown action with Group Policy for Windows 10 editions without gpedit.msc.
Set Default Shut Down Action with Group Policy in Registry
- Open the Registry Editor app.
- Go to the following Registry key:
HKEY_CURRENT_USER\SOFTWARE\Policies\Microsoft\Windows\Explorer
See how to go to a Registry key with one click. - On the right, modify or create a new 32-Bit DWORD value PowerButtonAction.
Note: Even if you are running 64-bit Windows you must still create a 32-bit DWORD value.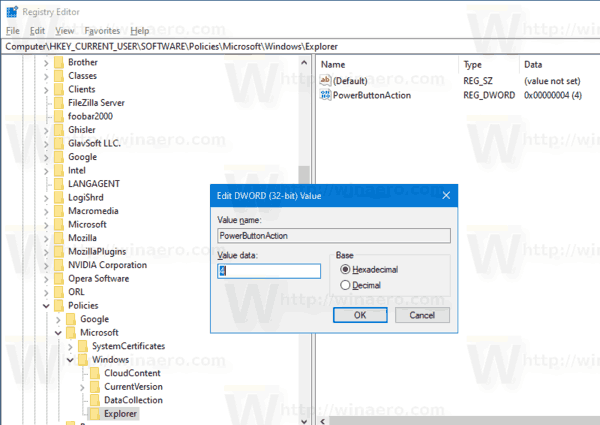
- Set its value data to one of the following values (hex):
1 = Sign out
2 = Shut down
4 = Restart
10 = Sleep
40 = Hibernate
100 = Switch user - To make the changes done by the Registry tweak take effect, you need to sign out and sign in to your user account. Alternatively, you can restart Windows 10.
You are done. The ready-to-use Registry files can be downloaded here:
The undo tweak is included.
Tip: Using Winaero Tweaker, you can
- Easily create a Shut Down Windows dialog shortcut
- Quickly set the default shut down action for the dialog without Registry editing.
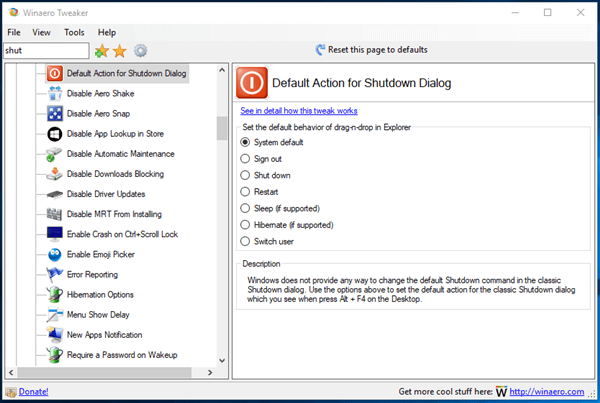
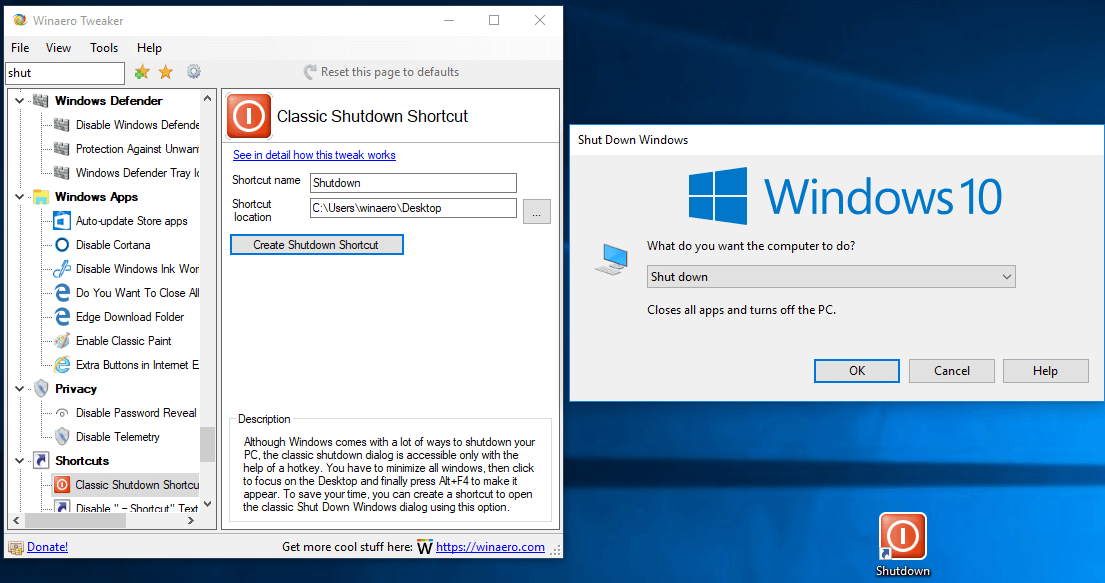
You can download the app here: Download Winaero Tweaker.
Articles of interest:
- Force Update Group Policy Settings in Windows 10 Manually
- How To See Applied Group Policies in Windows 10
- See Applied Windows Update Group Policies in Windows 10
- Apply Group Policy to All Users Except Administrator in Windows 10
- Apply Group Policy to a Specific User in Windows 10
- Reset All Local Group Policy Settings at once in Windows 10
Support us
Winaero greatly relies on your support. You can help the site keep bringing you interesting and useful content and software by using these options:
