You may want to open File Explorer as Administrator to modify files you have no access to. Those can be files created under a different user account, or some system file you want to play with. In such a situation, you may find that you have no permission to access the file or folder. Running Windows 11 File Explorer as Admin solves the issue.
Advertisеment
In order to address issues within a document or access system files for troubleshooting purposes, you may need to run File Explorer elevated. This could be necessary for making significant changes to system files or saving files to protected locations.
If you prefer to maintain control over your workflow without depending on a system administrator to provide elevated permissions, you can manually run File Explorer as an administrator. In modern versions of Windows, File Explorer typically operates with limited privileges as a security measure. Even attempting to run the executable file C:\Windows\explorer.exe as Administrator through the right-click menu does not result in privilege escalation: It will ultimately return to its default permissions.
But this guide will show on how to run Windows 11 Explorer elevated, i.e. with administrative privileges. Note that will require you to terminate
How to Run File Explorer as Administrator
To open Windows 11 File Explorer with administrator rights, do the following.
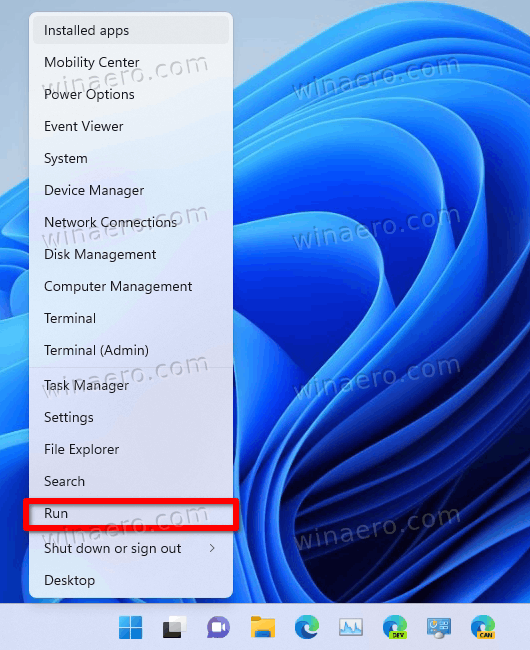
- Right-click the Start button in the taskbar and select Run from the menu.
- In the Run dialog, type
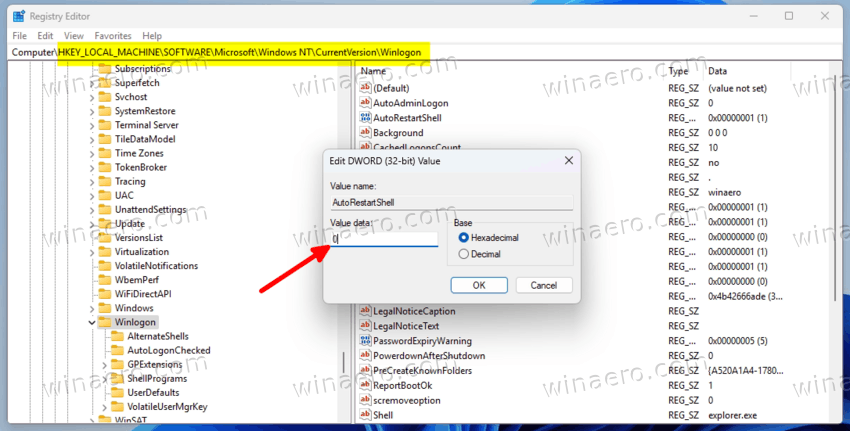
regeditand press the Enter key. - Navigate to the HKEY_LOCAL_MACHINE\SOFTWARE\Microsoft\Windows NT\CurrentVersion\Winlogon key.
- Double-click the AutoRestartShell DWORD value, and change its data from 1 to 0.
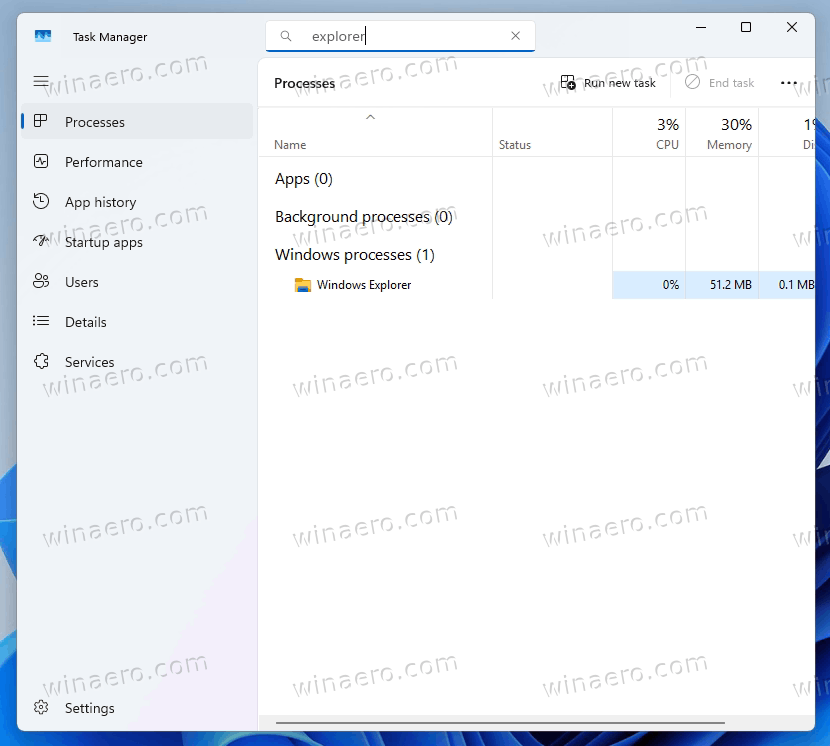
- Press Ctrl + Shift + Esc on the keyboard to open the Task Manager.
- In Task Manager, find the explorer process, and right-click it.
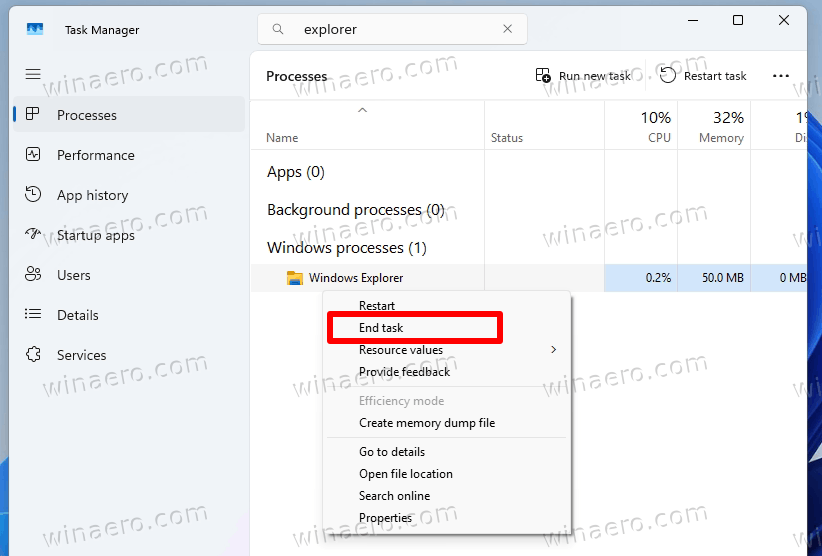
- Select End task from the menu, and click OK to confirm. This will stop the Explorer process, so the taskbar and desktop will disappear.
- Now in Task Manager, click on Run new task.
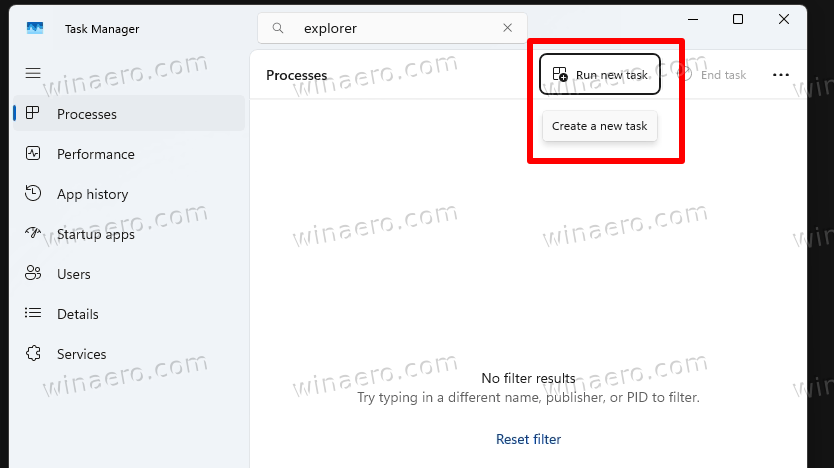
- In the Create new task dialog, type explorer.exe /nouaccheck.
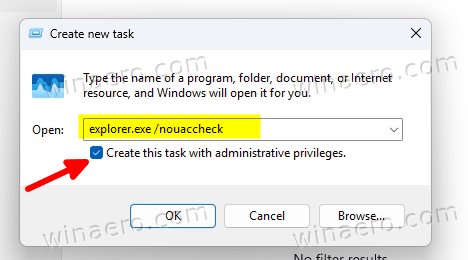
- Place a check mark for the Create this task with administrative privileges option, and click OK.
Done! The Explorer will now run as Administrator. Here is how can you be sure of this.
Check if Explorer runs elevated
In Task Manager, switch to the Details tab.
Now, right-click any column in the process grid, and choose Select columns from the menu.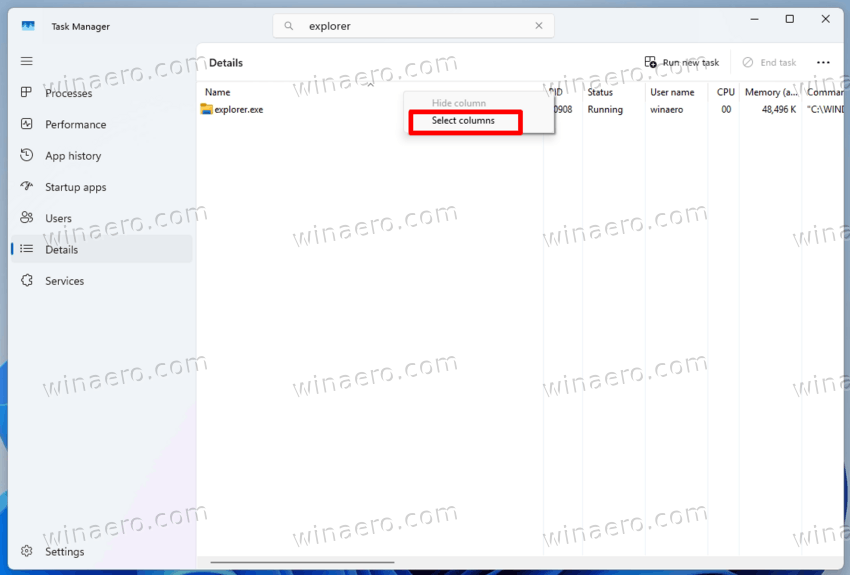
In the list of available columns, enable the Elevated option, and click OK.
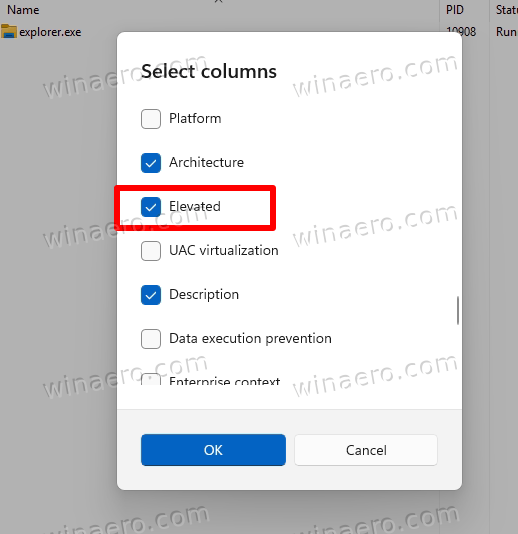
You will now clearly see in the Task Manager that Explorer runs as Administrator, and it has Yes in the newly added column.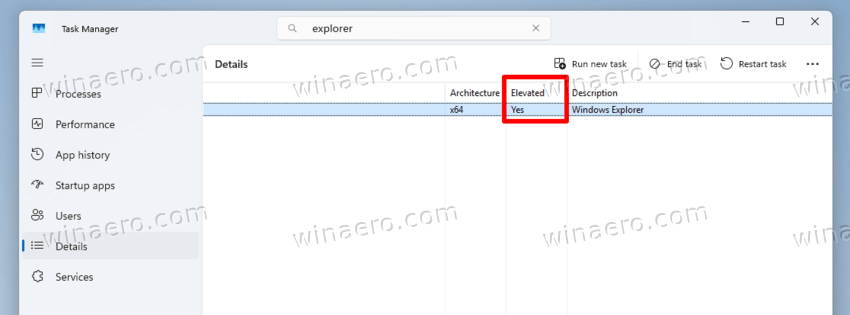
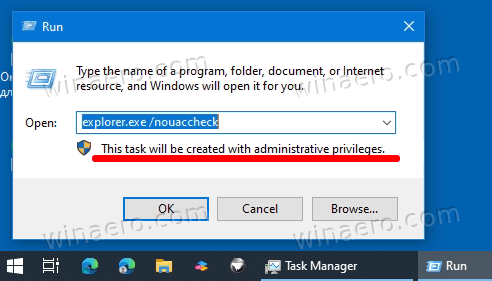
Also, if you now press Win + R to open the Run dialog, you will see a new text message telling that anything you launch will run with administrative privileges.
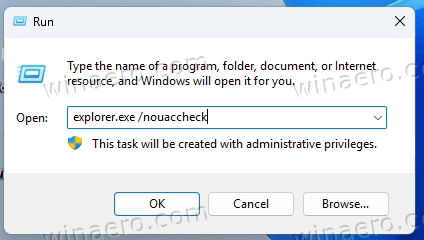
Keep in mind that now you have all explorer.exe processes running as Administrator. This includes the taskbar, new folder windows - everything. It will also launch all apps (EXE, CMD files) as administrator too. So it is not a good idea to keep with high privileges all the time, as you can accidentally modify or remove a file that was not supposed to be accessed by the regular user.
The same procedure can be done in Windows 10, but it doesn't require preliminary Registry editing. The latter is new to Windows 11 only. Here are some details.
In Windows 11 version 23H2, Microsoft has done changes to how explorer.exe starts with administrator rights. With 23H2 and above, Windows 11 controls the launch of Explorer with an administrator token and kills the running process, and instead launches a new one with normal rights. The undocumented explorer.exe /nouaccheck argument disables the check, but in order to make it work, you have to restart the automated shell restart in the Registry. But Windows 10 doesn't perform the automated shell restart, so you can omit the Registry editing.
How to Launch Explorer Elevated in Windows 10
To open Explorer as administrator (elevated) on Windows 10, do the following.
- Open the Task Manager (
taskmgr.exe), and go to the Details tab.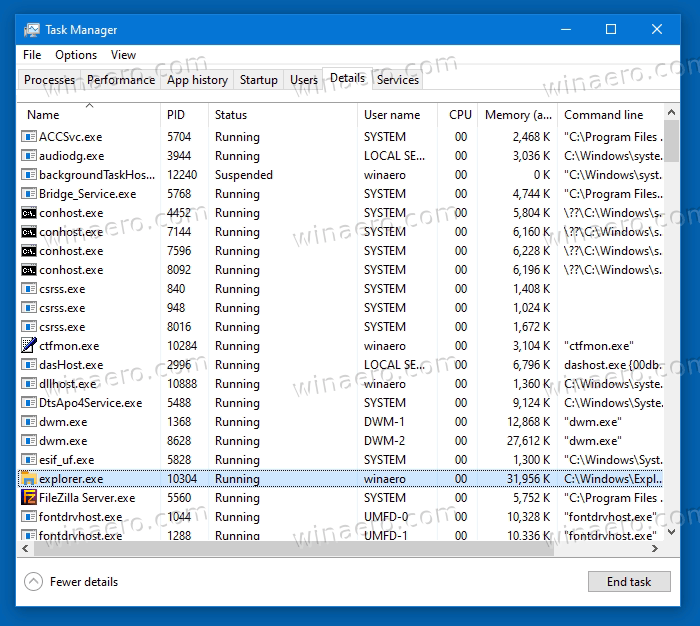
- Find explorer.exe in the list of processes and click on End task. The taskbar and desktop will flash and disappear.
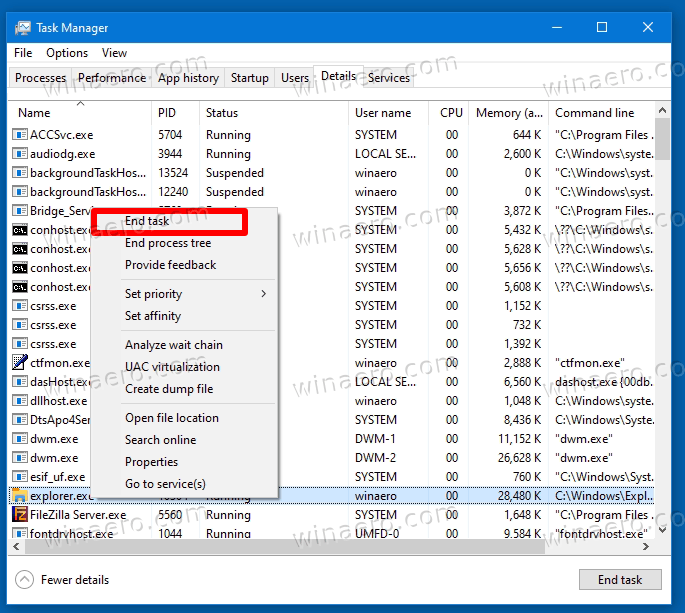
- Again in the Task Manager, select menu > File > Run New Task.
- In the new task box, type
explorer.exe /nouaccheck.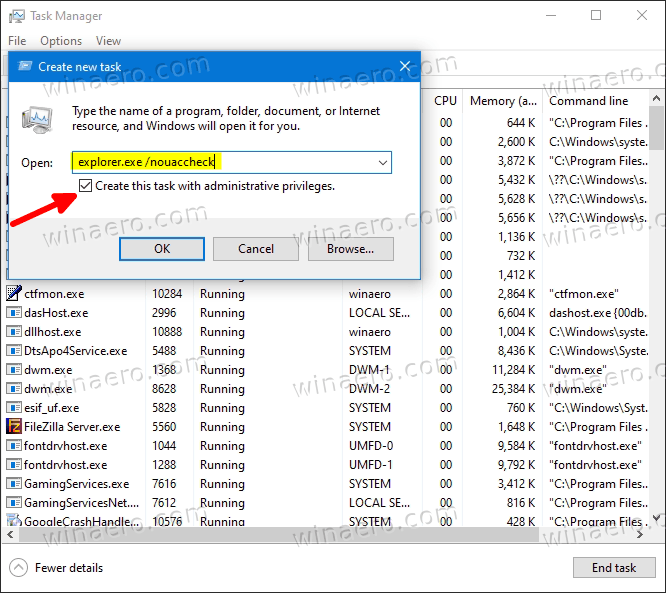
- Now enable the Create this task with administrative privileges option.
- Click OK. This will start the Explorer process with administrator rights (as admin).
You are done!
As you see, there is no much difference between the Windows 11 and 10. Only a small Registry modification is required in case of Windows 11 23H2.
Here's a final suggestion. Once you finish working with File Explorer running elevated, sign out from Windows and sign in back again. This will reload your user account session and will run the Explorer shell as usual, without administrative privileges. I don't recommend you running it with high access rights for a long period of time, as it a security risk for your OS.
That's it.
Support us
Winaero greatly relies on your support. You can help the site keep bringing you interesting and useful content and software by using these options:

Does not seem to work as of this date on Win11