How to Uninstall the Snipping Tool in Windows 10
Snipping Tool is one of the classic Windows apps which comes preinstalled starting in Windows Vista. It is a simple, but useful screen capturing app that is probably familiar to every user. With Windows 10, Microsoft offers a new Screen & Sketch modern app, which replaces the classic Snipping Tool.
Advertisеment
So, the Snipping Tool is a simple and useful application shipped with Windows by default. It was created specially for taking screenshots. It can create most types of screenshots - window, custom area or whole screen.
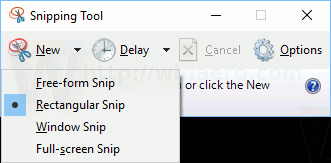
In Windows 10, the Snipping tool points the user to the Screen & Sketch app, indicating that its days are numbered. So, starting in Windows 10 build 21277, the Snipping Tool is now an optional component. While build 21277 retains it preinstalled (but this may eventually change), it is now possible to uninstall it.
This post will show you how to get uninstall the Snipping Tool app in Windows 10. We will also review how to install it back into the OS if you need to restore it after the removal. There are a number of methods you can use
Uninstall the Snipping Tool in Windows 10
- Open Settings.
- Navigate to Apps > Apps & features.
- On the right, click on Manage Optional features.
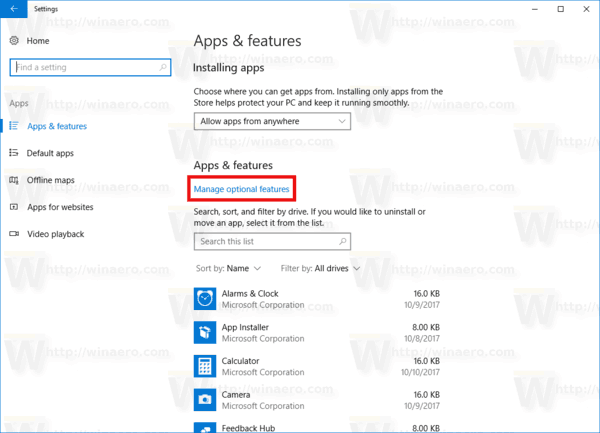
- Click on the Snipping Tool entry in the list of optional features.
- Click on the Uninstall button.
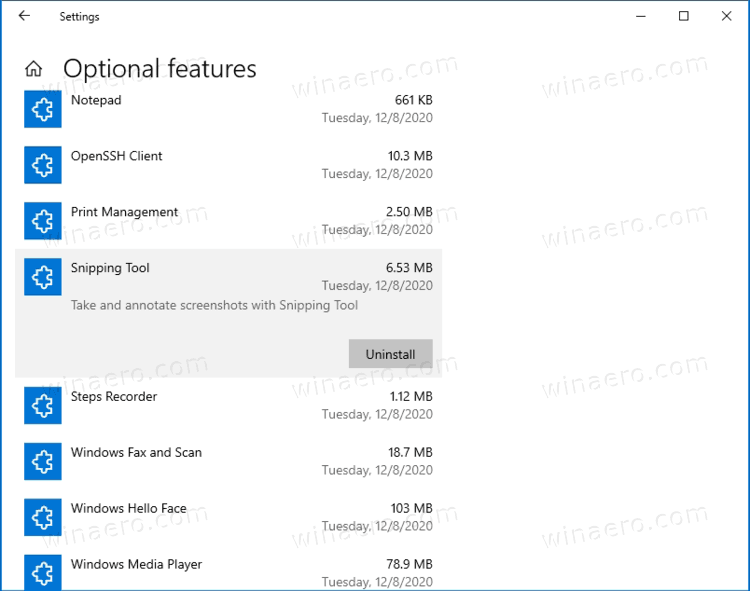
- This will instantly remove the app from the OS.
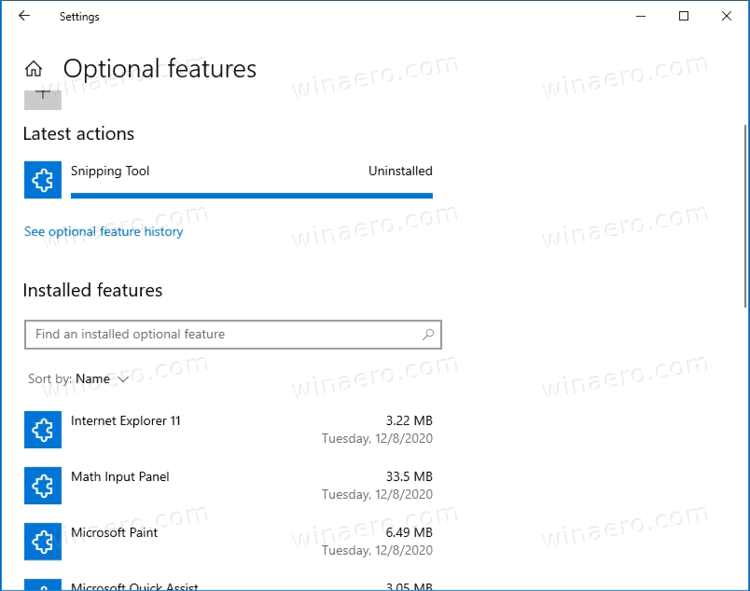
You are done.
Note. You can directly open the Optional features page in Settings by right-clicking on the Snipping Tool entry in the Start menu and then selecting "Uninstall" from the menu.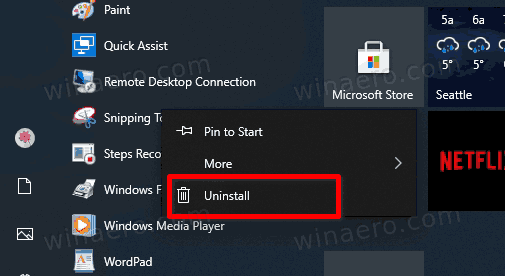
If you need to install the Snipping Tool after the removal, here is what you need to do.
Install Snipping Tool in Windows 10
- Open Settings.
- Navigate to Apps > Apps & features.
- On the right, click on Manage Optional features.

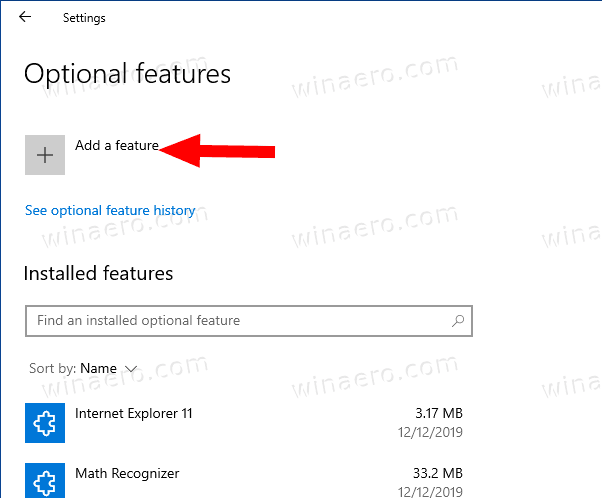
- Click on the Add a feature button.
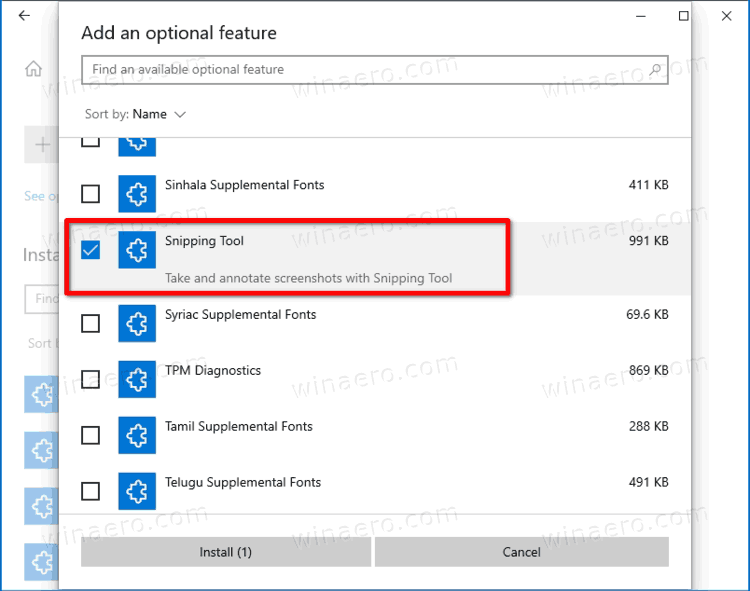
- Find the Snipping Tool app in the list of available components and select (check) it.
- Click on the Install button.
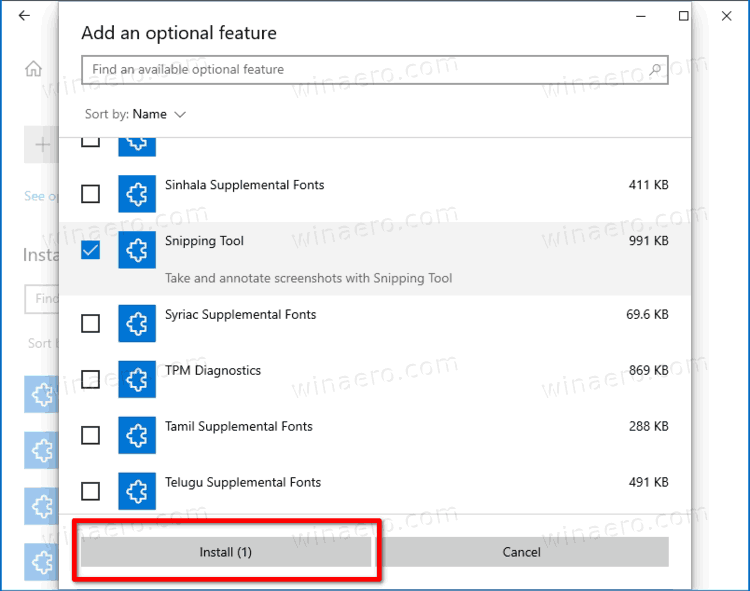
- You have installed the Snipping Tool.
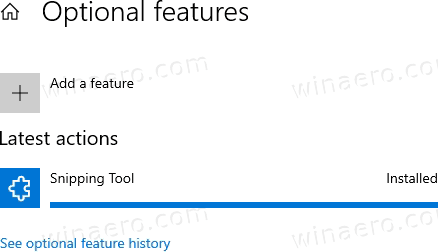
Alternatively, you can use the command prompt to install and uninstall the Snipping Tool. This involves the DISM command. You must be signed in as an administrator to use it.
Uninstall or Install the Snipping Tool using Command Prompt
- Open a command prompt as Administrator.
- Type or copy-paste the following command to uninstall the Snipping Tool.
DISM /Online /Remove-Capability /CapabilityName:Microsoft-Windows-SnippingTool~~~~0.0.1.0.
- To install the Snipping Tool after you removed it, use this command:
DISM /Online /Add-Capability /CapabilityName:Microsoft-Windows-SnippingTool~~~~0.0.1.0. - Hit the
Enterkey to run the command. - You can now close the command prompt window.
Finally, starting with Windows 10 build 21354, the Snipping Tool app followed Notepad and Paint, and it is now available from the Store. This change means you can install, repair and uninstall Snipping Tool.
Install or uninstall the Snipping Tool app from Microsoft Store
Although Snipping Tool is now in the list of deprecated features, Microsoft combined this app with Snip and Sketch. Now, uninstalling Snip and Sketch uninstalls Snipping Tool. It is hard to understand the logic behind this, so simply be aware of this fact, and not be confused when you see Snip and Sketch instead of Snipping Tool in the Microsoft Store.
Uninstall Snipping Tool, Store version
- Open the Start menu.
- Find the Snipping Tool shortcut in the app list.
- Right-click the application and select Uninstall.
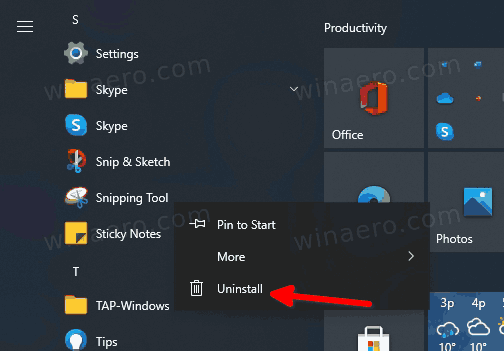
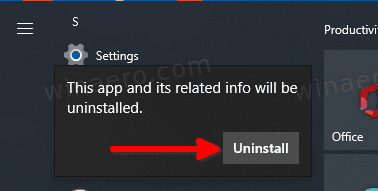
- Confirm the uninstall prompt to remove the Snipping tool from Windows 10.
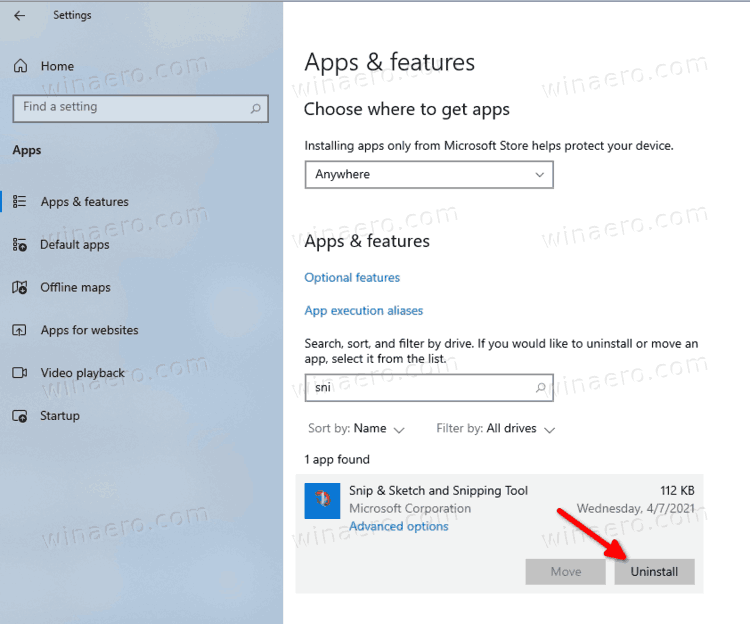
Remove the Snipping Tool (Store version) using Settings.
- Open Settings.
- Navigate to the Apps > Apps and features section.
- Find Snipping Tool in the list and click on it.
- Select Uninstall and confirm the action operation.
How to Install Snipping Tool from the Microsoft Store
- To install Snipping Tool from the Microsoft Store, open this link.
- Click the Get button.
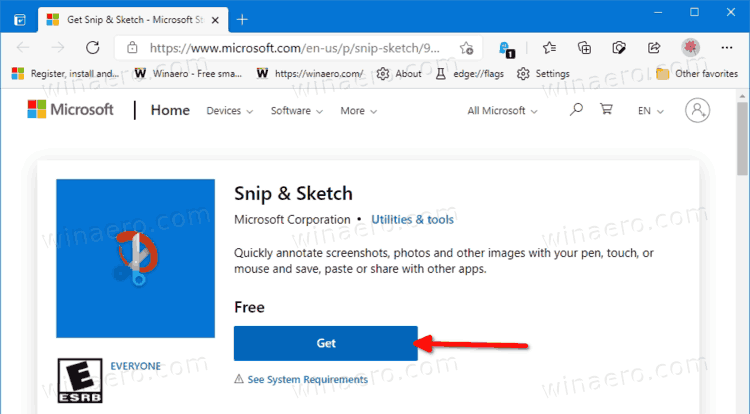
- This will install the modern Snip and Sketch app + Snipping Tool bundle and restore the Snipping Tool in the start menu.
You are done!
The Snipping Tool was part of Windows XP Tablet PC Edition but went mainstream after it was included in Windows Vista. It is able to capture screenshots of a window, of a screen area or the whole screen contents. Once you capture an image, you can add an annotation and save your capture to a *.png, *.jpg or *.gif file. The tool did not change much until Windows 10.
That's it.
Support us
Winaero greatly relies on your support. You can help the site keep bringing you interesting and useful content and software by using these options:
