Here is how you can remove removable drives from the navigation pane in Windows 11 File Explorer. By default, it shows entries in This PC and duplicate icons on the left for individual removable drives connected to your device.
Advertisеment
This behavior is default since Windows 10. Microsoft made it show all connected external storage devices directly in the left pane.
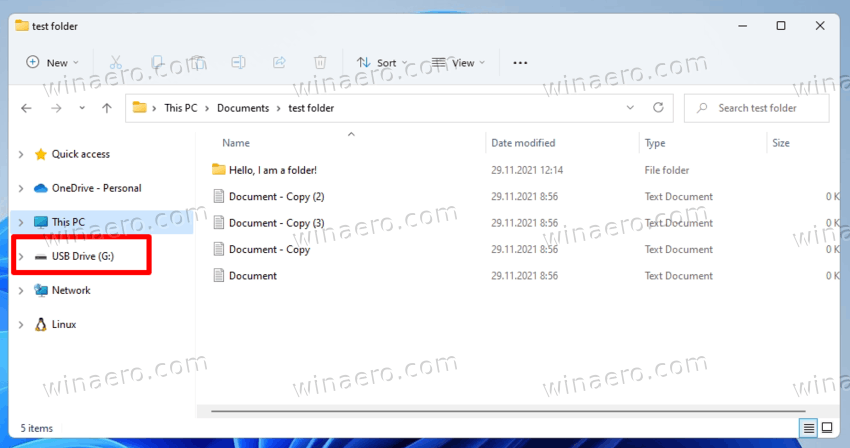
On the one hand, you can access them with a single click. To open the drive contents, you don't need to visit the This PC location. All you need to do is to open the File Explorer app.
On the other hand, this adds extra icons to the navigation pane, especially if you have it expanded. Some users just prefer the classic way of drive appearance when they are listed in the This PC folder. Luckily, it is easy to hide removable storage devices from the navigation pane of Windows 11 File Explorer.
To hide removable drives from the navigation pane in Windows 11, do the following.
- Open Registry Editor by pressing Win + R and typing
regeditin the Run box. - Navigate to the following key:
HKEY_LOCAL_MACHINE\SOFTWARE\Microsoft\Windows\CurrentVersion\Explorer\Desktop\NameSpace\DelegateFolders\{F5FB2C77-0E2F-4A16-A381-3E560C68BC83}.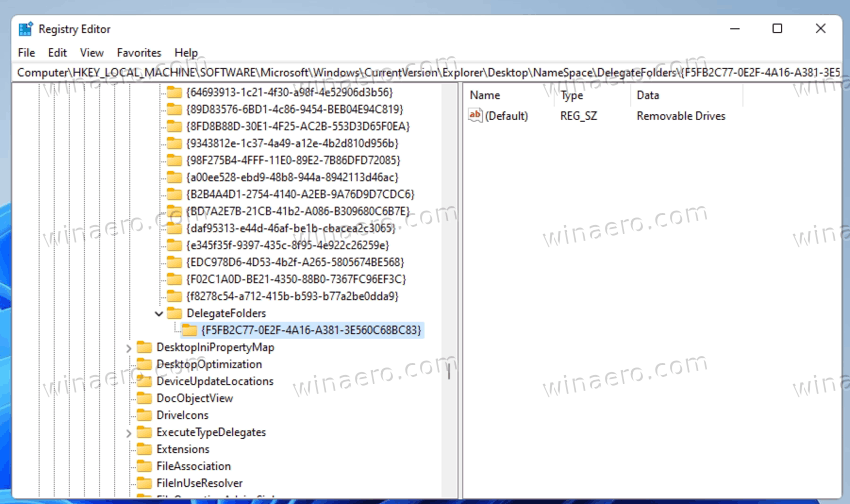
- Now, rename the
{F5FB2C77-0E2F-4A16-A381-3E560C68BC83}subkey. Simply add a hyphen '-' before or after its name.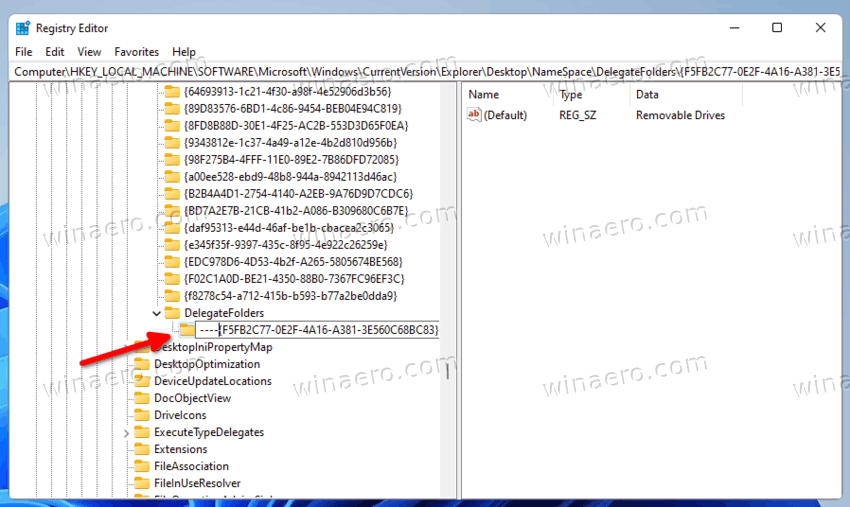
- Finally, close all File Explorer windows for the change to take effect.
You are done! Removable drives will disappear from the File Explorer navigation pane.
To restore removable drives in the navigation pane, rename the mentioned subkey from -{F5FB2C77-0E2F-4A16-A381-3E560C68BC83} back to {F5FB2C77-0E2F-4A16-A381-3E560C68BC83}.
Tip: Instead of renaming the GUID key, you can just delete it. But then you'll need to re-create it manually to undo the change.
Finally, here are a couple of options to save your time.
Ready-to-use REG files
First of all, you can download the following REG files to add or remove external drives from the navigation pane of File Explorer in Windows 11.
Download the ZIP archive using this link, and extract its contents to any folder of your choice. Double click the file Remove_removable_drives_from_navigation_pane.reg to instantly hide the drives. Confirm the UAC prompt and re-open File Explorer and you are good to go.
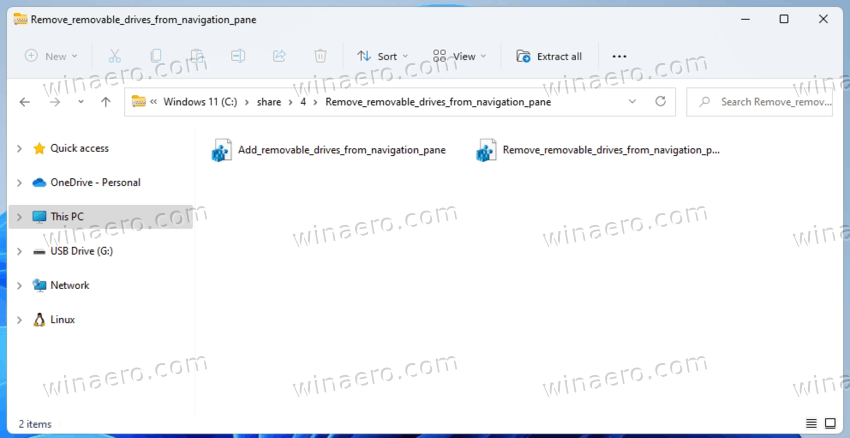
The undo tweak, Add_removable_drives_from_navigation_pane.reg, is also available in the archive you have downloaded.
Alternatively, Winaero Tweaker can do the trick for you.
Hide Removable Drives with Winaero Tweaker
You can save your time and use Winaero Tweaker to hide or show removable drives in the navigation pane. Download and install the app from here, and run it.
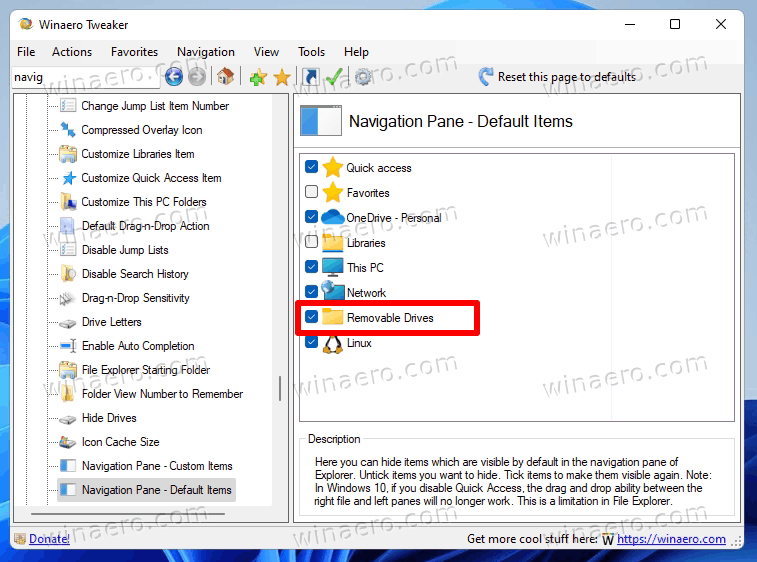
On the left, click on File Explorer > Navigation Pane - default items and uncheck Removable drives.
You can restore the drives back in the navigation pane at any moment later by placing the check box next to the removable drives option.
Support us
Winaero greatly relies on your support. You can help the site keep bringing you interesting and useful content and software by using these options:

Hello Sergey,
Doesn’t work on latest version of Win11 – the value of the subkey “delegatefolders” now is {d34a6ca6-62c2-4c34-8a7c-14709c1ad938} – renaming it as you suggest doesn’t do the trick!
Thanks for trying – perhaps you have a new tweak?
Thanks so much for this post, you saved me a lot of annoyance with some SSD drives that were showing up in the left panel as removable disks.
Hi Sergey,
Is there a way that the inverse of this could be accomplished where the drive is removed from the “This PC” drop down menu and only shown in the outer navigation tree.
Basically I want only things internally connected in my PC to show in “This PC” whereas anything externally connected (USB drives, etc) are outside of this drop down menu
Great! Thanks!!