You may need to re-register the Start menu in Windows 11, if it doesn't open, has glitches or just doesn't work as expected. The procedure is very simple; all you need to do is to run a single PowerShell command.
Advertisеment
Windows 11 is a significant milestone in the operating system history. It welcomes the user with a new style of the taskbar, window borders, and the Start menu.
The taskbar shows the icons in the center, include the Start logo. The right area still hosts the tray icons. However, the battery, network, and sounds icons are now one big button.
The Start menu has also been reworked by Microsoft. The company has removed Live Tiles, and changed its layout. The upper area of the Start menu now shows "Pinned" icons, with the "Recommended" files below it. The "All apps" list which is used to be on the left is now hidden behind its own button.
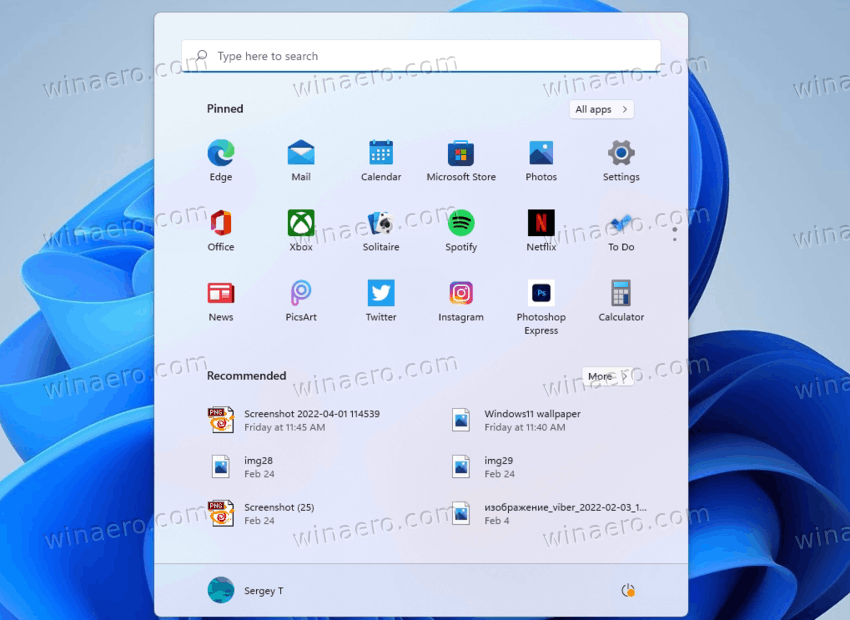
If the Start menu is not opening or working properly, then try to re-register it - this may help.
Re-Register Start Menu in Windows 11
- Right-click the Start button and select PowerShell or Windows Terminal from the menu.
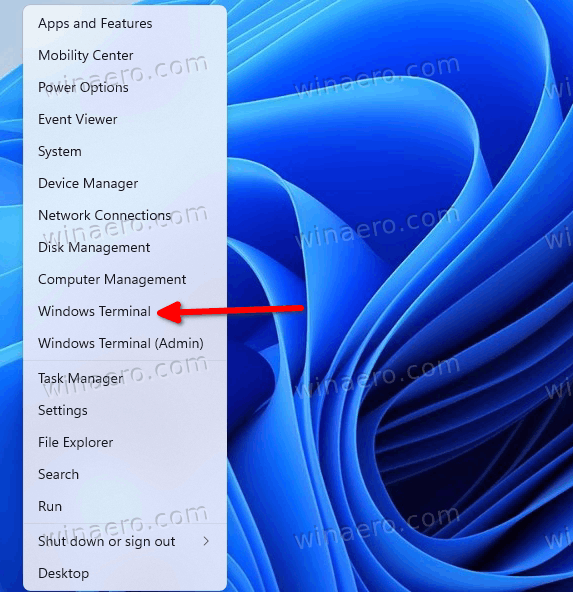
- Copy and paste the
Stop-Process -Name "StartMenuExperienceHost" -Forcecommand and hit Enter. This will stop the Start menu process.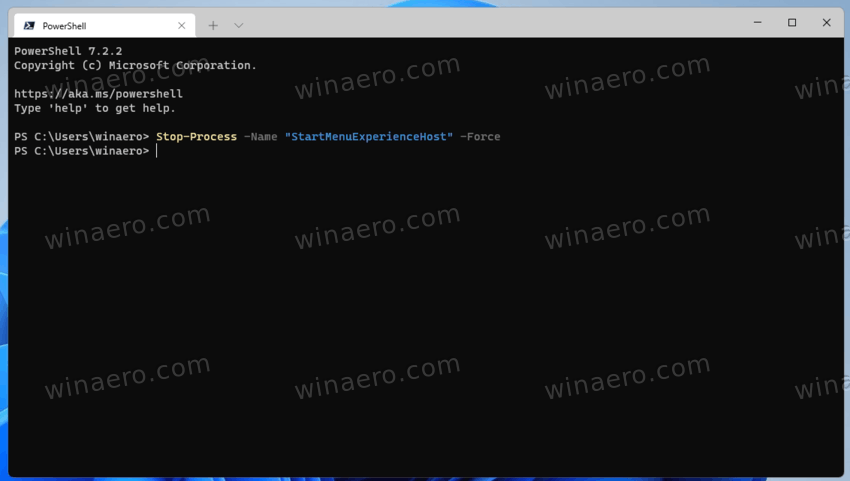
- Now, copy and paste the following command:
Get-AppxPackage Microsoft.Windows.ShellExperienceHost | Foreach {Add-AppxPackage -DisableDevelopmentMode -Register "$($_.InstallLocation)\AppXManifest.xml"}. It will re-register the Start menu.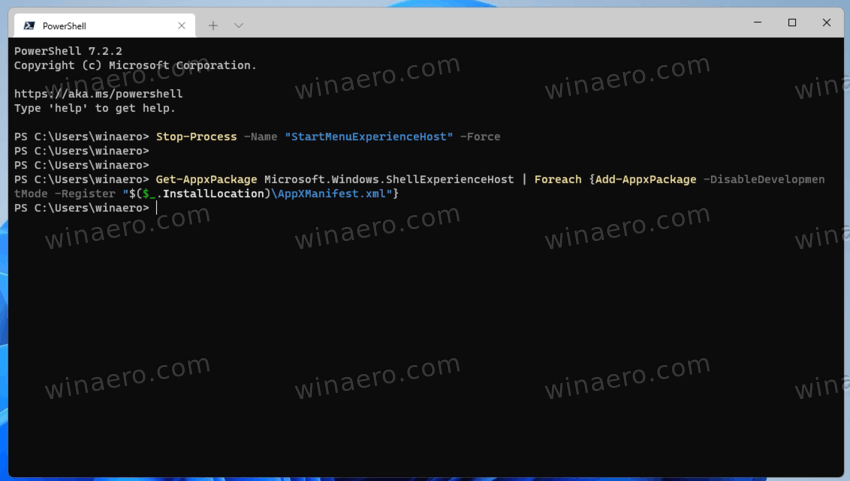
- The command won't print anything, it works silently. You can now close the PowerShell or Windows Terminal.
You are done.
The above command is effective when only your user account is affected. It applies to the current user only, with whose credentials you run the command.
You may also want to run it for all users to get the Start menu re-registered for all users.
- Press Win + X and select Windows Terminal(Admin) or PowerShell (Administrator) from the menu.
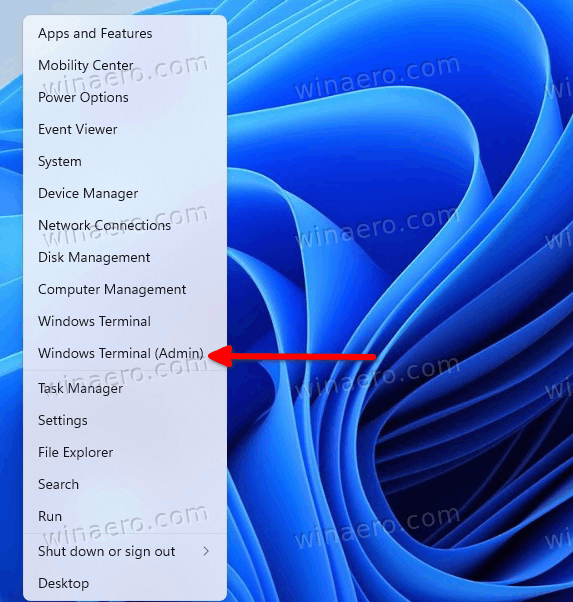
- Terminate the StartMenuExperienceHost process by running the following command
Stop-Process -Name "StartMenuExperienceHost" -Force. - Finally, copy-paste the following command to re-register Start for all users in Windows 11:
Get-AppxPackage -AllUsers Microsoft.Windows.ShellExperienceHost | Foreach {Add-AppxPackage -DisableDevelopmentMode -Register "$($_.InstallLocation)\AppXManifest.xml"}.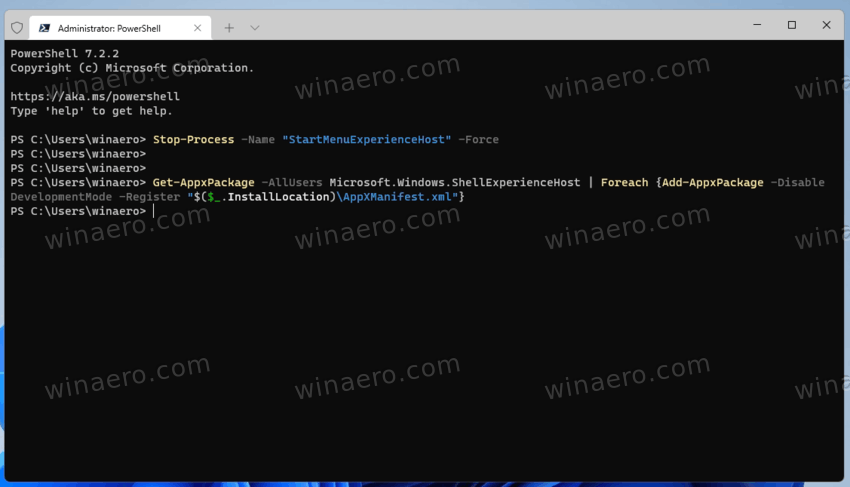
- Close the Terminal or PowerShell window.
That's all about the Start menu in Windows 11. You may wonder how the commands work.
How does it work
Starting in Windows 10, the Start menu is actually a dedicated app bundled with the OS. It is built with Universal Windows Platform (UWP), a modern technology that is widely used in Store apps. The use of UWP allows Microsoft and third-party developers to unify the app experience across all platforms. In our case, the Start menu will have the same look and feel on classic Desktops, modern laptops and convertibles, tablets, Xbox and other devices that support Windows 11.
There is also another reason why Microsoft has implemented the Start menu as a separate process. This makes Windows 11 more stable, because crashes in the Start menu and its icons won't affect the taskbar and File Explorer.
Being a UWP app, the Start menu has its own package, Microsoft.Windows.ShellExperienceHost. It is not listed under apps and features in Settings, but is present on each and every Windows 11 computer.
It runs the StartMenuExperienceHost.exe process in the background. You can see the latter in the Task Manager.
The Get-AppxPackage cmdlet in our command gets the list of packages related to the Start menu. Its companion, Add-AppxPackage, registers the packages to make it known for Windows. If the app is already known, it overwrites the current registration data, that fixes potential issues with the app.
Support us
Winaero greatly relies on your support. You can help the site keep bringing you interesting and useful content and software by using these options:

That’s why I permanently using Linux Lite as my primary
Shut up, Phil.
I get:
Add-AppxPackage : Deployment failed with HRESULT: 0x80073D02, The package could not be installed because resources it
modifies are currently in use.
error 0x80073D02: Unable to install because the following apps need to be closed
Microsoft.Windows.ShellExperienceHost_10.0.22000.71_neutral_neutral_cw5n1h2txyewy.
NOTE: For additional information, look for [ActivityId] fd7db1a5-68e5-0007-6e91-8efde568d801 in the Event Log or use
the command line Get-AppPackageLog -ActivityID fd7db1a5-68e5-0007-6e91-8efde568d801
At line:1 char:76
+ … | Foreach {Add-AppxPackage -DisableDevelopmentMode -Register “$($_.I …
+ ~~~~~~~~~~~~~~~~~~~~~~~~~~~~~~~~~~~~~~~~~~~~~~~~~~~~~~~~~
+ CategoryInfo : NotSpecified: (C:\Windows\Syst…ppXManifest.xml:String) [Add-AppxPackage], Exception
+ FullyQualifiedErrorId : DeploymentError,Microsoft.Windows.Appx.PackageManager.Commands.AddAppxPackageCommand
but nice try
you just need to do what the error message is telling. Go into task manager and then close out Microsoft windows shell experience host service. Then re-run the command as stated in the article.
I ran into a similar issue. I was able to resolve by doing the following on quite a few machines that I adminster.
Open powershell as an admin and run the following commands.
1. Get-AppxPackage Microsoft.Windows.ShellExperienceHost | reset-AppxPackage
then once completed
2. Get-AppxPackage Microsoft.Windows.StartMenuExperienceHost | reset-AppxPackage
This second one takes longer then the first in my experience but your mileage may vary. Once both commands have finished reboot the machine
Following the reboot functionality of the start menu will hopefully be restored.