This post will show you multiple way to make a network private or public in Windows 11. In short, these network types are differ with the default sharing option. When on a private network, Windows 11 makes your device visible for other computer. On a public network, your device and its shared resources are hidden.
Advertisеment
Actually, Windows 11 supports three network profiles.
Public - this network profile is assigned to newly made connections. it makes your computer not discoverable for other devices on the same network. A public network is considered to be unsafe, e.g. to be shared with a third-party without a strong protection. So, Windows 11 applies certain restrictive Firewall rules where file sharing, network discovery, media cast, and automatic printer setup are all disabled.
Private network - this network connection profile is applicable to home networks. It is less restrictive, and allows sharing of your files and folders. It also makes your PC visible to other computers on the network. If you trust the connected network, then you may set this profile for it.
Domain network is the last profile which applies automatically when your PC joins an Active Directory, and you authenticate to a domain controller.
To change the network type to Private or Public in Windows 11, do the following.
Make Network Private or Public in Windows 11
There are a number of methods you can use to change the network type on Windows 11. You can use Settings, PowerShell, Registry, and Local Security Policy. In this post, we will review all these methods in detail.
Make Network Public or Private using Windows 11 Settings
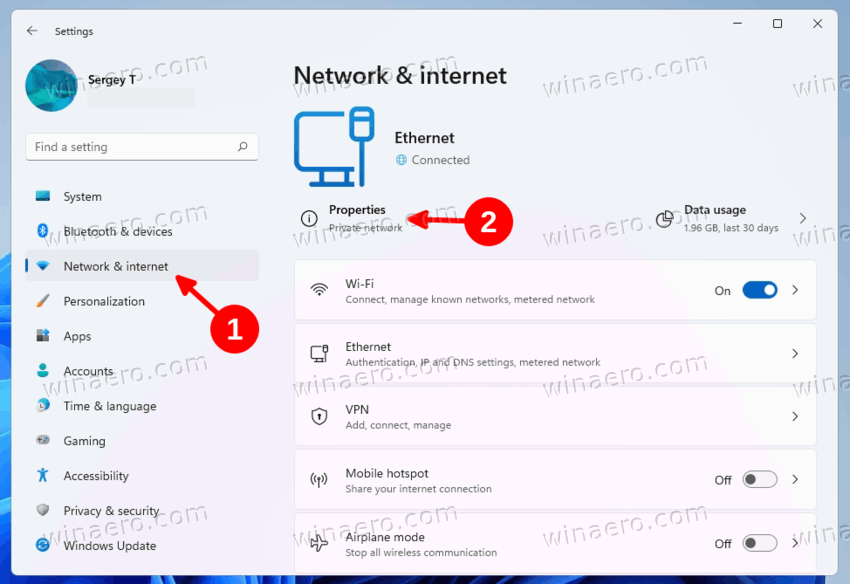
- Press Win + I to open the Settings app.
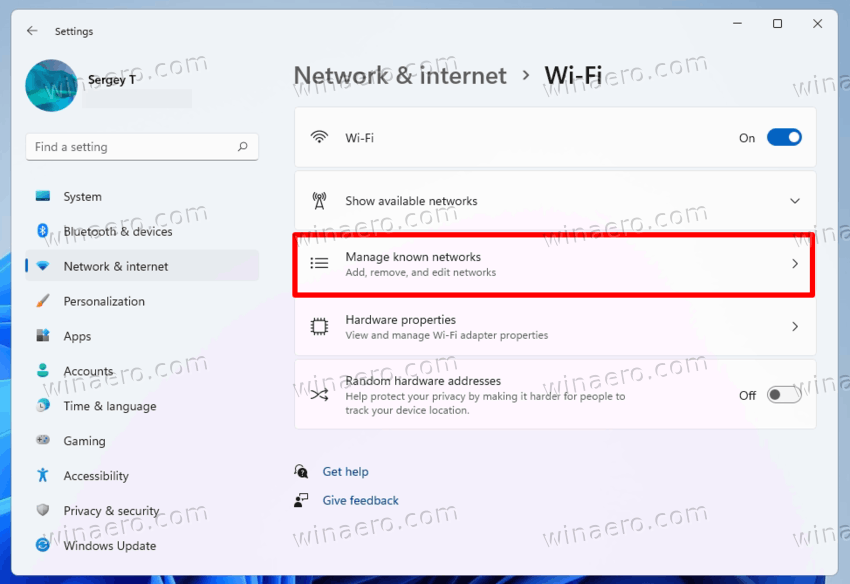
- Click on Network & internet on the left, and click on Properties on the right for the network you want to configure.
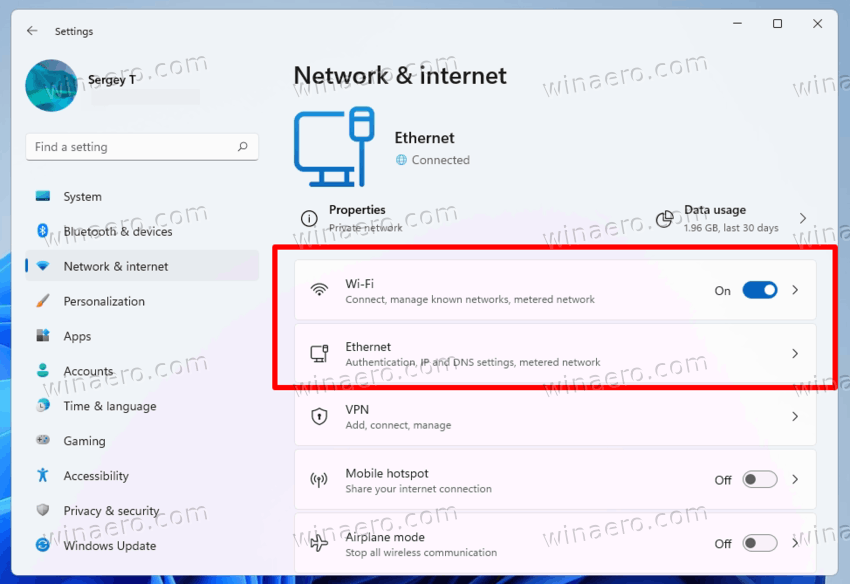
- Alternatively, you can directly click on Wi-Fi or Ethernet categories on the right, and the click on a connection to change its profile type.
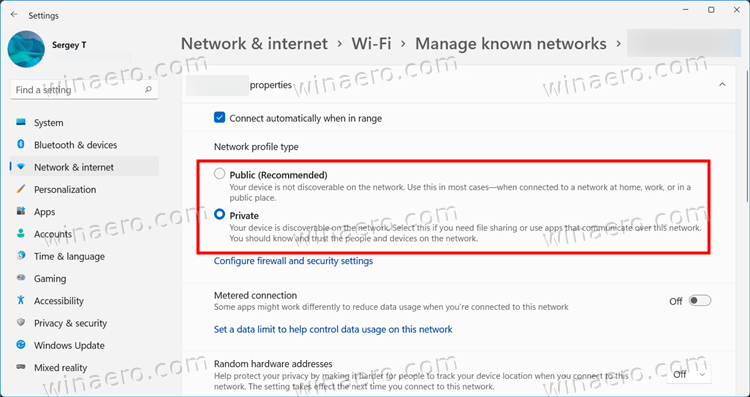
- Under Network profile type, select either Public or Private.
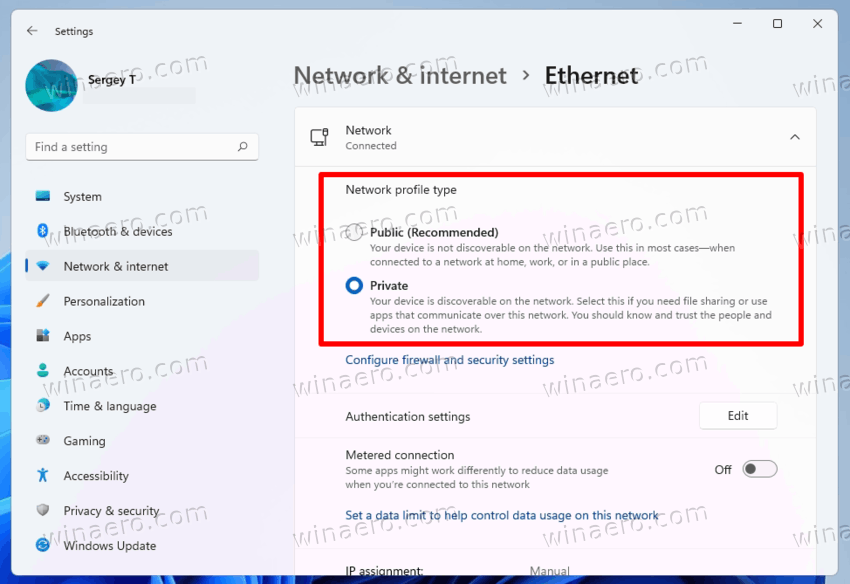
You are done. Windows will instantly apply new settings to the connection and reconfigure Windows Firewall.
Additionally, you can change the network type for a known network. Known networks in Windows 11 are successfully established saved wireless connections. The good thing about this method is that you don't have to be currently connected to that network. So you can change its profile in advance.
Change Network Profile Type for Known Networks
- Right-click the Start button and select Settings from the menu.
- Navigate to Network & internet > Wifi.
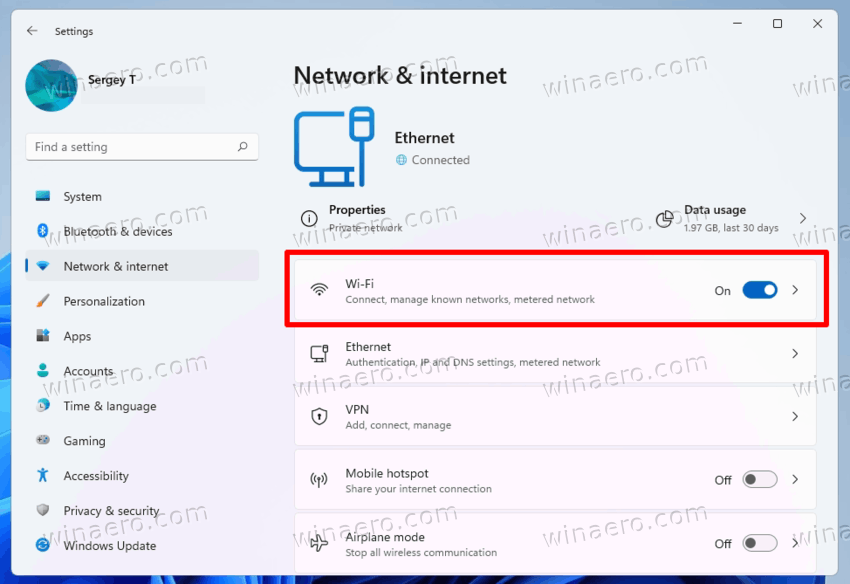
- In the right pane, click on Manage known networks.
- On the next page, click on the known Wi-Fi network you want to modify.
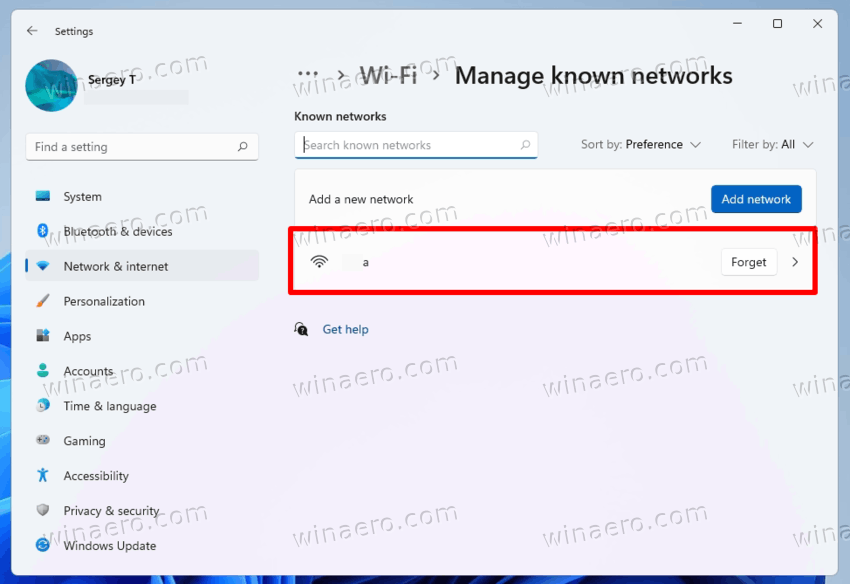
- Finally, select Public or Private for the network profile type you want.
You are done.
Now, let's review the PowerShell method.
Change Network to Public or Private using PowerShell
- Press Win + X and select Windows Terminal (admin). You can also use other methods of opening it.
- Select the PowerShell if it opens to some different profile.
- Now, get the list of network profiles stored on your computer using the
Get-NetConnectionProfilecommand.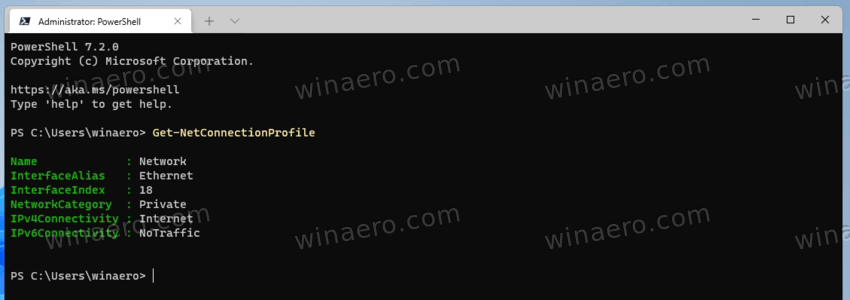
- Note the network name you want to change the profile type for.
- Finally, issue the following command:
Set-NetConnectionProfile -Name "your network name" -NetworkCategory <Type>. Replace "your network name" with the actual name of the network profile, and<Type>with one of the following values: Private, Public, or DomainAuthenticated.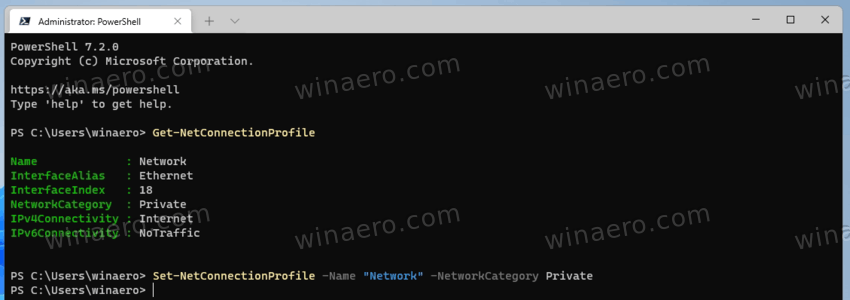
You are done. You can now close Windows Terminal.
Alternatively, you can change your network profile type in the Registry editor.
Change Network Profile Type in the Registry
- Press the Win + R shortcut keys and type
regeditin the Run dialog that opens. - Go to the following key:
HKEY_LOCAL_MACHINE\SOFTWARE\Microsoft\Windows NT\CurrentVersion\NetworkList\Profiles. - Expand open the
Profilesfolder to see its subkeys, each of which represents a saved network profile. - On the right side of each network profile, look for the ProfileName string value that keeps the friendly name for the network. Find the one you want to configure.
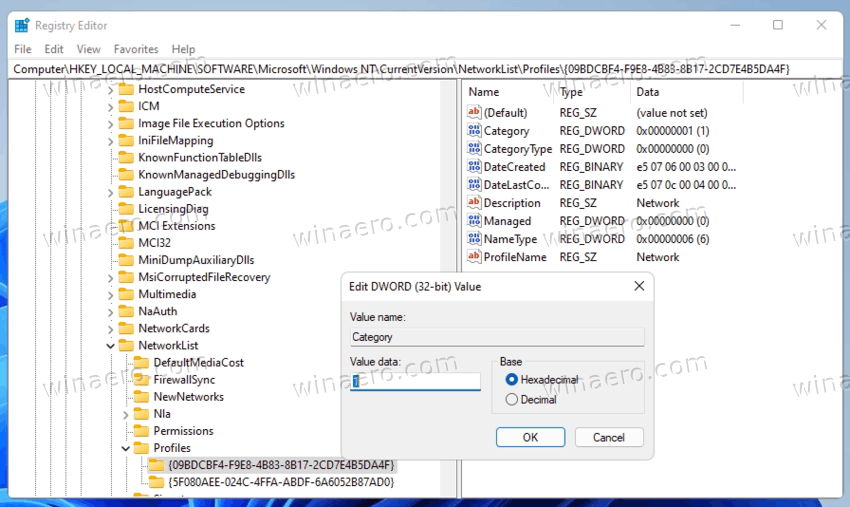
- Once you find the required network, double click the Category DWORD value and set its data to one of the following numbers:
- 0 = Public
- 1 = Private
- 2 = Domain
Everything is done, so you can now close the Registry editor app. However, I recommend you to restart Windows 11 to ensure the network settings are applied.
Finally, the last method we will review is Local Security Policy. Please keep in mind that the Local Security Policy app is only available in Windows 11 Pro, Enterprise, and Education editions. If you are running Windows 11 Home, use any other method expressed above.
Setting the network location type with Local Security Policy will override the user choice in Settings and prevent the user from changing the options. So it is a restrictive configuration.
Using Local Security Policy
- Type
secpol.mscin the Run dialog (Win + R).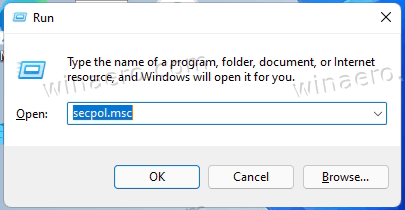
- In the left pane of the app, click on Network List Manager Policies.
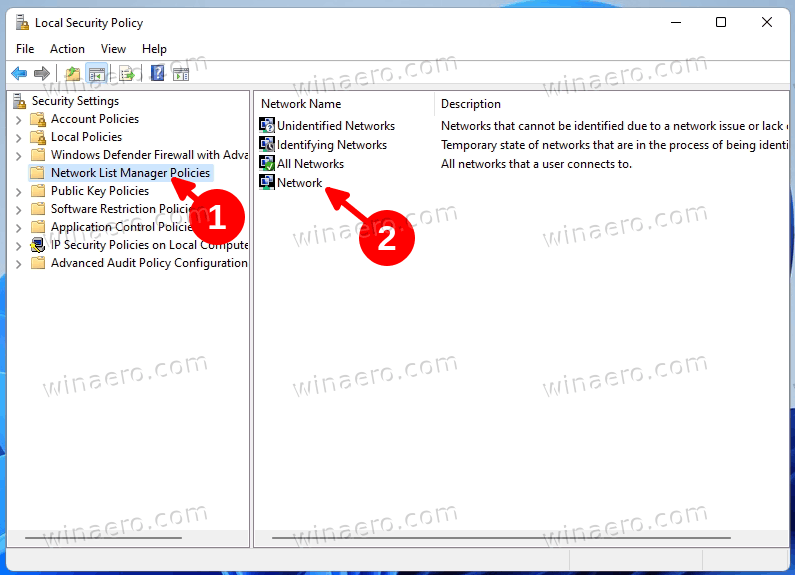
- On the right, click on the network you want to set as Public or Private. You can also make all networks of the same type by clicking on the All Networks entry.
- In the next dialog, switch to the Network Location tab.
- For the Location type option, select Public or Private.
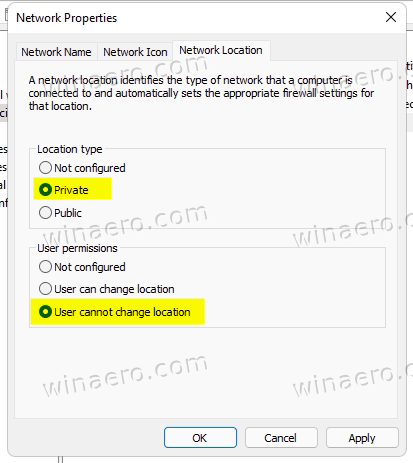
- For the User permissions options, set it to User cannot change location.
Done! This will enforce the chosen profile type for all or specific network connections. You can always undo the restriction by setting both User permissions and Location type to Not configured.
That's it!
Support us
Winaero greatly relies on your support. You can help the site keep bringing you interesting and useful content and software by using these options:

First method worked for me in windows
Thanks