Learn how to install Windows Subsystem for Linux on Windows 11 with ease and enjoy the best applications of both worlds.
Microsoft announced Windows Subsystem for Linux (WSL) back in 2016. Since then, the project went through several major updates and improvements. The latest versions of Windows 10 come with WSL 2.0, and it is relatively easy to set up. With Windows 11, Microsoft makes installing WSL even simpler. You can now install Windows Subsystem for Linux with a couple of clicks and one command in Windows Terminal. Here is how to do that.
Advertisеment
Note: The new command that installs WSL in Windows 11 "with a single click" includes automatic installation of Ubuntu as a default Linux distro. If you prefer a specific Linux distributive, move along to the next chapter of the article.
Install Windows Subsystem for Linux in Windows 11
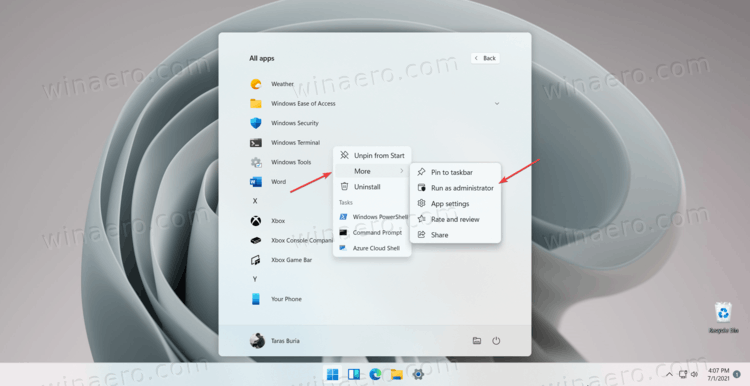
- Open the Start menu and find Windows Terminal. Right-click it and select Run as Administrator.
- Enter the following command:
wsl --install. That includes all the steps that previously required separate commands, such as installing a virtual machine platform, Windows Subsystem for Linux, WSL Kernel, etc.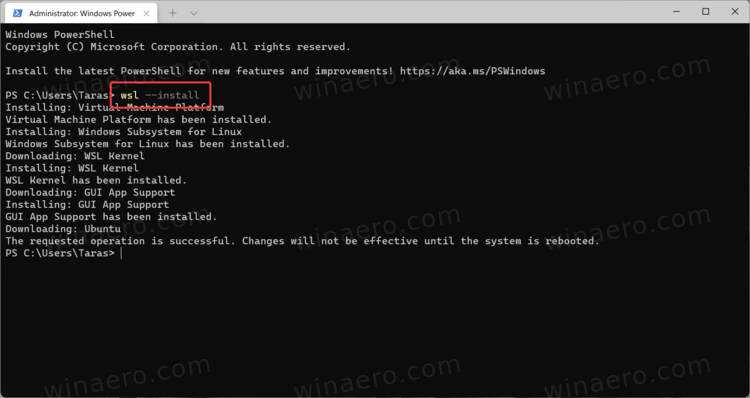
- Wait for Windows 11 to install WSL 2.0.
- Restart your computer.
That is how you install Windows Subsystem for Linux in Windows 11.
Tip: To update the Linux kernel in Windows 11, launch Windows Terminal with Administrator privileges and enter wsl --update.
Install WSL in Windows 11 with a specific Linux distro
If default Ubuntu is not your cup of tea, there is a separate command that allows you to specify a preferred Linux distro during WSL installation.
- Open an elevated Windows Terminal instance.
- Enter the following command:
wsl --online --list. That will list all Linux distros available for download.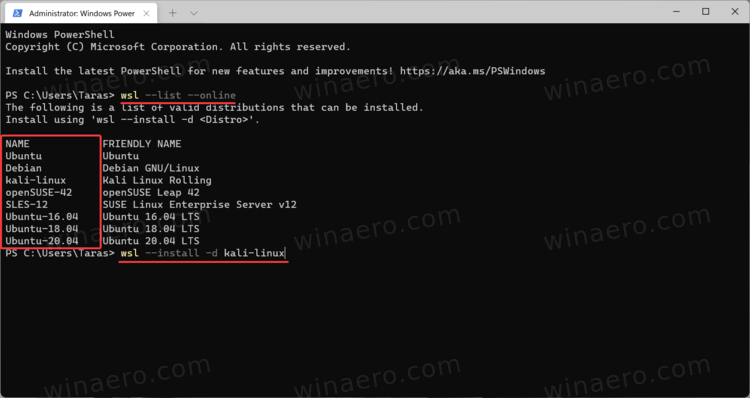
- Find the distro you want to set up alongside WSL.
- Next, enter
wsl --install -d distro-name. Replace distro-name with the name of the distro you want to install, for example, debian. - Press Enter and wait for Windows 11 to install WSL and complete the process.
- Restart your computer.
Done! Once it boots back, WSL in Windows 11 is up and running, ready for use.
That s it.
Support us
Winaero greatly relies on your support. You can help the site keep bringing you interesting and useful content and software by using these options:
