You can make Windows 11 switch Keyboard Layout per app in Windows 11. By default, when you switch the keyboard layout, it applies globally to all open windows. If you find this inconvenient, here are two ways to change this behavior.
Advertisеment
From very early days, Windows allows users to type in more than one language. It supports installing multiple keyboard layouts and switch between them with special shortcut keys. In Windows 11, the default sequence is Left Alt + Left Shift and Win + Space.
The keyboard layout is responsible for letters that appear when you type. So, when you have more than one language installed, you need to switch between when working on various documents. Here we come to a little annoyance.
The new layout will be applied to all apps. This means that when you switch from English to German in Microsoft Word, you will also have the German keyboard layout in any running app like web browser or File Explorer. If you find this inconvenient, here are a couple of solutions.
Enable Keyboard Layout Per App Windows
To enable the keyboard layout per app window on Windows 11, do the following.
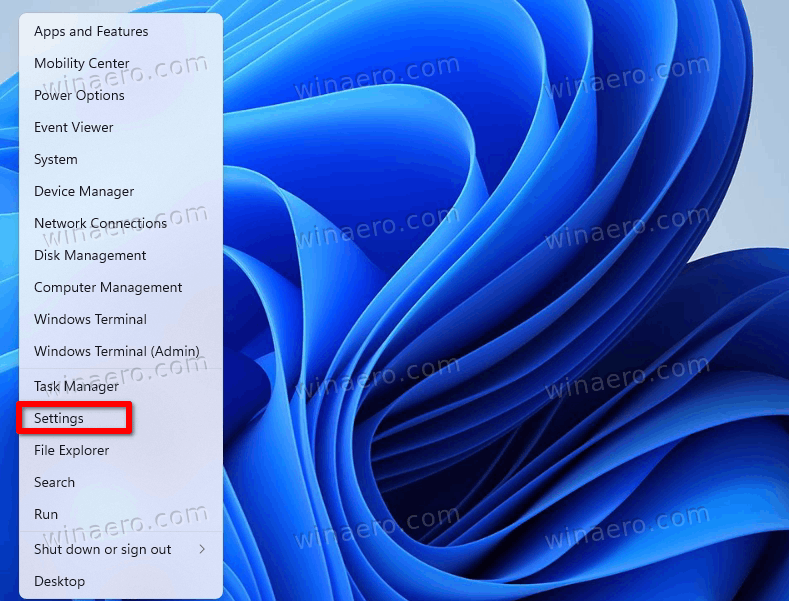
- Right-click the Start button and select Settings from the menu.
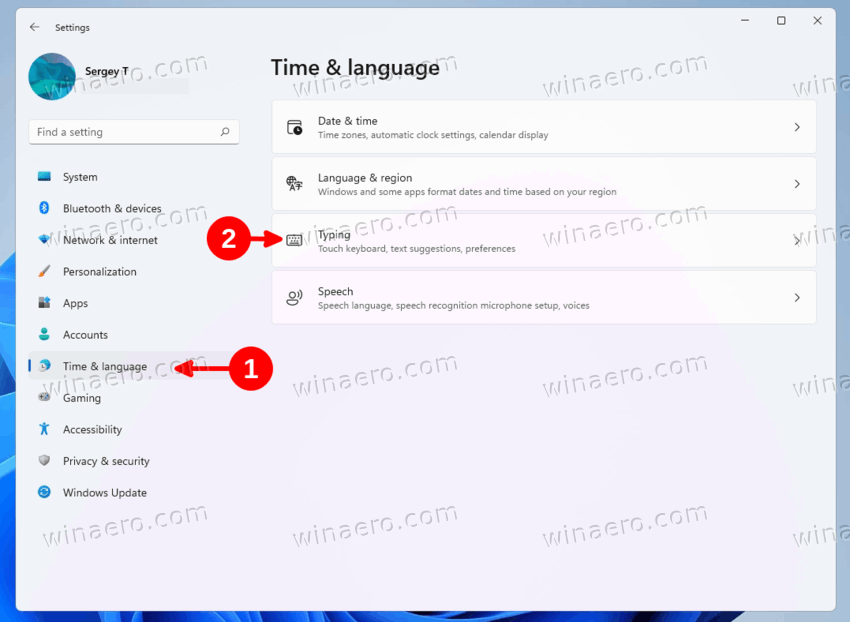
- Click Time & Language on the left.
- On the right, click the Typing entry.
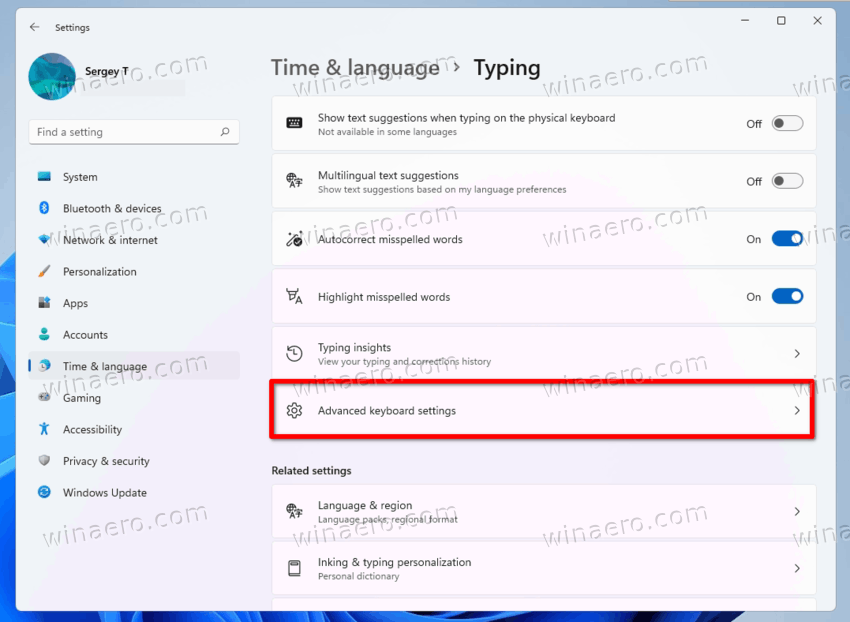
- Scroll down the next page to the Advanced keyboard settings option and click it.
- Finally, turn on the Let me use a different input method for each app window checkbox.
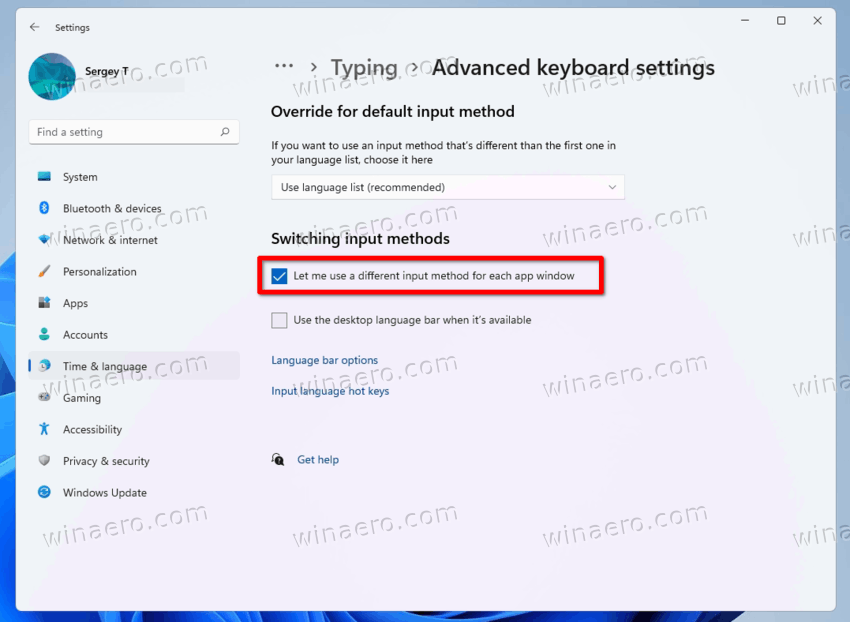
Done! From now, each app's window will have its individual keyboard layout.
Alternative to Settings, you can use PowerShell. The latter includes a bunch of cmdlets to manage language preferences that can be useful in our case. Here's how.
Enable Individual Keyboard Layout for Each Window with PowerShell
- Press Win + X and select Windows Terminal from the menu.
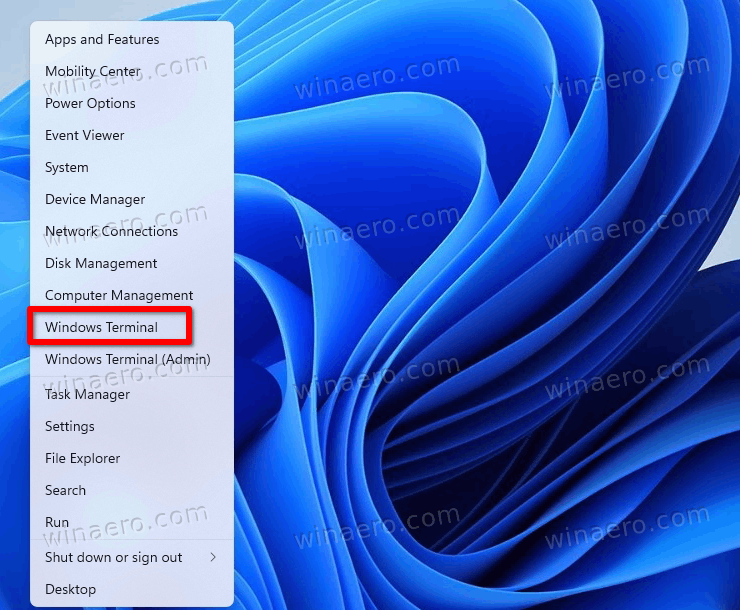
- If required, select the PowerShell profile (Ctrl + Shift + 1) for the Terminal app.
- Now, type
Set-WinLanguageBarOption -UseLegacySwitchModeand hit Enter. This will enable keyboard layout per app window in Windows 11.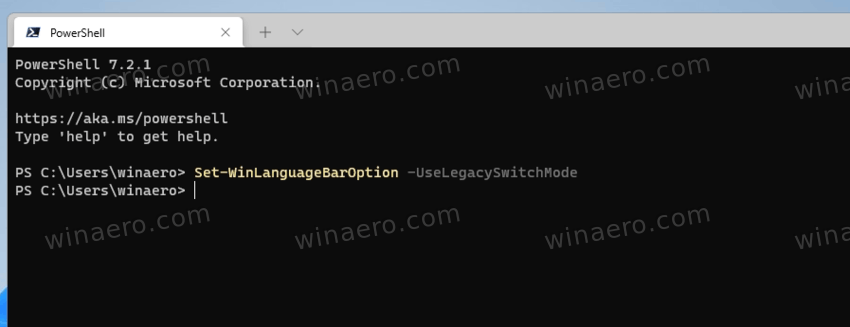
- To undo the change later, execute the cmdlet without arguments, i.e.
Set-WinLanguageBarOption. This will restore input defaults in Windows 11 and make it apply the current keyboard layout to all apps.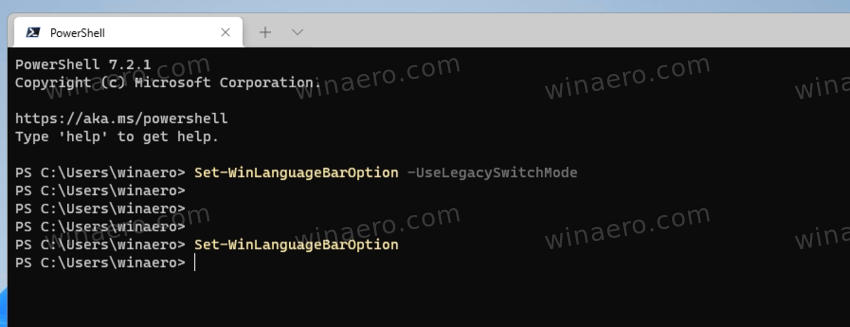
That's it!
Support us
Winaero greatly relies on your support. You can help the site keep bringing you interesting and useful content and software by using these options:

I am so glad you shared this information. It is very helpful for me.
best of windows 11
Thanks for the help.