In this post, we will see how to check HDR support, and how to enable HDR in Windows 11. HDR or high dynamic range is a screen technology that allows a display to show more details in extremely bright and dark scenes. Besides, it significantly raises the peak brightness in games or movies for a more immersive experience. HDR-compatible monitors and TVs also can render more rich and contrasty colors.
Advertisеment
Windows 11 supports HDR-compatible monitors and TVs. Also, the operating system offers additional HDR-specific features to enhance your gaming experience.
Less experienced users may not tell right away whether a monitor or TV supports HDR. So, this post will show in detail how to find if your device supports HDR.
Windows 11 has a dedicated HDR settings section in the Windows Settings app. It allows you to learn whether your laptop or monitor supports HDR.
Before we start, it is worth mentioning that HDR is not just a software feature you can bring to any computer via driver updates. To enable HDR in Windows 11, you need a compatible monitor and a recent driver from AMD, Nvidia, or Intel.
Check HDR support in Windows 11
To check HDR support in Windows 11, do the following.
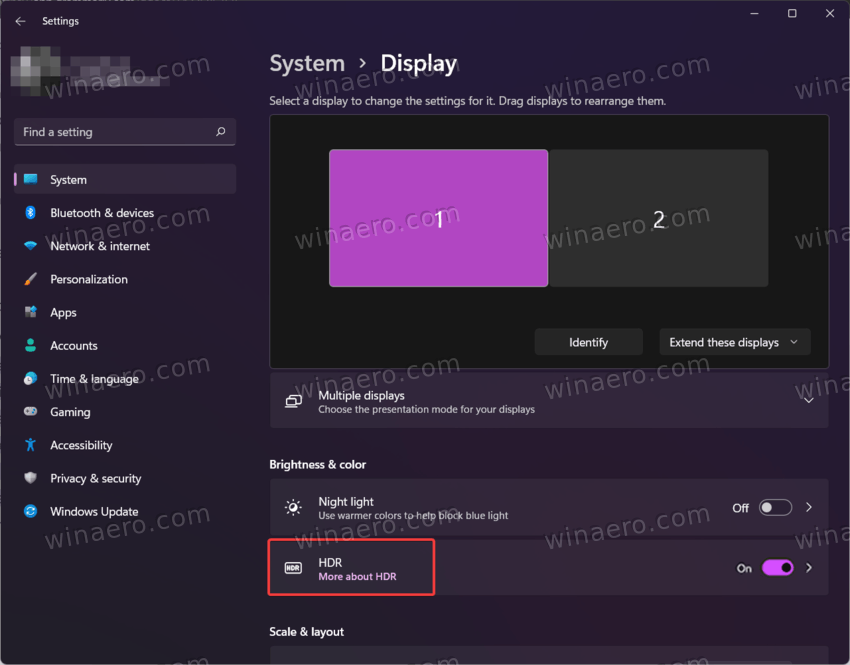
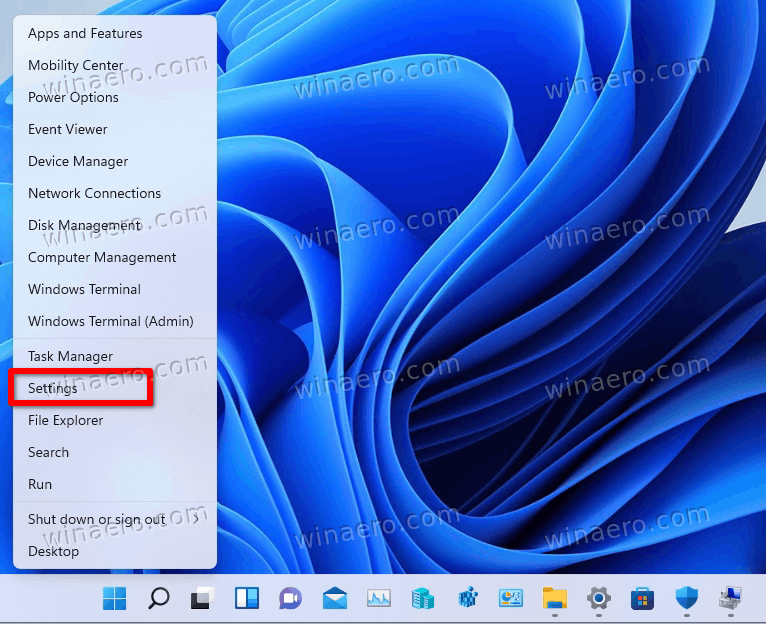
- Press Win + I to launch the Settings app. Alternatively, right-click the Start menu button and select Settings.
- Go to the System > Display page.
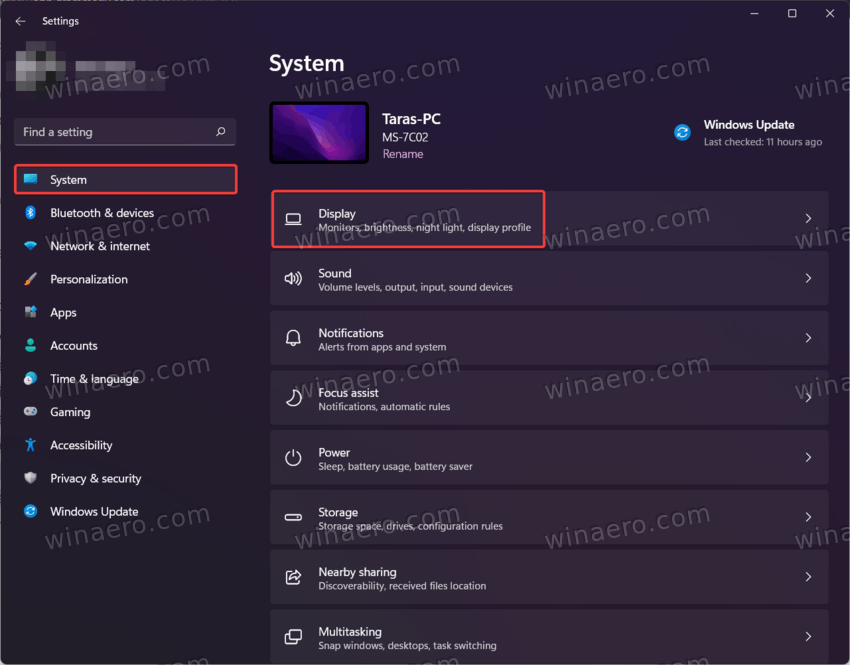
- Find the Brightness and control section and click HDR.
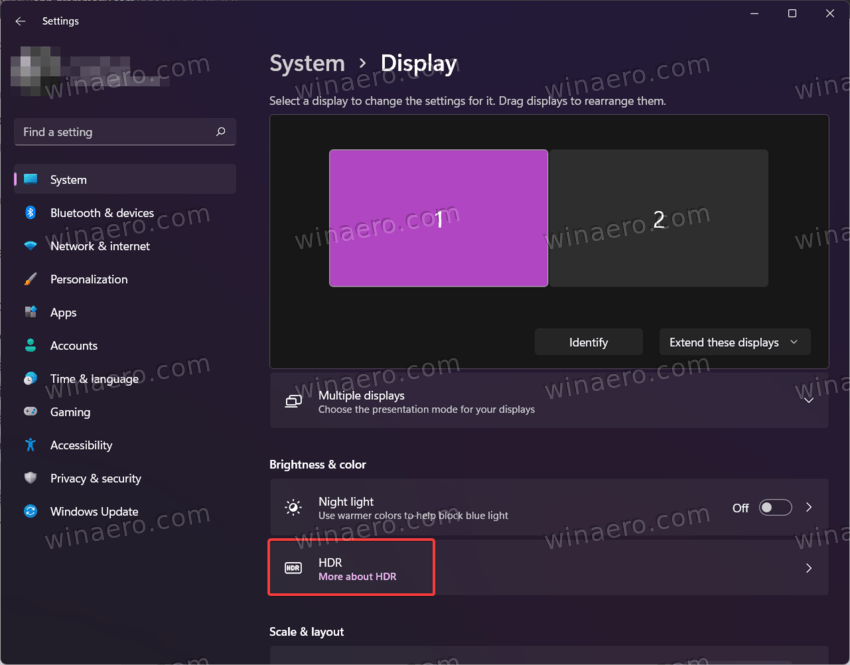
- If you have more than one monitor, select the one you need from the “Select a display to view or change it settings” drop-down list.
- If the selected monitor supports HDR, it will show Supported next to Play streaming HDR video and Use HDR.
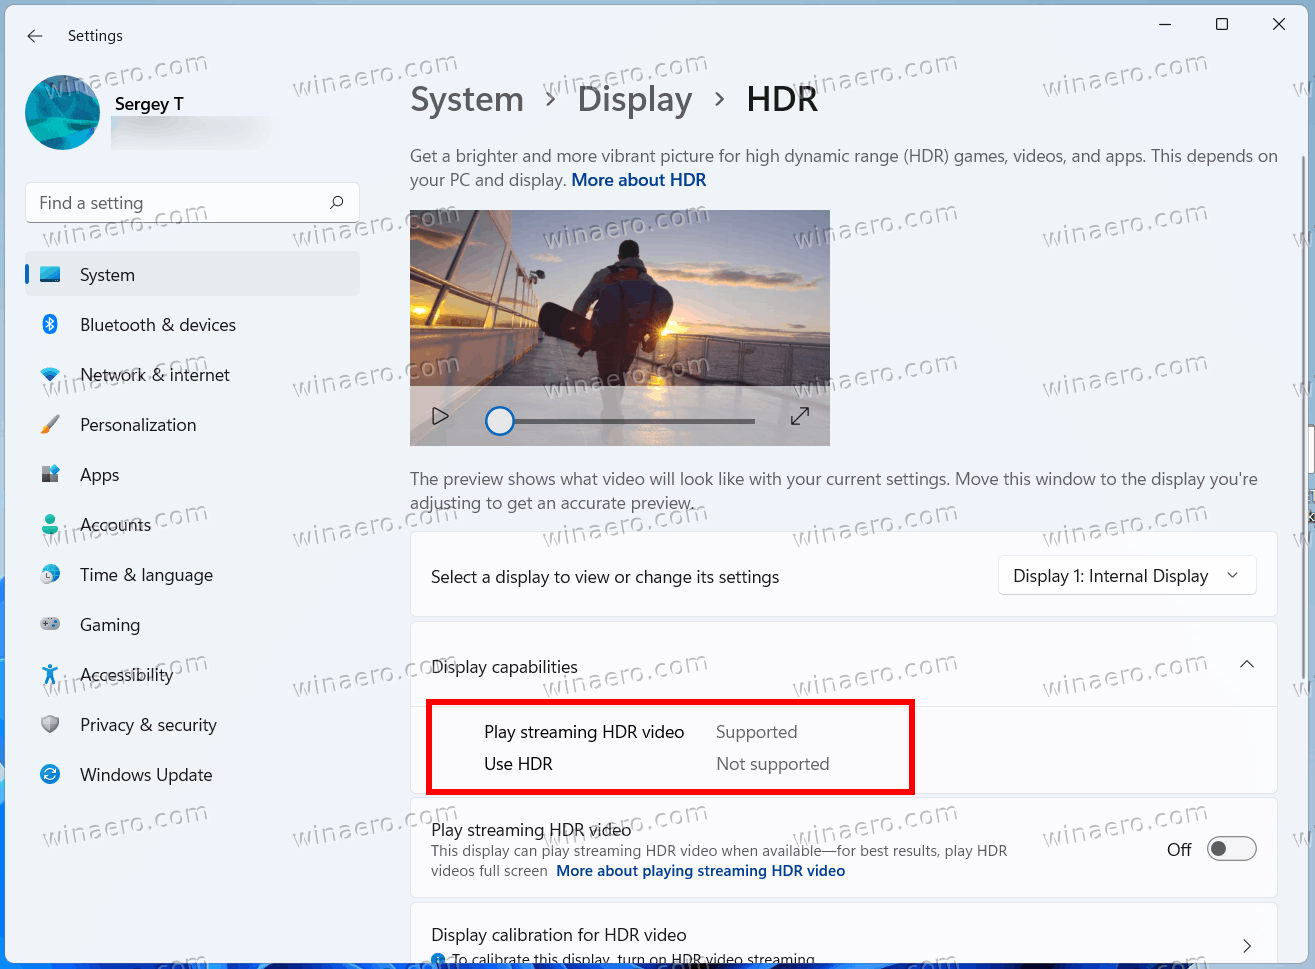
You are done. That is how you check HDR support in Windows 11.
Note that playing HDR content on an HDR-compatible laptop or tablet can cause significant battery drain. HDR uses significantly higher peak brightness, which causes your laptop or table to consume more power.
Some devices disable HDR to preserve the charge. Be sure to check the battery saver settings to allow your computer to use HDR when working from the battery.
Now, let's see how to enable or disable HDR in Windows 11.
Enable HDR in Windows 11
You can use Windows 11 Settings, Xbox Game Bar, and a keyboard shortcut to enable HDR in Windows 11. Let's review each of the methods in detail.
Enable HDR in Windows 11 Settings
To enable HDR in Settings, do the following.
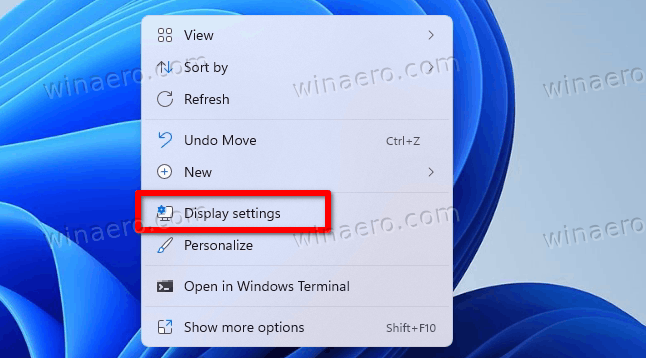
- Right-click the desktop and select Display Settings from the menu.
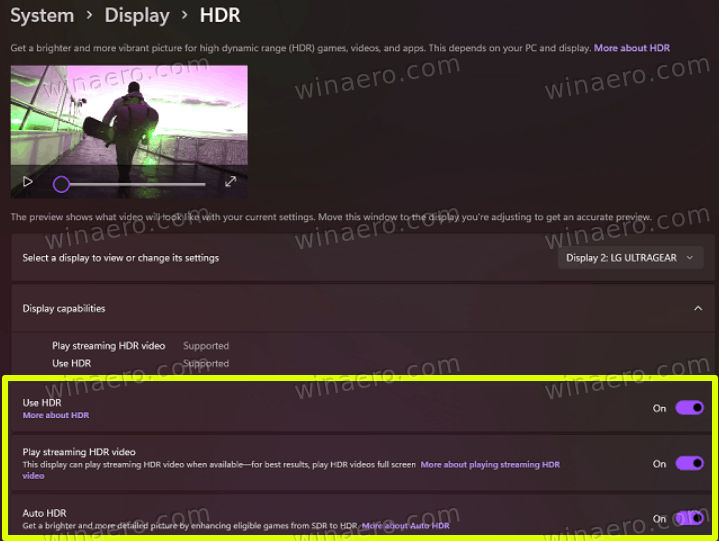
- In Windows Settings, on the Display page, scroll down to find the Use HDR toggle switch.
- Turn on the Use HDR option.
- To access advanced HDR options, click the small arrow next to the toggle switch. There, you can adjust more settings, e.g. enable HDR for video streams.
Done!
There are a few more options to turn on HDR in Windows 11. One of them is a special keyboard shortcut.
Enable HDR using a keyboard shortcut
To enable HDR, press Win + Alt + B. The screen will flicker for a moment, and the HDR feature will be enabled. Pressing the same hotkey will disable HDR.
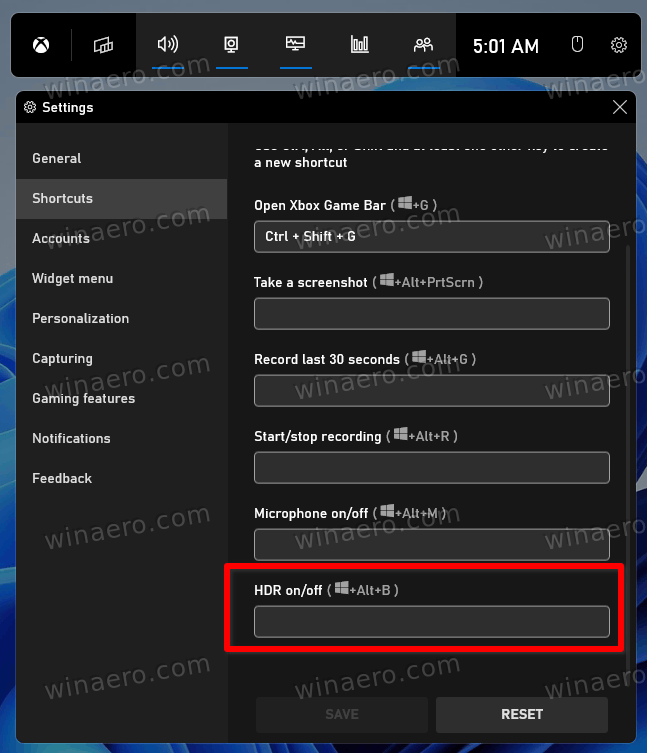
As you can see in the screenshot, the shortcut is implemented by the Xbox Game Bar app.
This is probably the most convenient way to enable the HDR feature. Additionally, you can use the Xbox Game Bar app. When your hadrware supports HDR, you can enable it from Game Bar settings.
Turn on HDR in Xbox Game Bar settings
- Press Win + G to open the Xbox Game Bar.
- Click the Settings button with the gear icon.
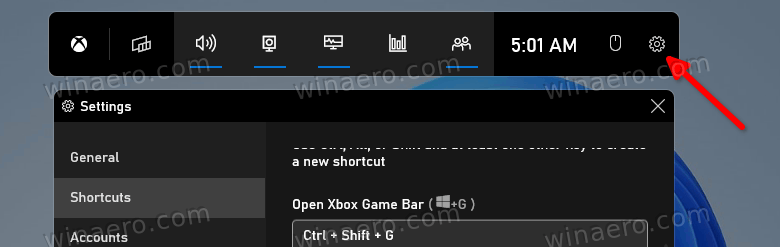
- In the Settings dialog, click on the Gaming features tab on the left.
- Turn on the Use HDR with compatible display option.
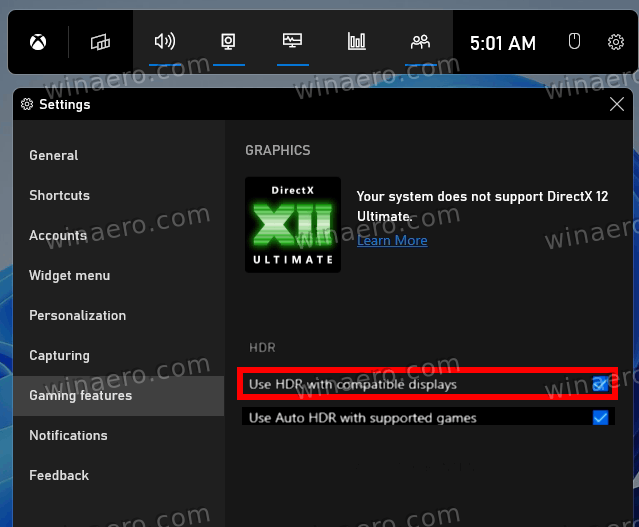
You have successfully enabled HDR.
Speaking about games, you can also enable the Auto HDR feature to improve the image quality for games initially designed for SDR. While modern titles are made with HDR by default, there are a galore of classic cool games what are SDR only. The Auto HDR feature is a newest addition to Windows that signiificantly improves the image quality by enabling HDR for such games.
Enable Auto HDR in Windows 11
To enable the Auto HDR feature in Windows 11, do the following.
- Right-click the Start button and select Settings from the menu.
- Head up to System > Display.
- Ensure that the Use HDR option is enabled. Click the small right arrow next to its toggle option.
- On the next page, turn on the Auto HDR option.
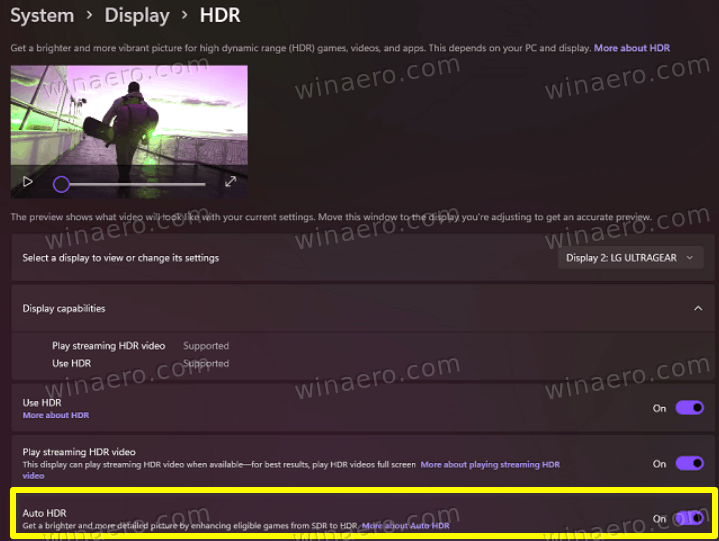
You are done.
The Auto HDR is now enabled. Now it will automatically improve the video picture when you play a compatible game in Windows 11.
Finally, you can use the Xbox Game Bar to enable Auto HDR.
Enable Auto HDR with Xbox Game Bar
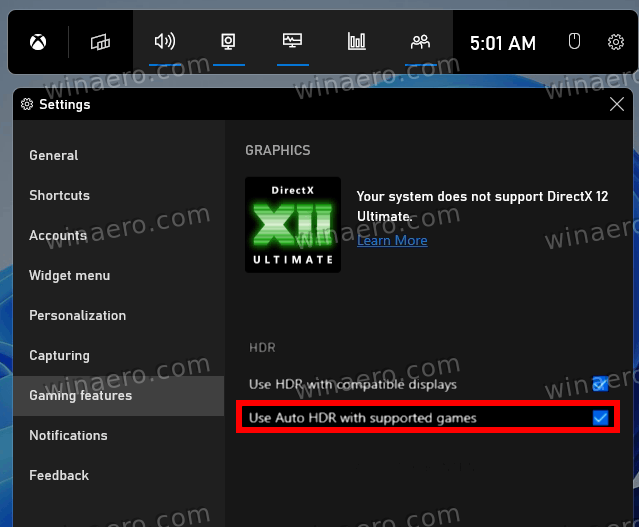
- Launch the Xbox Game Bar app (Win + G).
- Click on the Settings button on the main bar.
- On the left, select Gaming features.
- In the right pane, turn on (check) the Use Auto HDR with supported games option.
That's all about enabling the HDR feature on Windows 11.
Support us
Winaero greatly relies on your support. You can help the site keep bringing you interesting and useful content and software by using these options:
