You can enable the classic full context menus in Windows 11 using two. By default, the OS shows shorten menus with only a few items, but it is easy to disable this feature and restore the full menus that do not require clicking on More options.
Advertisеment
Windows 11 introduced drastic changes to the user interface. It comes with a new taskbar with icons aligned to the center of the screen. There is also a new Settings app, Start menu, and a galore of the other changes.
File Explorer and the shell have been tweaked a lot. For example, Explorer doesn't show the Ribbon UI. Instead, it shows a toolbar with a line of icons.
Another change is compact context menus, which only show a few items by default and hide the rest of commands by the "Show more options" entry.
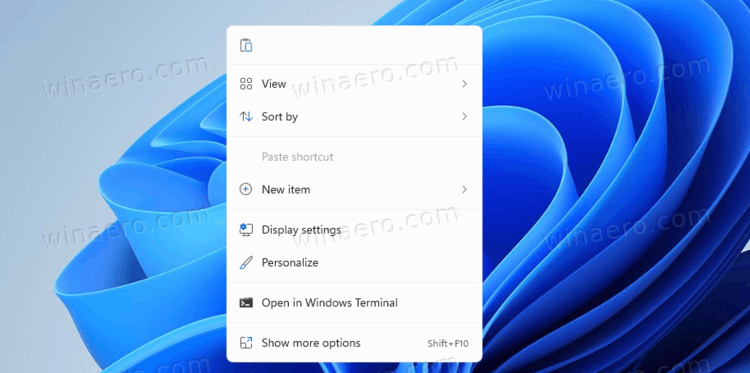
If you are not happy with this change, here is how to revert it and enable the full context menus by default in Windows 11.
You need to do the following.
Enable Full Context Menus in Windows 11
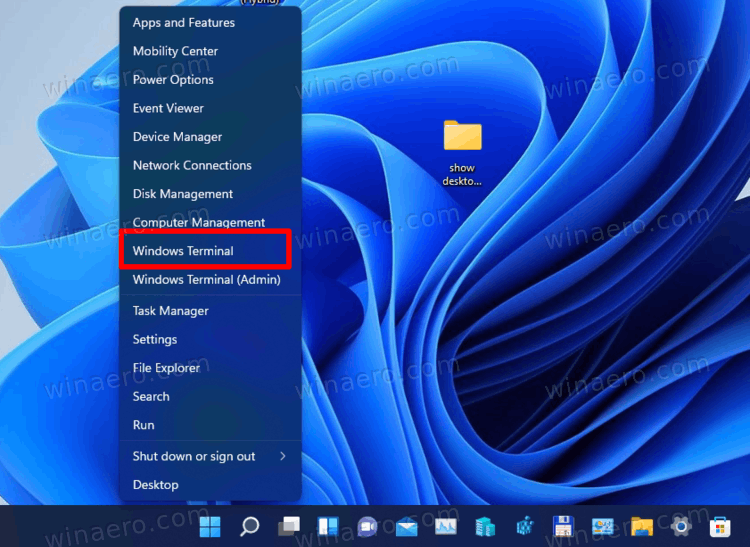
- Right-click the Start menu button and select Windows Terminal.
- Copy and paste into Windows Terminal the following command:
reg.exe add "HKCU\Software\Classes\CLSID\{86ca1aa0-34aa-4e8b-a509-50c905bae2a2}\InprocServer32" /f /ve.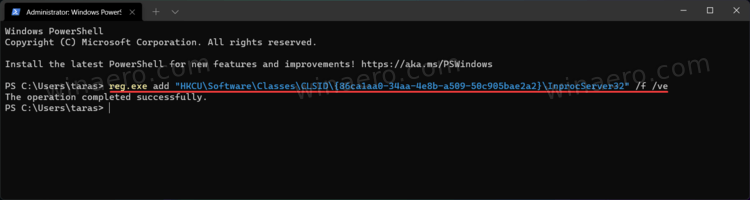
- Press Enter. The
regapp in Windows Terminal should report successful command execution. - Now, restart File Explorer in Windows 11.
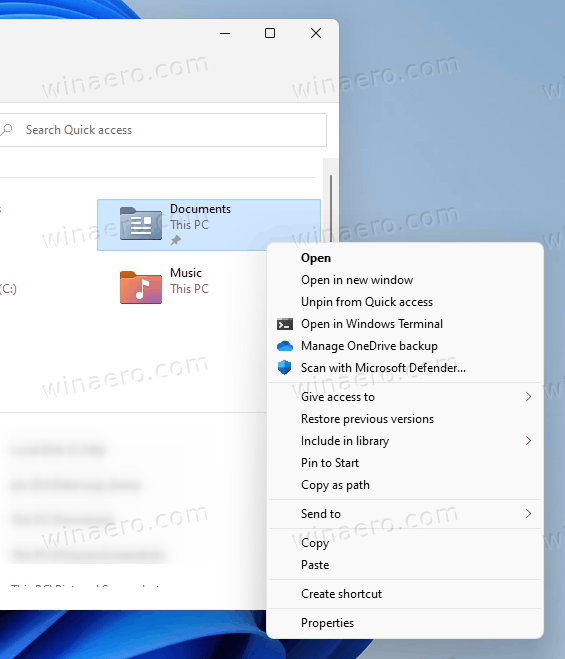
Voila, this will disable the new context menus! The Registry tweak masks the new COM object that implements the compact menus with the "Show more options" entry. Once you get this done, Explorer falls back to the classic full menus. Bingo!
The command listed above is just an automated process of creating a new key in Windows Registry, which you can also do manually. If you prefer to tweak Windows 11 manually in order to enable the full context menus, here are the steps for you.
- Press Win + R and enter the
regeditcommand to open the Registry Editor app. - Copy and paste the following link into its address bar:
HKCU\Software\Classes\CLSID. - Right-click the
CLSIDkey (folder) and select New > Key.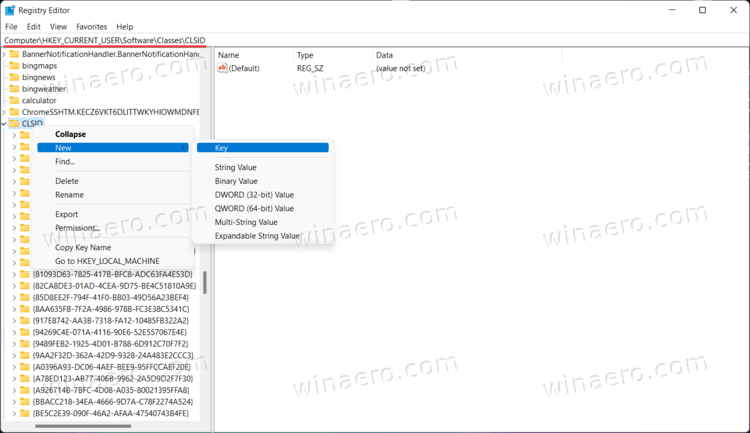
- Rename the new key to
{86ca1aa0-34aa-4e8b-a509-50c905bae2a2}.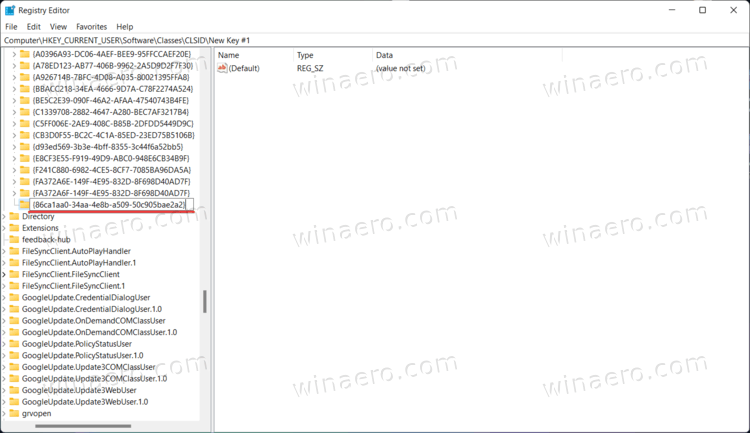
- Next, right-click the newly made key and again select New > Key.
- Rename the new key to InprocServer32.
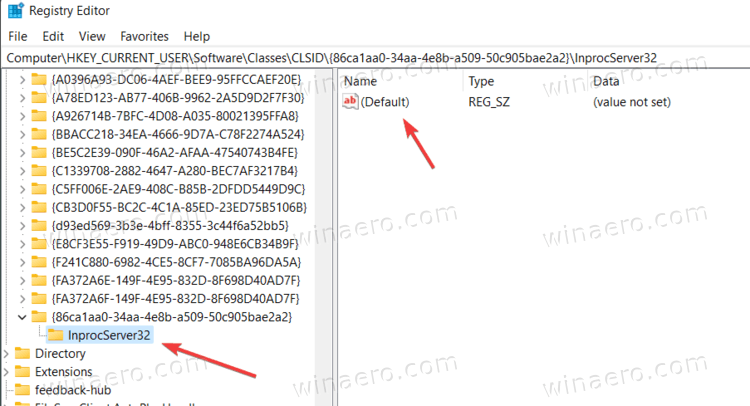
- On the right side of the window, open the "(Default)" value, then press Enter. This will set its value data to the empty text data and change it from (value not set) to blank.
- Restart File Explorer to apply changes.
You are done!
Ready-to-use Registry Files
Finally, here are the ready-for-use registry files to complete the task with a single click without complicated commands or browsing the keys of Windows Registry.
- Download registry files in a ZIP archive using this link.
- Unpack files wherever is convenient for you.
- Open the "Restore the classic context menus in Windows 11.reg" file to bring back Windows 10-styled context menus.
- Confirm changes in Windows Registry, then restart File Explorer in Windows 11.
If something went wrong or you want to restore the original context menus in Windows 11 for some other reason, do the following.
- Right-click the Start menu button
- Open Windows Terminal from the menu.
- Copy and paste the following command:
reg.exe delete "HKCU\Software\Classes\CLSID\{86ca1aa0-34aa-4e8b-a509-50c905bae2a2}" /f.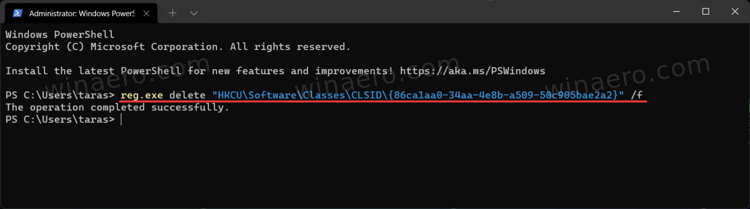
- Restart File Explorer.
Alternatively, remove two keys from Windows Registry manually.
- Press Win + R and enter the
regeditcommand to launch the Windows Registry editor. - Go to the
HKEY_CURRENT_USER\Software\Classes\CLSID\{86ca1aa0-34aa-4e8b-a509-50c905bae2a2}key. - Right-click the
{86ca1aa0-34aa-4e8b-a509-50c905bae2a2}key and select Delete. This will also remove all nested keys.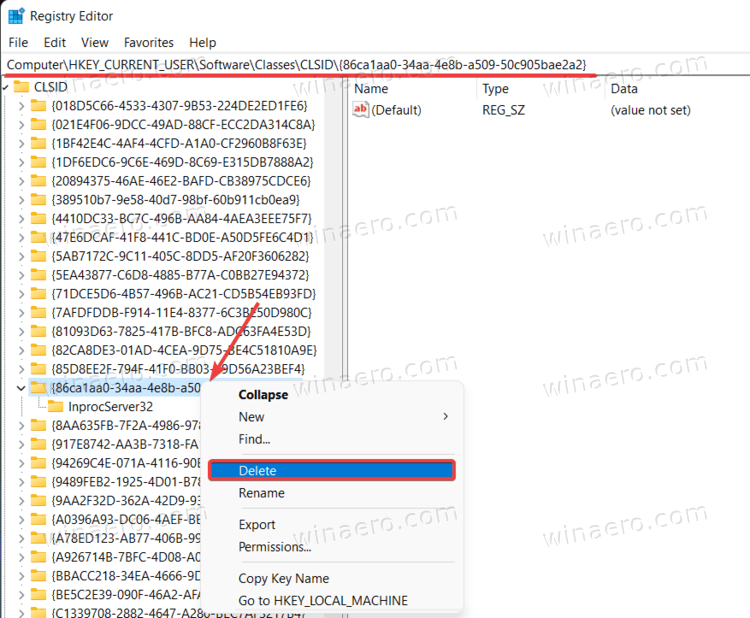
- Restart File Explorer.
You are done!
Obviously, you can use the ready-to-use registry files you have downloaded. Open the "Restore stock Windows 11 context menus.reg" file and confirm the changes to the Windows Registry. After that, restart File Explorer.
Alternative method with a Feature Management tweak
Earlier, we used to disable the new context menus using a special "Feature Management" tweak in the Registry. This tweak "tell" the operating system that the new context menus were not delivered to the current Windows machine. Currently, we find the above reviewed method more reliable, and recommend it. However, if it doesn't work for you, you can always try to go with the Feature Management option.
- Download this ZIP archive.
- Extract the two REG files from the archive you downloaded to the Desktop.
- Double-click on the file Enable classic context menus in Windows 11.reg.
- Click Yes the User Account Control dialog to modify the Registry.
- Restart Windows 11 to apply the change.
Done!
After you restart Windows 11, you will no longer have compact context menus on Windows 11. If you right a file, folder, or the Desktop background, you will see the full context menu instantly.

For your convenience, there is also an undo file in the archive named Restore default context menus in Windows 11.reg. It will allow you to revert the change and get back the default menu style.
Double click on that file, confirm the UAC prompt, and restart Windows 11. The default compact context menus will be restored.
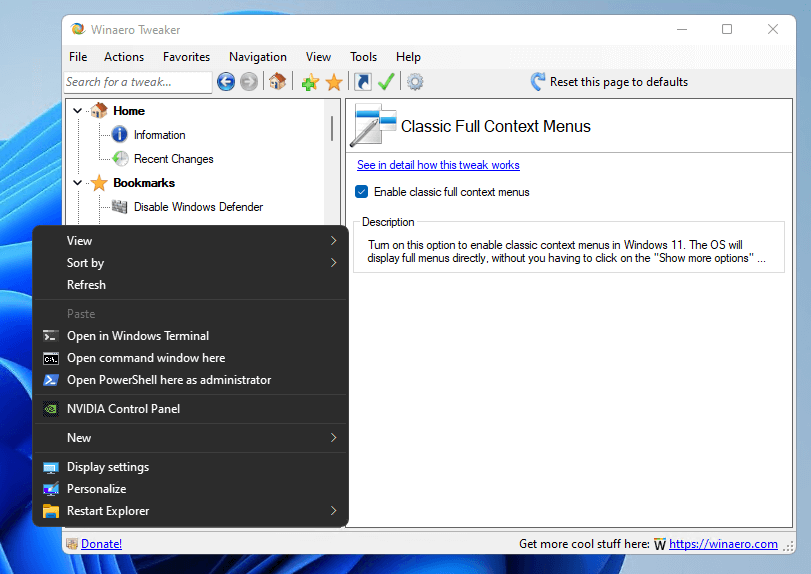
Using Winaero Tweaker
To save your time, you can also use Winaero Tweaker. It now includes a special option to enable the full context menus with one click. Check out the following screenshot:
You can download Winaero Tweaker using the following link:
Finally, here is one more method to achieve the same.
Windows Insiders can use ViveTool to get rid of the compact menus. As of this writing (2022/21/22), Dev channels builds have a hidden option that turns on the full right-click menus by default.
To disable shorten right-click menus and enable full context menus, do the following.
- Download ViveTool from GitHub and extract its files to the c:\vivetool folder.
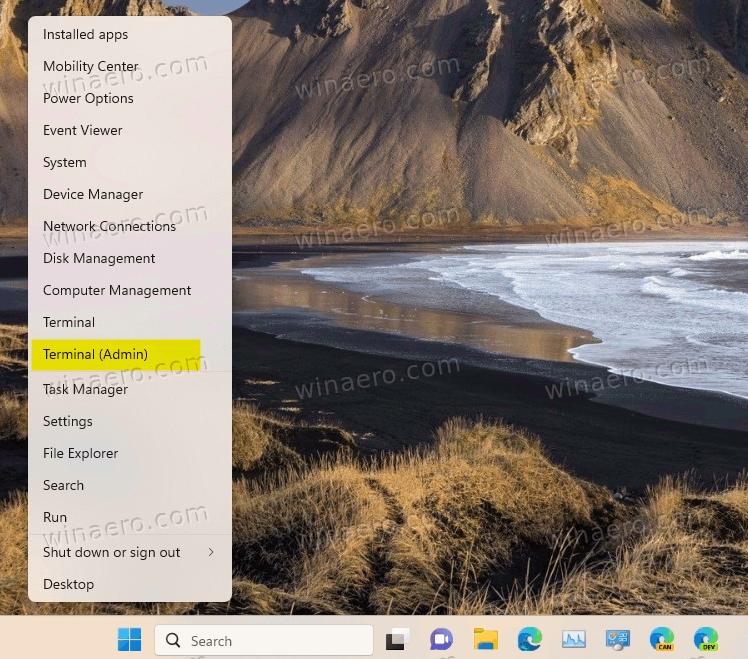
- Right-click the Start button in the taskbar and select Terminal(Admin) from the menu.
- Finally, type the following command and press Enter:
c:\vivetool\vivetool /enable /id:39696859.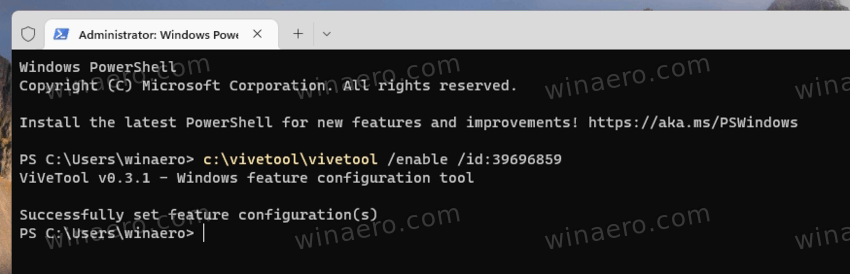
- Restart Windows 11.
Again, this only applies to the Dev channel releases as of this writing. Eventually, it may or may not become an user-friendly option somewhere in the GUI.
If you need to undo the change made with ViveTool, here is the opposite command: c:\vivetool\vivetool /disable /id:39696859.
That's it.
Support us
Winaero greatly relies on your support. You can help the site keep bringing you interesting and useful content and software by using these options:

This does not work with Windows 11 build 22000.65
Yep. I’ve noticed.
Do you have a fix for this?
not yet.
the post has been updated to include a working method.
Explorer no longer shows the menu. I have tried a number of things, and looked through all the tweakt in WinAero Tweaker, but I can’t figure out how I lost the menu, nor (more importantly) how to get it back. This article seems to cover that, but I don’t find the entry CLSID in HKEY_CURRENT_USER\Software\Classes\ where you say it is supposed to be. Also, you refer to that spot as HKCU, which I suppose stands for HKEY_CURRENT_USER, but when instructing folks how to edit the registry, perhaps it would be best not to abbreviate things?
Friends, this is a developer version, not even beta so to speak.
What sense does it make at such an early stage of development to immediately change and tweak everything.
Any further update will surely overwrite your settings.
Just wait and see how everything develops, if it doesn’t work for you in the end, you can always make changes, right?
A nice rest of the week to you.
Unimaginative fools like you are why we don’t have nice things. Learning how to change it NOW so that its easier to do so later is paramount to this stuff
You are the one who immediately want to change everything back to legacy and you call him an unimaginitive fool. F~~k logic.
2 Years later and the “new” context menu is still a barren piece of sh~. Microsoft’s own people building VS Code still haven’t implemented the new menu integration correctly. You and all the other bootlickers are the f~~~~g fools.
They removed the print and send to options from context menu.
Is there any way to make the selection taller with some padding on top and bottom? Now the blue bar selection is very narrow with no padding. Thanks! Works great on 22471.1000
I bet it is a theme feature. I can be wrong.
Right click menu restore works well.
Does not work for the taskbar (the handy way to invoke task mgr).
Great!!!!!!!! You save my live.
THANK YOU!
Still works in 22h2, thanks :)
I really hate how the new menu resizes itself after you open it and the items move around.