You can create a local account in Windows 11, which is an offline account. Unlike the Microsoft account, it doesn't require an Internet connection to be fully functional. You can create such an account for your private tasks or for some of your family members.
Advertisеment
As you may already know, modern Windows support two account types. The first one, Microsoft Account, is an online account. Microsoft actively promotes this type of account. It connects the user to Microsoft's very own ecosystem, similar to what Android has. So, with your Microsoft Account, you can sync your Windows settings, browser bookmarks, store files in OneDrive, use Microsoft Office online and maintain its subscriptions, all across your devices. Additionally, Microsoft account needs some extra info from you, like your phone number, your location, and more.
The local account is a different story. It is a classic, offline account. It doesn't require you to be connected to the cloud, or to share your identity data. Also, it can be password-free. Unlike a Microsoft Account, the local account doesn't require you to have a password, PIN or any other protection layer to sign into the OS.
Let's see how to create a new Local Account in Windows 11.
Create a Local Account in Windows 11
There are several ways to add a new local account in Windows 11. You can use the Settings app, a classic Control Panel applet, the Computer Management tool, and even the good old net command line tool. Let's review these methods.
Using Settings
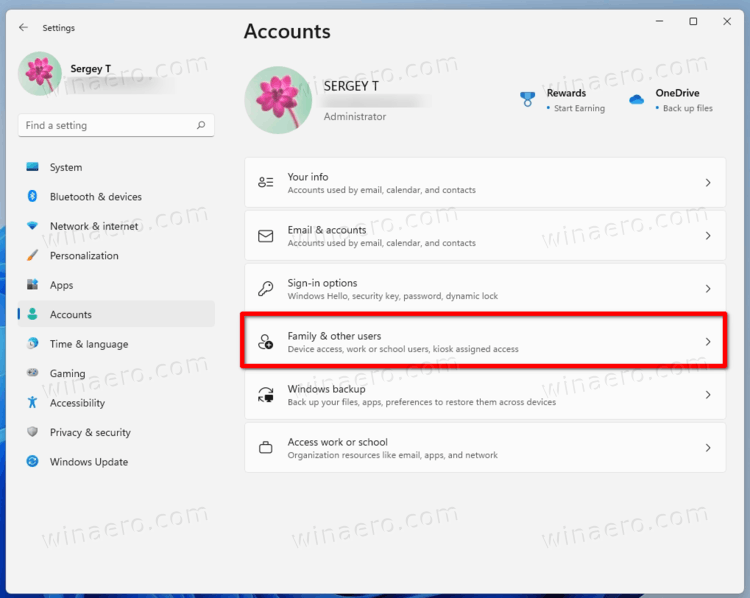
- Open the Settings app (Press Win + I).
- Click on Accounts on the left.
- On the right, click on the Family & other users item.
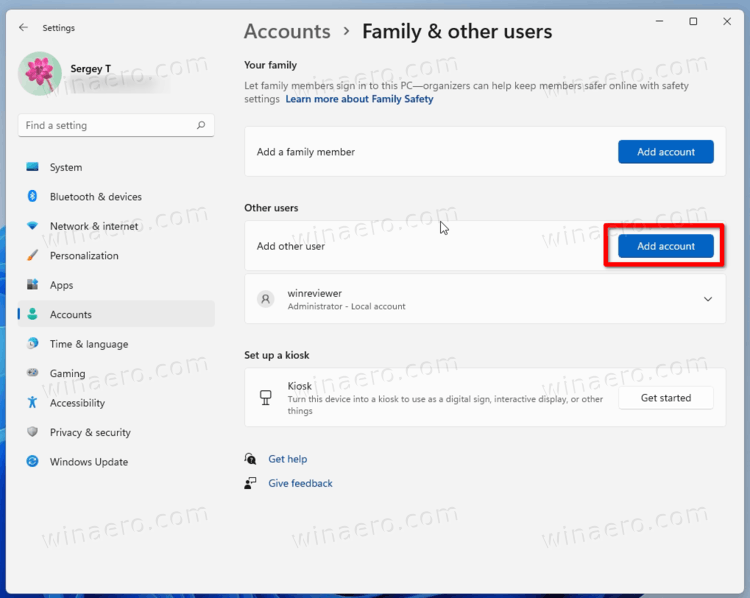
- Now, click on the Add account button inside the Add other user box.
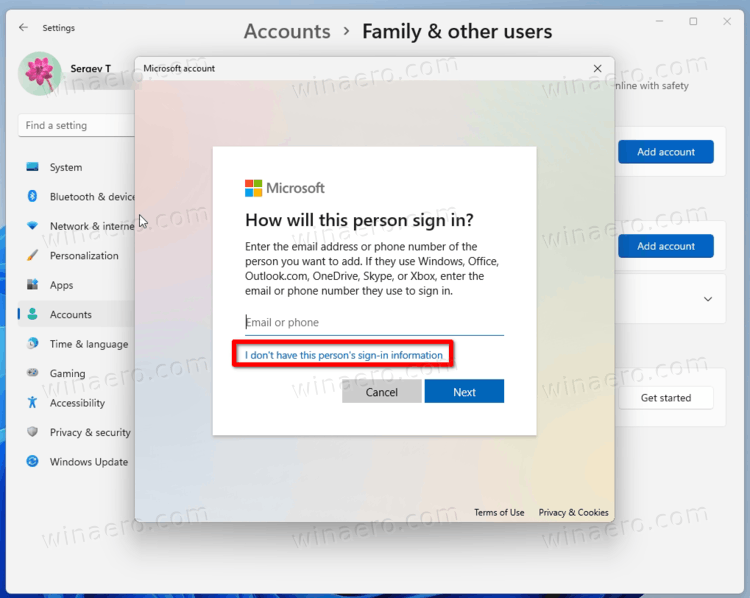
- In the next dialog, click I don't have this person's sign-in information.
- Now, click on Add a user without a Microsoft account link.

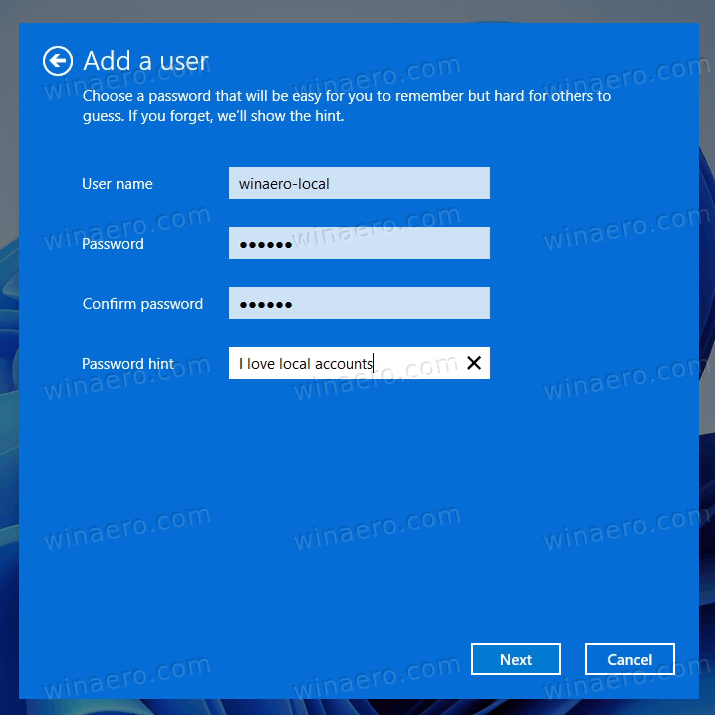
- Enter the desired user name for your local account.
- If you want, you can specify the password.
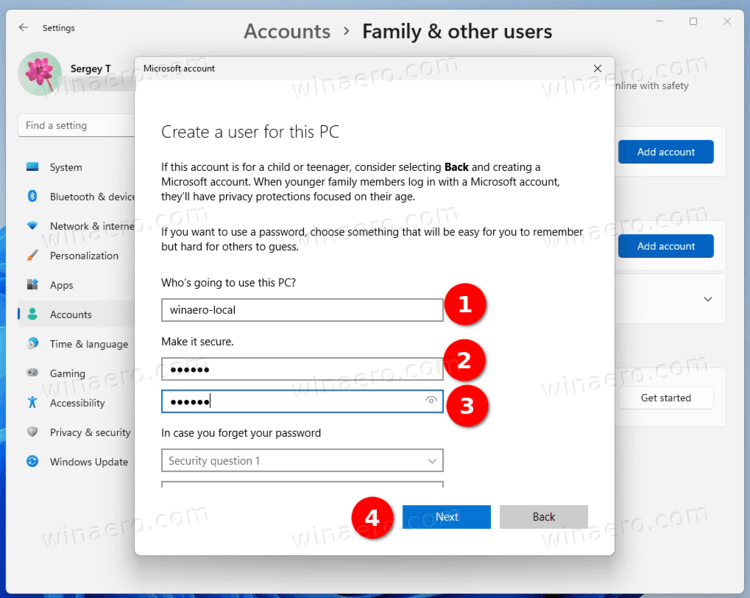
- If you set a password, it will ask you for security questions and answers. They will allow you to reset your password on the sign-in screen when needed.
- Click on Next, and you have successfully created a new local account.
Create a Local Account in Windows 11 with netplwiz
To add a local account, you can use netplwiz, one of the classic Control Panel applets available in all modern Windows versions.
- Press Win + R to open the Run dialog, and type
netplwiz.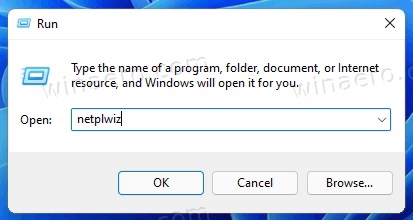
- On the Users tab, turn on (check) the Users must enter a user name and password to use this computer option. See the note below if you don't have such an option.
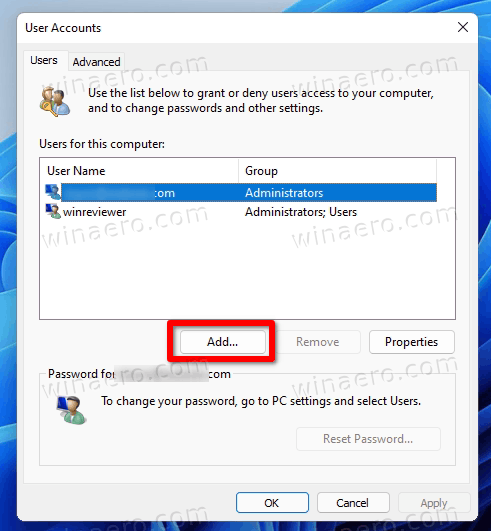
- Click on the Add... button.
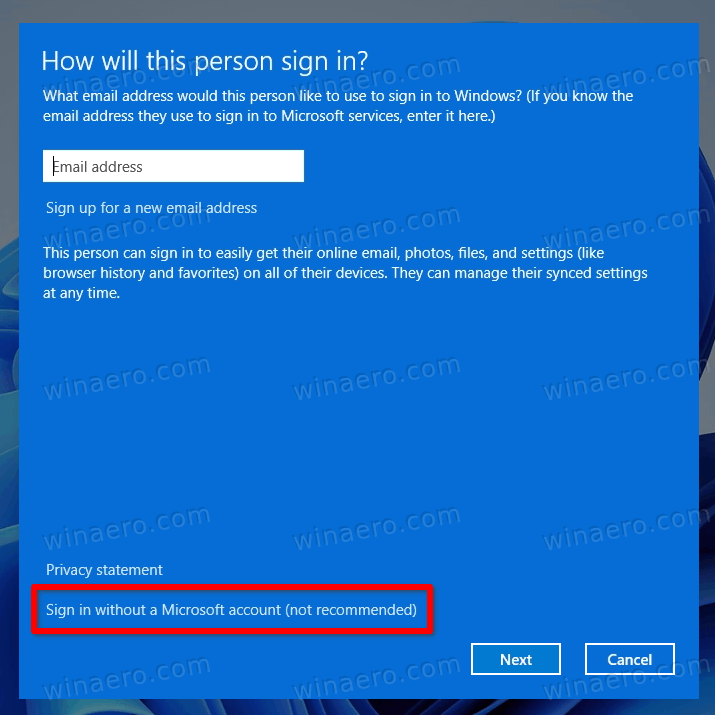
- In the next dialog, click on the Sign in without a Microsoft account link.
- On the next page, click on the Local account button.
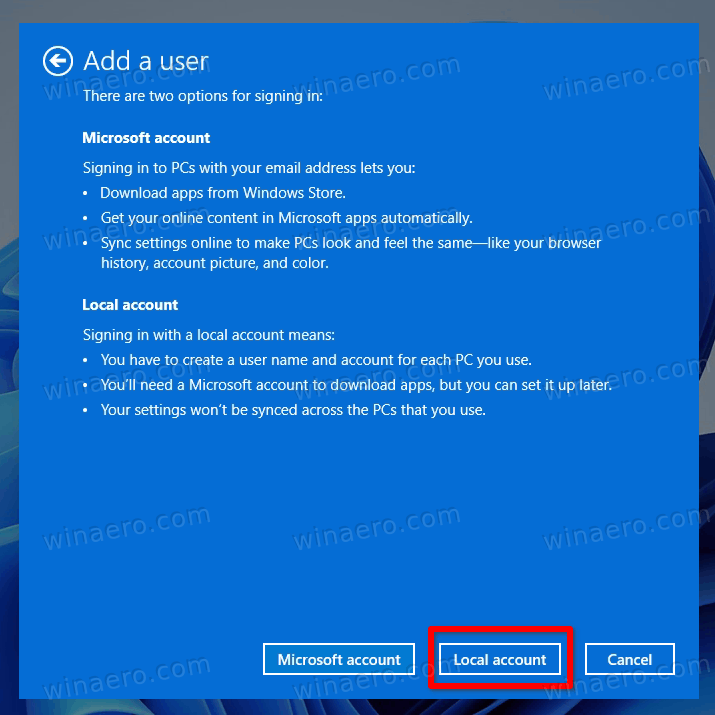
- Specify a user name, password, and password hint you want for the new local account, and click Next.
- Click on the Finish button. The local account is now created.
Create a Local Account in Computer Management
- Enter the
compmgmt.msccommand into the Run window (Win + R).
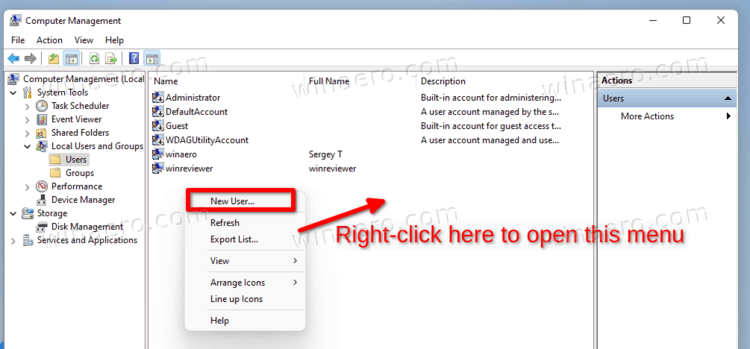
- Expand open the left tree to Local Users and Groups > Users.
- Right-click anywhere on the empty space in the middle column, and select New user... from the menu.
- Enter the desired User name, a password if needed (twice, the second time in Confirm password:), and check/uncheck options like Password never expires, User must change password at next logon, etc, for what you want.
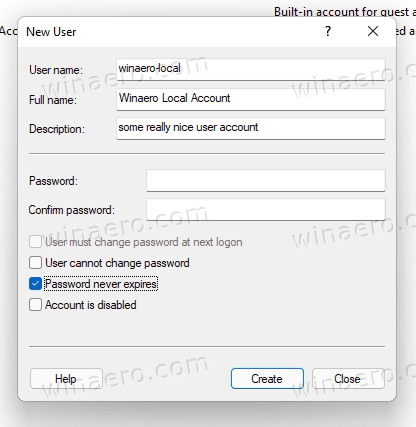
- Click on Create.
That's how you can create a local account in Windows 11 with the Computer Management tool.
Add a Local Account using the Net tool
The net command should be already familiar to many Windows users. It has a long history in the OS. It was first introduced decades ago, and is still actual for many administrative tasks. For instance, you can use it to enable the built-in Administrator account.
To create a local account in Windows 11 with the net tool, do the following.
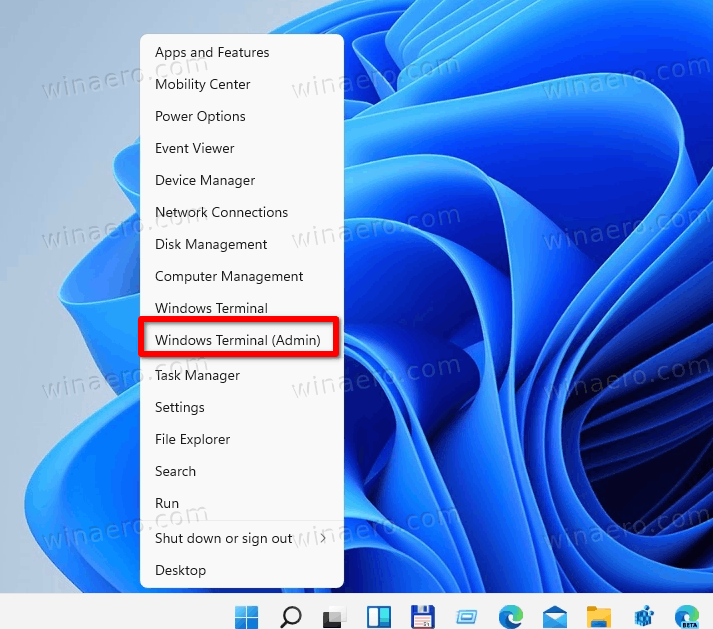
- Open Windows Terminal as Administrator, e.g. press Win + X and select Windows Terminal (Admin).
- To add a local account without a password, type
net user "UserName" /add, and press Enter.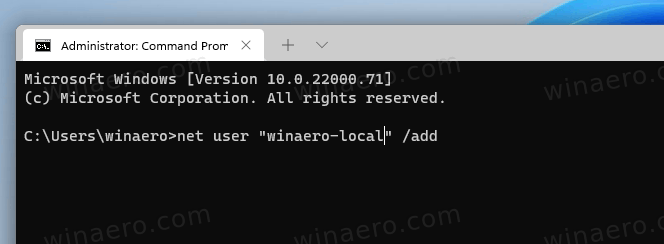
- To add a password-protected local account, enter
net user "UserName" "Password" /add. - Substitute
UserNamewith the actual user name. Do the same for the "Password" portion in the step 3. - You can now close the elevated Windows Terminal.
That's all about the topic.
Support us
Winaero greatly relies on your support. You can help the site keep bringing you interesting and useful content and software by using these options:
