This article explains two ways to change the User Account Image in Windows 11 for both local account and Microsoft account. In Windows 11, Microsoft reworked the out-of-box experience (OOBE), enabling users to set up more settings and customize the system during the first start. One of the changes includes the ability to rename a PC in Windows 11. Still, there is no way to change the account image in Windows 11 during the initial setup.
Advertisеment
One of the reasons is that Windows 11 forces people to use Microsoft accounts and gets the account image from the specified Microsoft account.
Microsoft allows users to change the profile picture in Windows 11 regardless of the account type. Either a local profile or a Microsoft Account, you can change the account image in Windows 11 with the help of this article.
To change the user account image in Windows 11, do the following.
Change User Account Image in Windows 11
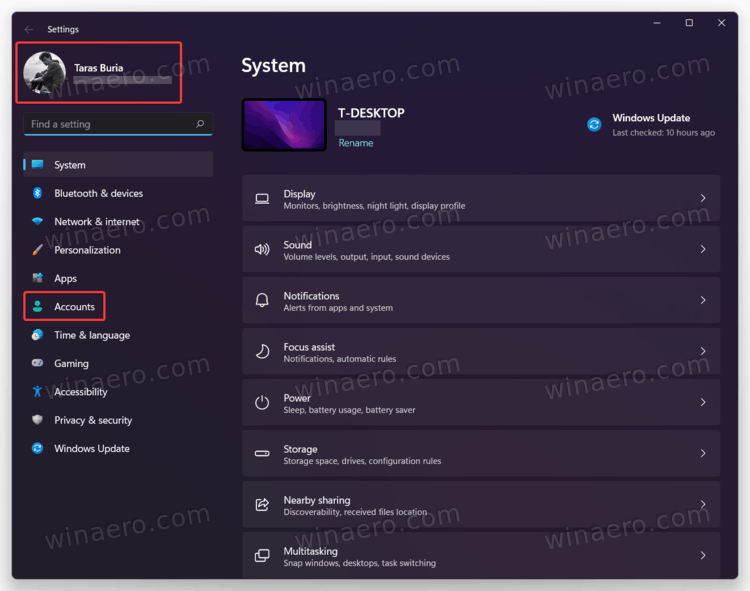
- To begin, open Settings in Windows 11. You can use the Win + I shortcut or any other method.
- Click on your profile in the upper-left corner of the window. Alternatively, go to the Accounts section.
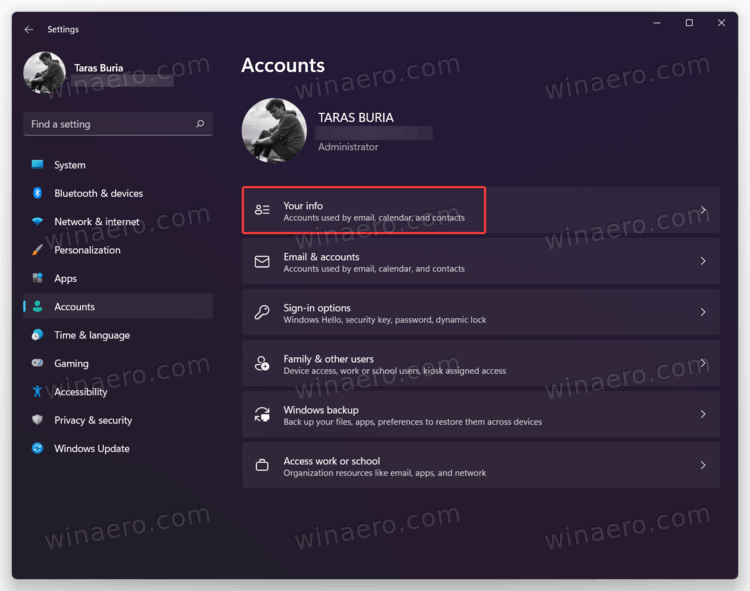
- On the next screen, click the Your Info button.
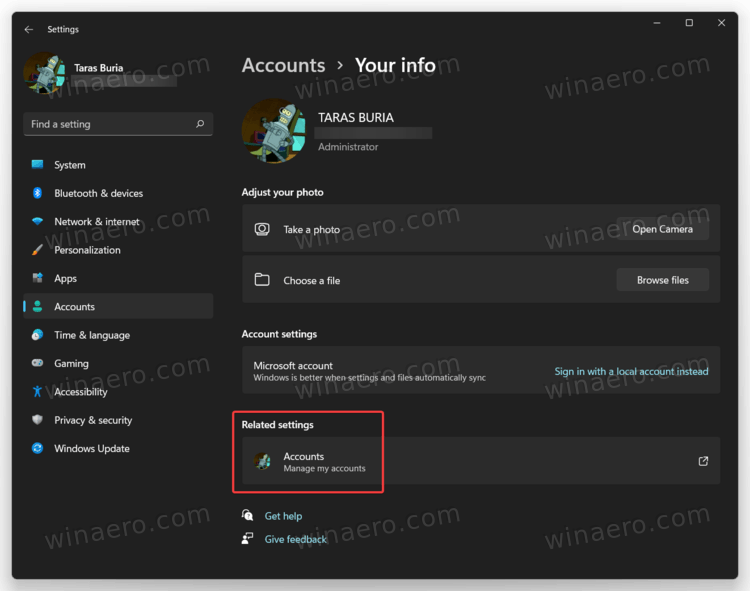
- Next, click the Browse files to pick an existing image you want to set as the profile image in Windows 11.
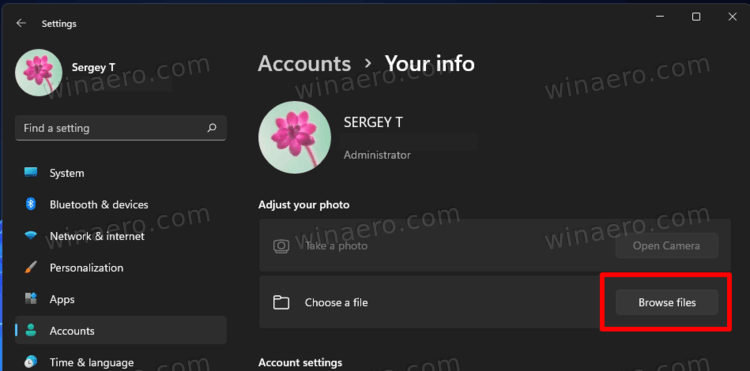
- Another option is to take a new profile picture using a built-in front or rear camera. To do so, click the Open Camera button.
- Now, change the image's position and or zoom, then click Done to save changes.
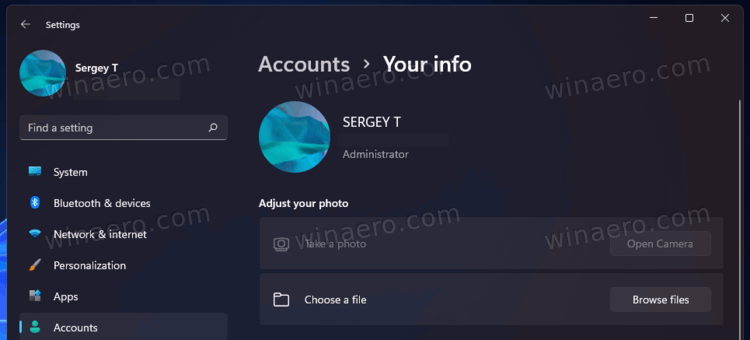
Note: Although Windows 11 lets you use a GIF file as a profile image, it remains static once applied. Unfortunately, Windows 11 does not support animated account pictures officially. Still, if you desperately want a GIF as a profile picture, use this guide that describes how to set an animated user profile image in Windows 11 and 10.
Finally, if you use a Microsoft Account, you can change the profile picture in Windows 11 by changing your avatar online, on the Microsoft Account website.
Change the user account picture for a Microsoft Account
- Go to the Microsoft Account website using the account.microsoft.com link.
- Alternatively, open Windows Settings(Win+I), then go to Accounts > Your Info.
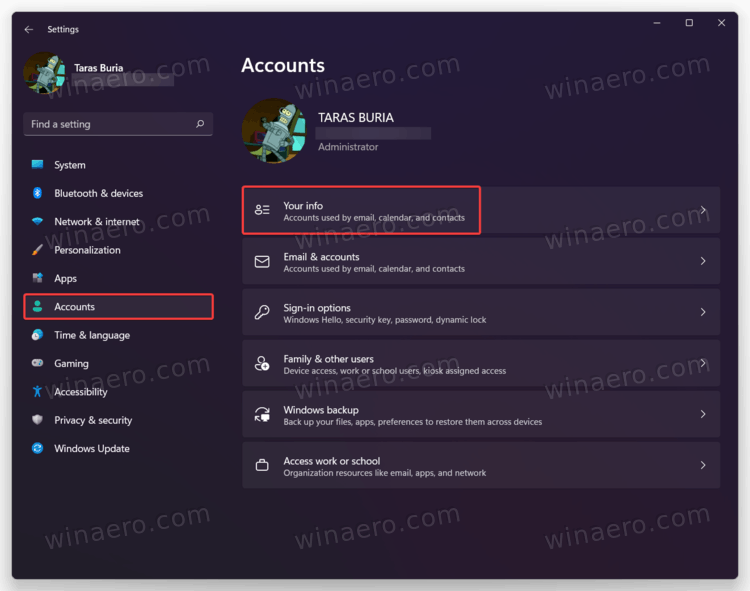
- Click the Accounts > Manage my accounts button. That button will take you to the Microsoft Account website in your default browser.
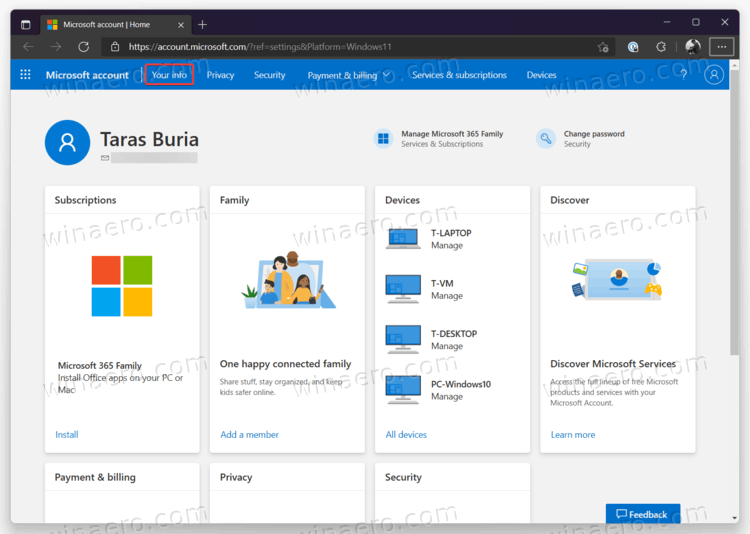
- Sign in with your Microsoft Account, then click the Your Info link on the toolbar.
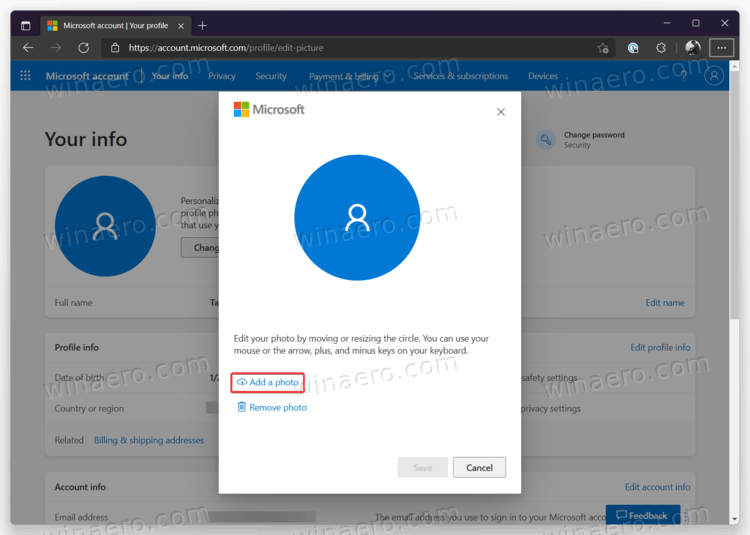
- Next, click the Change photo button.
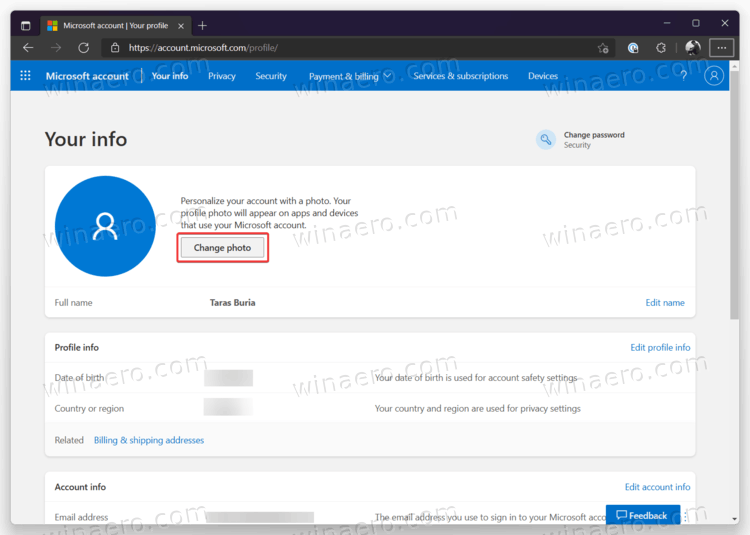
- Click the Add a photo link, then select a new profile image.
- Press the Save button.
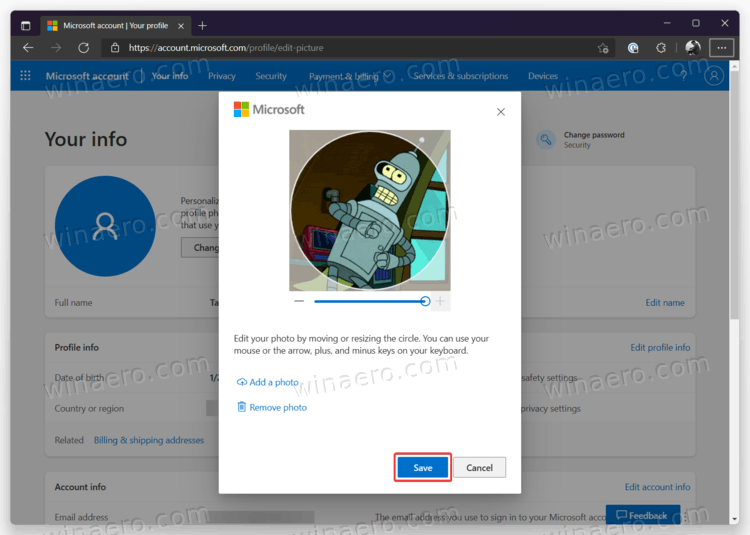
Note that it might take some time for Windows 11 to download and display your new profile image. Usually, it takes less than a day to apply the changes.
That's it. Now you know how to change the profile image in Windows 11.
Support us
Winaero greatly relies on your support. You can help the site keep bringing you interesting and useful content and software by using these options:
