In Windows 8 and Windows 8.1, the Start Screen is designed as the touchscreen-friendly Start menu replacement. It allows you to customize its layout as you want. You can pin and unpin your favorite apps and documents as tiles there, in the order you want. Once you have organized your Start screen layout according to your personal preferences, you might want to backup the layout for further use, e.g. to use it again after a re-install of Windows. Here's how you can back up the customized layout that you have.
Advertisеment
In Windows 8 RTM, every single installed app's EXE was pinned automatically to the Start screen, creating a real mess of random icons splattered all across the Start Screen in no logical order or groups. Thankfully, in Windows 8.1, Microsoft has changed this behavior. Windows 8.1 does not pin anything automatically, so you are able to keep your Start Screen well organized.
The Start screen keeps almost all data related to pinned apps and tiles in the following file:
%LocalAppData%\Microsoft\Windows\appsFolder.itemdata-ms
You need to backup this file. To do that,
1. Locate the appsFolder.itemdata-ms file
To locate the appsFolder.itemdata-ms file, you may also use the following trick:
- Press Win+R keys together on your keyboard. The "Run" dialog will be displayed on the screen.
- Type the following:
shell:Local AppData
Tip: You can get the full list of shell commands from here: The full list of shell commands in Windows 8.
2. Exit Explorer:
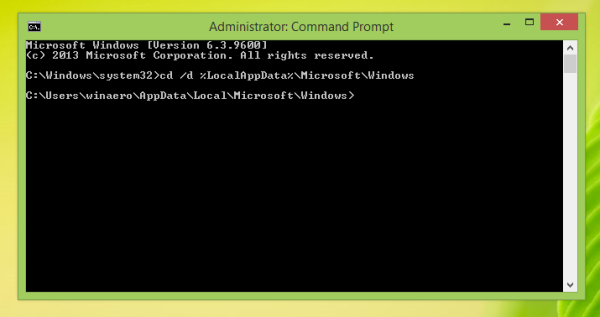
Before you leave the Explorer shell, open an elevated command prompt and type:
cd /d %LocalAppData%\Microsoft\Windows\
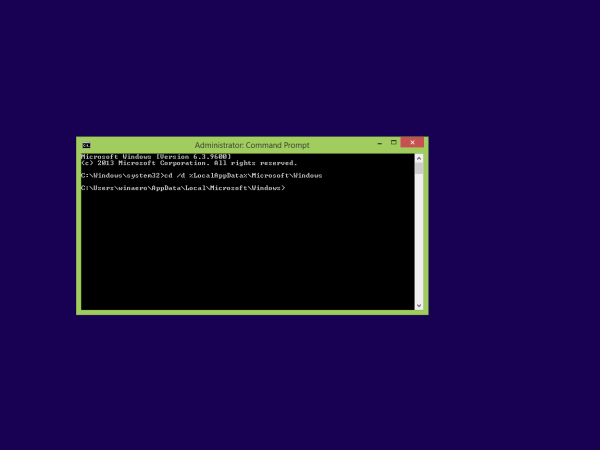
 Do not close this window, leave it open, so you can use it later after you exit Explorer.exe.
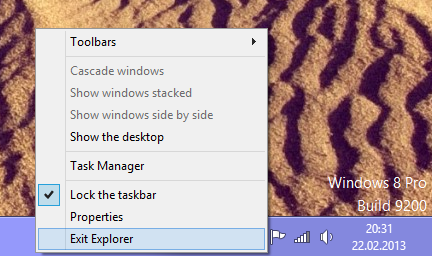
To exit the Explorer shell, use the secret "Exit Explorer" context (right-click) menu item on the Taskbar or Start Menu, which is described well in my following article: "How to properly restart the Explorer shell in Windows".
 Your Desktop wallpaper and the taskbar will disappear:
3. Create a backup of your Start Screen layout
Enter the following command in the elevated command prompt window:
copy appsFolder.itemdata-ms c:\backup\*.*
Replace the path (c:\backup) with the actual path on your PC. If your path contains spaces, include it in quotes, i.e.:
copy appsFolder.itemdata-ms "c:\my backup\*.*"
That's it. Now you have a backup of your Start screen layout.
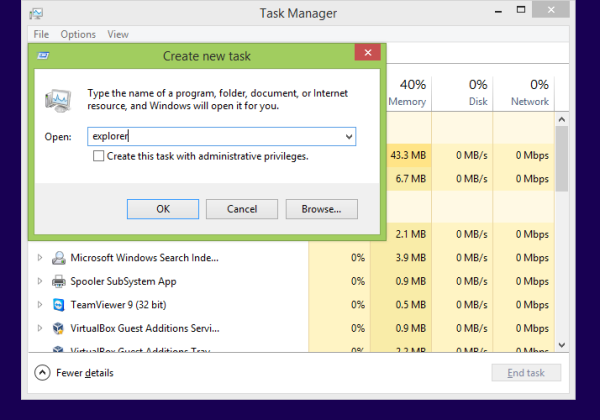
Run Explorer again. Press Ctrl + Shift + Esc keys together on your keyboard. It will open the Task Manager. Choose File -> Run new task and type explorer in the 'Create new task' dialog:
4. Restore backup of your Start screen layout
After you reinstall your OS, you will be able to restore the Start screen layout quickly. You need to perform these simple steps:
- Open an elevated command prompt.
- Exit explorer.
- Enter the following command:
copy /y c:\backup\appsFolder.itemdata-ms "%LocalAppData%\Microsoft\Windows\appsFolder.itemdata-ms"
- Start Explorer again.
Now, when you open the Start screen, you will see your previous customized Start screen layout. It is also possible to transfer it between multiple PCs.
Support us
Winaero greatly relies on your support. You can help the site keep bringing you interesting and useful content and software by using these options:


Thanks mate.
You are welcome
very useful! thanks!
Indeed, very useful tutorial.
Thank you !
One question : is it still / also possible to get the same results by simply backing up the -ms and -ms.bak files and, after an eventual Windows reinstall, restoring them by overwriting the existing files ?
Thanks for your opinion on this procedure ! :-)
I think it will work.
Oooops, why was my previous comment (from earlier today) not published ?
I didn’t mean to be unpolite or something like that; I just wanted an advice on what I wrote …..
Forget this comment : I see that my previous comment is there again. Sorry for the inconveniences caused ….. :-(
I am sorry!
I was ill and was not able to check comments
No problem, Sergey, and thanks for your advice on this.
Take care of yourself ! :-)
Thank you for understanding
Sergey, is this method works in Windows 10?
Nope, it doesn’t work any more.