If you are customizing power plans included in Windows 10, it can be useful to export them to a file. Using that file, you'll be able to restore your power plan settings quickly after reinstalling the OS, or deploy it on multiple PCs. Here is how it can be done.
Advertisеment
By default, Windows 10 includes power plans like High Performance, Balanced, Power Saver, etc. These plans are designed to quickly let you switch a group of hardware and system power settings (like display, sleep, etc). Your PC can have additional power plans defined by its vendor. These power settings affect how long your battery lasts and how much power your PC consumes. It is possible to customize these power plan settings using advanced power options.
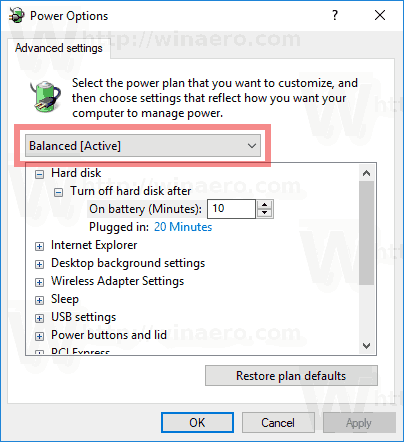
Windows 10 comes with a new UI again to change the operating system's power related options. The classic Control Panel is losing its features and probably will be replaced by the Settings app. The Settings app has already got many settings which were exclusively available in the Control Panel. The battery notification area icon in the Windows 10 system tray was also replaced with a new Modern UI. If you want to export your power plans quickly, there is no GUI way yet. So instead, you should use a console tool, powercfg.exe.
The powercfg.exe console utility exists in Windows since Windows XP. Using the options provided by that app it is possible to manage various power settings of the operating system. It can be used to export your power plan options to a file.
To export a power plan in Windows 10, do the following.
- Open an elevated command prompt.
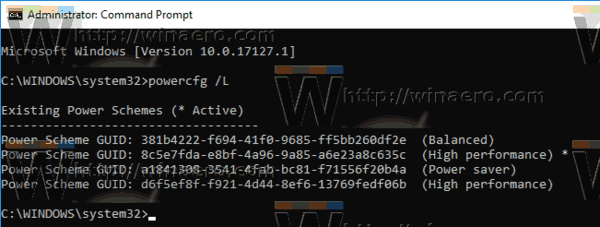
- Type the following command to list all the available power plans:
powercfg.exe /L.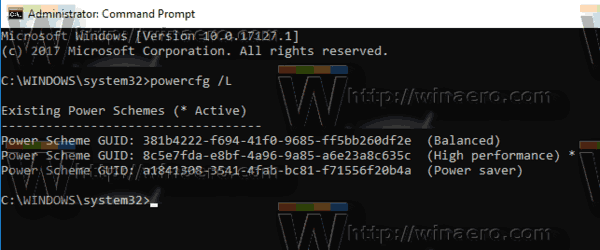
- You can see that every power scheme in Windows has its own GUID. Note the GUID of the power plan you want to export.
- Execute the following command:
powercfg -export "%UserProfile%\Desktop\PowerPlan.pow" GUID. Replace the GUID portion with the actual GUID value. Also, you can change the page to the backup file (*.pow).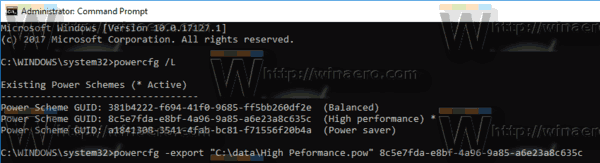
You are done. The sample command can look as follows.
powercfg -export "C:\data\High Peformance.pow" 8c5e7fda-e8bf-4a96-9a85-a6e23a8c635c
Using the command above, you will export the High Peformance power plan to the file C:\data\High Peformance.pow. Now, let's see how to import the power plan you have exported earlier.
Import a Power Plan in Windows 10
- Open an elevated command prompt.
- Type the following command:
powercfg -import "The full path to your .pow file". - Provide the correct path to your *.pow file. You will get something like this:
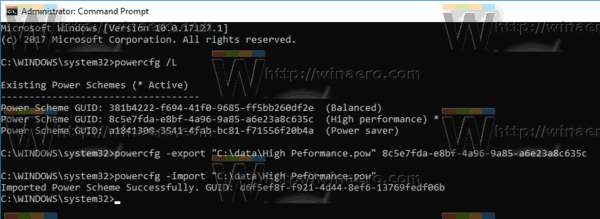
- The power plan is now imported and has its own GUID.
Now, you can list your power plans with the powercfg /L command.
To activate the imported power plan, execute the following command:
powercfg -setactive GUID
Of course, you can switch the power plan using the GUI.
That's it.
Related articles:
- Add Switch Power Plan context menu to Desktop in Windows 10
- Add Power Options Context Menu in Windows 10
- Add Energy Saver to Power Options in Windows 10
- How to Restore Power Plan Default Settings in Windows 10
- How to open advanced settings of a power plan directly in Windows 10
Support us
Winaero greatly relies on your support. You can help the site keep bringing you interesting and useful content and software by using these options:

I have found this article searching the usage of powercfg.exe command because I needed to remember the export/import method. In other websites people didn’t mention the -setactive switch so many thanks!
Thanks for the guide!!! It helped me to ask other person to export their power plans for a Lenovo Legion 5 Pro. Like you said, is important to put the whole full path. Even if you are already in the same folder than the pow file, will say that file not found :D
Great, thanks!