Windows 10 includes the ability to automatically empty your Recycle bin, delete temporary files, and remove a number of other files to free up disk space. This is possible with the Storage Sense feature. However, if you are not happy with this new feature of the OS, you can disable it. This can be done with either Settings, a Registry tweak, or by applying a Group Policy option.
Advertisеment
Storage Sense is a nice, modern replacement for Disk Cleanup. It allows you to maintain certain folders by preventing them from getting too large and clean them up automatically. The Storage Sense feature can be found in Settings, under System -> Storage.
Storage Sense can be used to remove Windows upgrade log files, system-created Windows Error Reporting Files, Windows Defender Antivirus temporary files, Thumbnails, Temporary Internet Files, Device driver packages, DirectX Shader Cache, Downloaded Program Files, Delivery Optimization Files, old System log files, System error memory dump files and minidumps, temporary Windows update files, and more.
If you find no use for Storage Sense or just not happy with its behavior, you can disable it.
To disable Storage Sense in Windows 10, do the following.
- Open Settings.
- Go to System - Storage.
- Turn off the Storage sense option on the right.
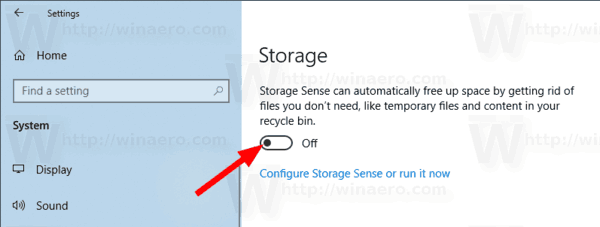
You are done. Alternatively, you can apply a Registry tweak.
Disable Storage Sense with a Registry Tweak
First of all, ensure that you are signed in as Administrator before proceeding. Now, do the following.
- Open the Registry Editor app.
- Go to the following Registry key.
HKEY_CURRENT_USER\Software\Microsoft\Windows\CurrentVersion\StorageSense\Parameters\StoragePolicy
See how to go to a Registry key with one click.
- On the right, modify or create a new 32-Bit DWORD value named 01. Set it to 0 to disable the Storage Sense feature. A value data of 1 will re-enable it.
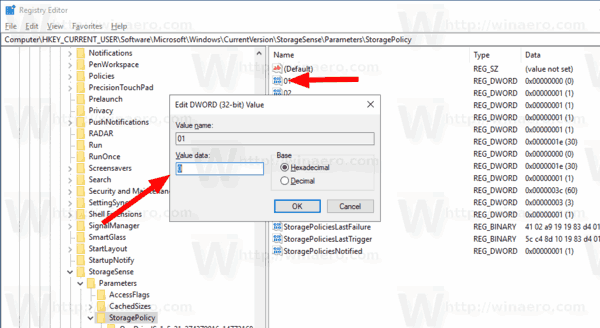
Note: Even if you are running 64-bit Windows you must still create a 32-bit DWORD value. - To make the changes done by the Registry tweak take effect, you need to sign out and sign in to your user account.
To save your time, you can download the following ready-to-use Registry files.
The undo tweak is included.
Finally, you can force disable or force enable the Storage Sense feature for all users in Windows 10. This can be done with Group Policy.
Disable Storage Sense with Group Policy
- Open Registry Editor.
- Go to the following Registry key:
HKEY_LOCAL_MACHINE\SOFTWARE\Policies\Microsoft\Windows\StorageSense
Tip: See how to jump to the desired Registry key with one click.
If you do not have such a key, then just create it.
- Here, create a new 32-bit DWORD value AllowStorageSenseGlobal. Note: Even if you are running 64-bit Windows, you still need to use a 32-bit DWORD as the value type.
Set it to 0 to disable the Storage Sense options.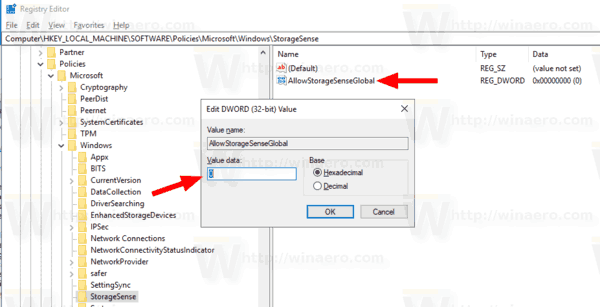
- Restart Windows 10 to apply the restriction, and you are done.
Later, you can delete the AllowStorageSenseGlobal value to allow the user to control the Storage Sense feature.
Also, you can download the following ready-to-use Registry files.
The files can be found under the 'Group Policy' folder.
Windows 10 Pro and above
If you are running Windows 10 Pro, Enterprise, or Education edition, you can use the Local Group Policy Editor app to configure the options mentioned above with a GUI.
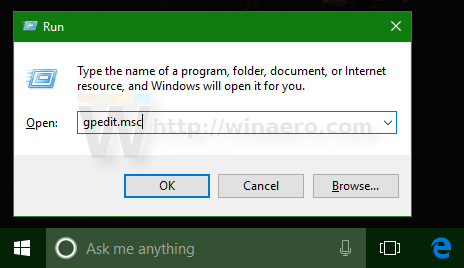
- Press Win + R keys together on your keyboard and type:
gpedit.msc
- Group Policy Editor will open. Go to
Computer Configuration\Administrative Templates\System\Storage Sense. Set the policy optionAllow Storage Senseto what you want.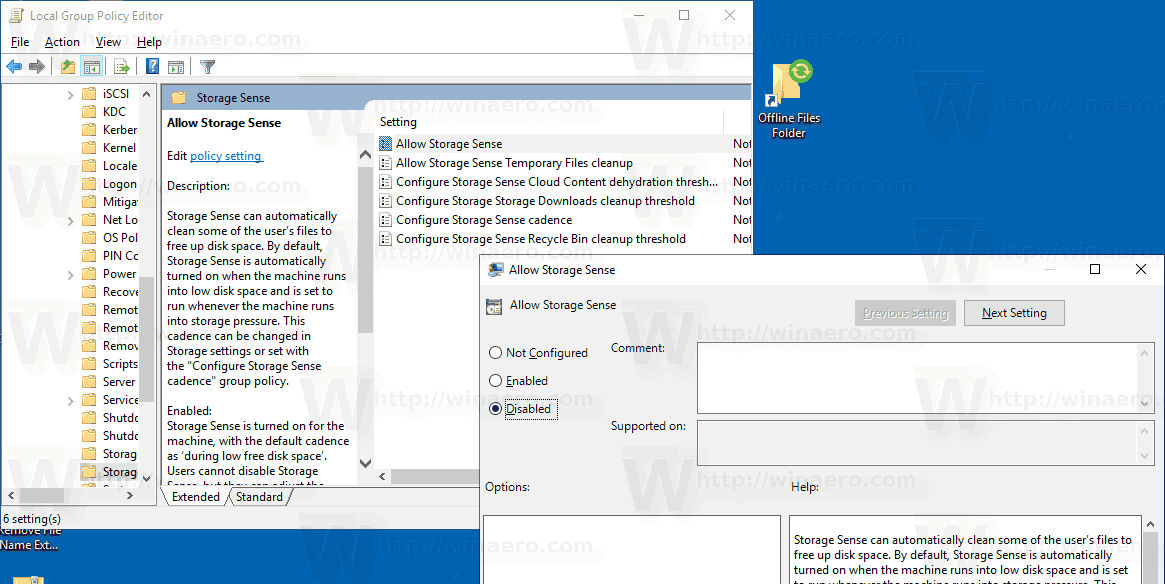
That's it!
Support us
Winaero greatly relies on your support. You can help the site keep bringing you interesting and useful content and software by using these options:

Isn’t Storage Sense disabled by default?
not in my case