How to Disable Shared Experiences in Windows 10 with Group Policy
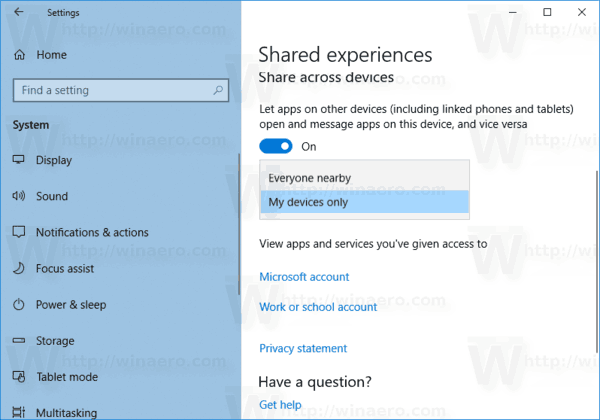
The Shared Experiences feature in Windows 10 allows you to start a task on one of your devices and finish it on another device running under the same Microsoft Account. It also includes an ability to connect your phone to manage task via a companion app.
Advertisеment
Starting with Windows 10 version 1607 "Anniversary Update", Windows 10 includes a new feature that allows apps on your device to communicate with other devices and open the same apps on them. This will allow you to continue your work faster when you change your device. This feature provides synchronization between apps installed on your Windows 10 PC and other devices, saving your time. It is known under its internal 'Project Rome' name, and also formerly known as Cross-Device Experiences.

The Shared Experiences platform provides the Remote Systems API, enabling developers to extend their app experiences across Windows devices connected proximally or through the cloud. It can be used to share experiences, send messages, web links, and open apps across other devices including other Windows 10 computers, Windows 10 Mobile phones, and Android smartphones.
Windows 10 comes with a special Group Policy option that can be used to disable Shared Experiences for all users. You can use one of the two available methods, a Group Policy option, and a Group Policy Registry tweak. The first method can be used in editions of Windows 10 that come with the Local Group Policy Editor app. If you are running Windows 10 Pro, Enterprise, or Education edition, then the Local Group Policy Editor app is available in the OS out of the box. Windows 10 Home users can apply a Registry tweak. Let's review these methods.
- Open the Local Group Policy editor app, or launch it for all users except Administrator, or for a specif user.
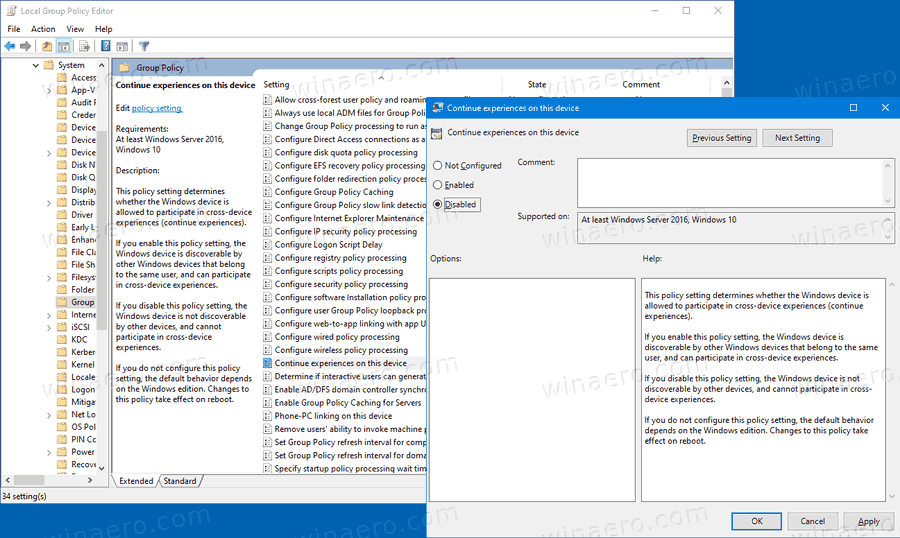
- Navigate to Computer Configuration\Administrative Templates\System\Group Policy on the left.
- On the right, find the policy setting Continue experiences on this device.
- Double-click on it and set the policy to Disabled.

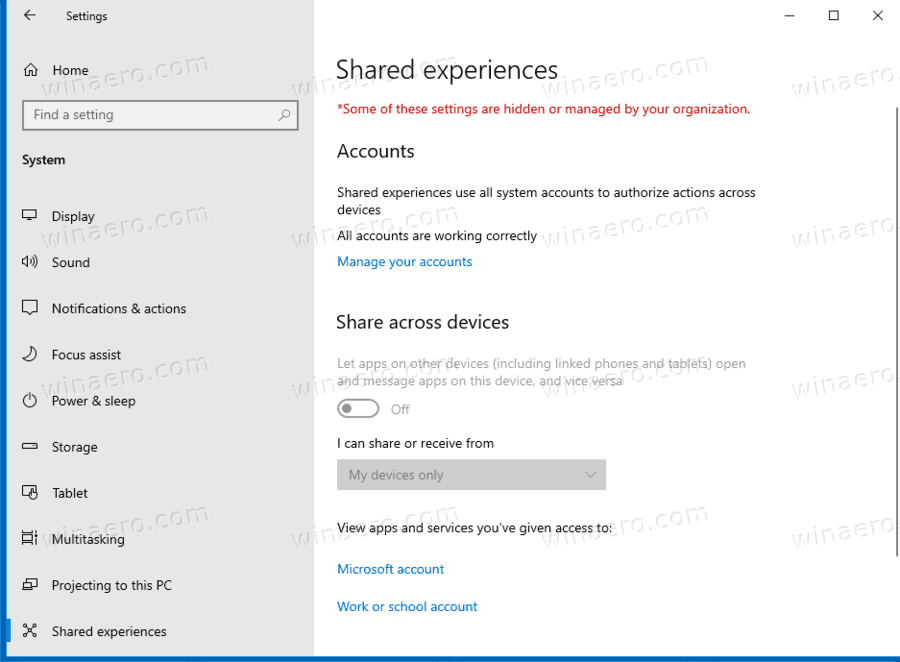
You are done. If someone try to access the Shared Experiences page in Settings > System, he will find all the options disabled. See the following example:

Tip: See How to Reset All Local Group Policy Settings at once in Windows 10.
Now, let's see how the same can be done with a Registry tweak.
- Open Registry Editor.
- Go to the following Registry key.
HKEY_LOCAL_MACHINE\SOFTWARE\Policies\Microsoft\Windows\System
Tip: See how to jump to the desired Registry key with one click. - If you do not have such a key, then just create it.
- Here, create a new 32-bit DWORD value EnableCdp. Note: Even if you are running 64-bit Windows, you still need to use a 32-bit DWORD as the value type.
- Leave its value data as 0 to disable the feature.
- To make the changes done by the Registry tweak take effect, you need to restart Windows 10.
Later, you can delete the EnableCdp value to allow the user to use the Shared Experiences options.
To save your time, use the following Registry files:
Download Ready-to-use Registry Files
The undo tweak is included.
Tip: You can try to enable GpEdit.msc in Windows 10 Home.
Articles of interest:
- How To See Applied Group Policies in Windows 10
- All Ways To Open Local Group Policy Editor in Windows 10
- Apply Group Policy to All Users Except Administrator in Windows 10
- Apply Group Policy to a Specific User in Windows 10
- Reset All Local Group Policy Settings at once in Windows 10
- Enable Gpedit.msc (Group Policy) in Windows 10 Home
Support us
Winaero greatly relies on your support. You can help the site keep bringing you interesting and useful content and software by using these options:
