Today, we will see how to disable a service in Windows 10. It can be any service which you want to prevent from running in the background. Here are the steps.
Advertisеment
Windows services are a special apps which run in the background. Most of them have no interaction with the user session and have no user interface. Services are one of most important parts of the Windows NT operating system family, which was started with Windows NT 3.1 and includes all modern Windows versions like Windows 7, Windows 8 and Windows 10.
Windows 10 has a huge number of services which exist out-of-the-box. Many third-party apps and even device drivers can add various services to Windows 10. You might want to disable a service to free up system resources or check if a service affects the OS behavior in some bad way.
To disable a service in Windows 10, do the following.
Press Win + X shortcut keys on the keyboard to open the Power user menu. Alternatively, you can right-click on the Start menu.
In the menu, select the item Computer Management.
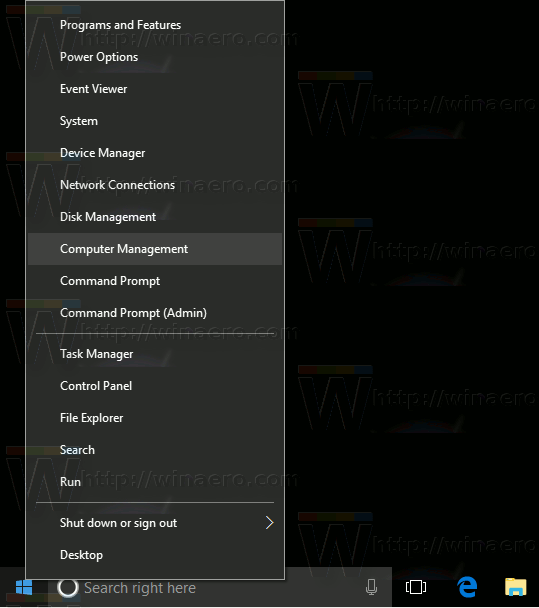
Tip: You can tweak and customize the Win + X menu in Windows 10. Refer to these articles:
- Customize Win+X menu in Windows 10
- Restore Classic Control Panel shortcuts to Win+X menu in Windows 10
- Restore Control Panel items in Win+X menu in Windows 10 Creators Update
- Add Command Prompt back to Win+X Menu in Windows 10 Creators Update
The Computer Management utility will be opened. On the left, expand the tree view to Services and Applications\Services.
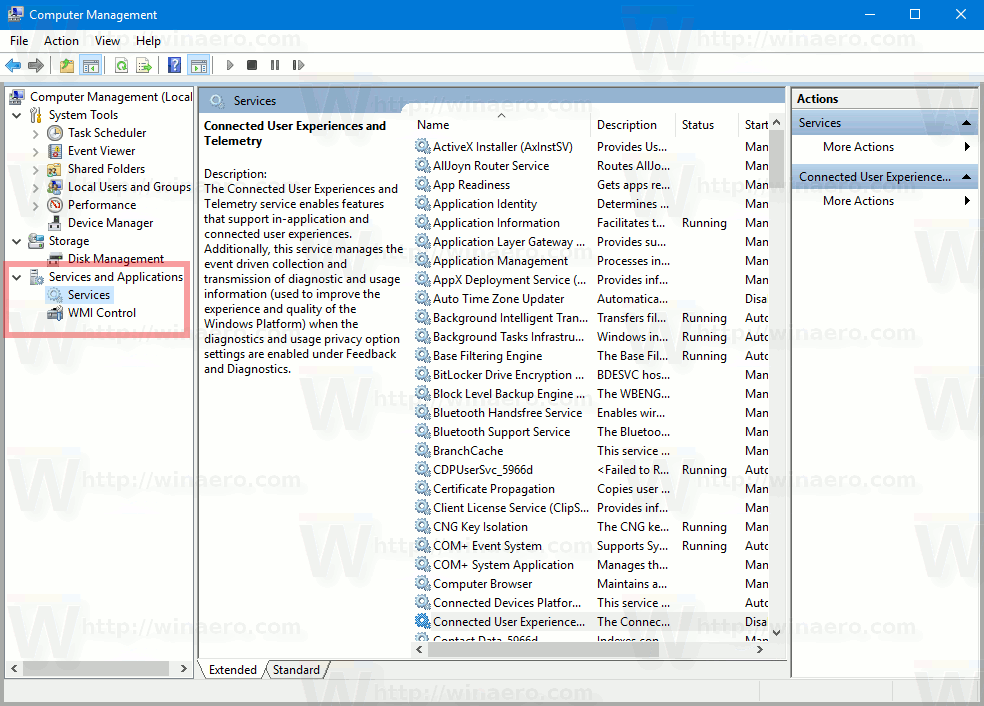
On the right, you will see the list of installed services.
There, find and double-click the service you want to disable. For example, I am going to disable the service named "Server". This will allow me to hide administrative shares along with other shared folders over my network.
Note: I do not recommend you to disable this service. I use it just as an example for this article. Turning off the Server service will completely disable file and print sharing, that is, the computer will no longer be able to act as a file server.
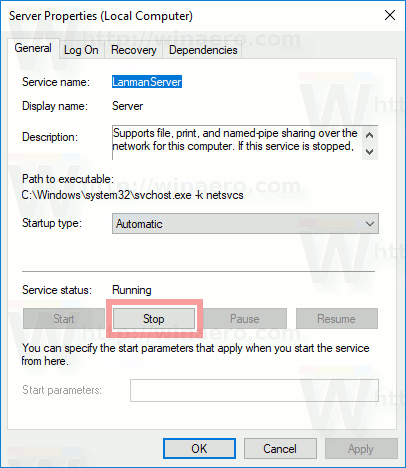
The service properties dialog will be opened:
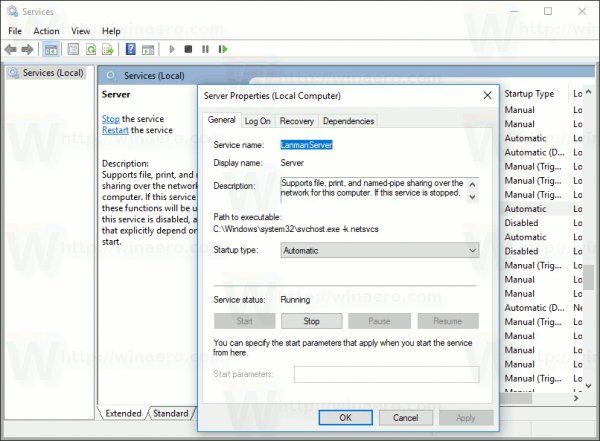
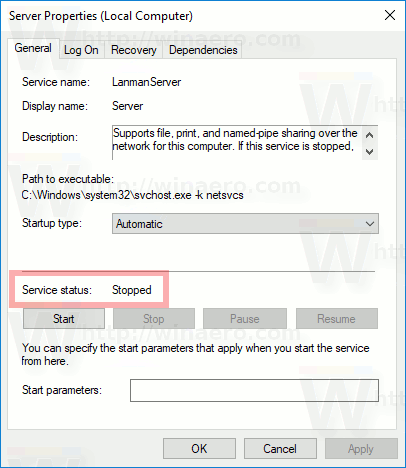
See the line "Service status:". If the service has the status "Running", click on the Stop button, and wait until its status shows as Stopped.
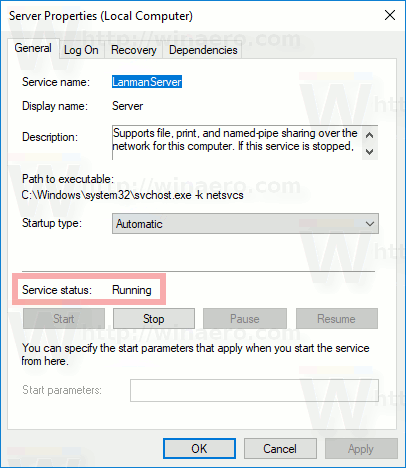
Now, in the "Startup type" drop down list select "Disable" to disable the service in Windows 10.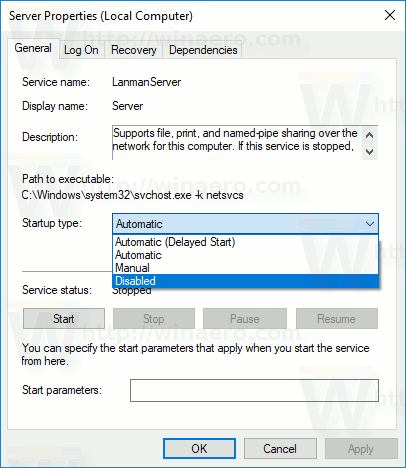
Voila, you just disabled the service in Windows 10.
Alternatively, you can use the console tool, "sc". It is a powerful app which will allow you to manage existing services in Windows 10.
Disable a service in Windows 10 using Command Prompt
You can use sc as follows.
Open an elevated command prompt and type the following commands:
sc stop "Name of Service"
sc config "Name of Service" start= disabled
The first command will stop the service. The second command will disable it.
Note: It is very important to add a space after "=" and not before it.
Replace the "Name of Service" portion with the name of your service. In my case it is "LanmanServer":
My commands look as follows:
sc stop LanmanServer
sc config LanmanServer start= disabled
The output will be as follows: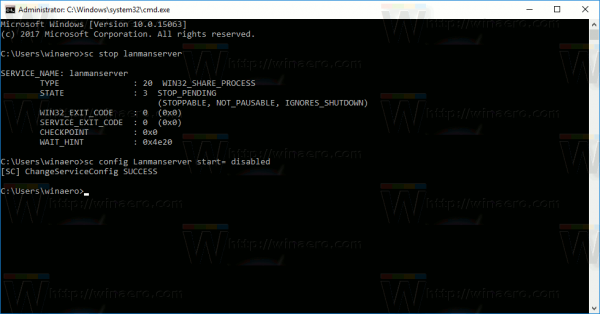
That's it.
Support us
Winaero greatly relies on your support. You can help the site keep bringing you interesting and useful content and software by using these options:

How to stop a service like that of Windows Defender?
The best way to disable it is a tweak described here: Disable or enable Windows Defender in Windows 10
Thank you Sergey, but in Creators Update you I can’t disable it completely using your Winaero Tweaker.
Strange, because it is disabled in my CU 15063.11 exactly with Tweaker.
Can you share more details please?
Using your Tweaker, I still have :
1) “MSACuiL” (Windows Defender Notification Icon on systray)
and
2) “SecurityHealthService”
running on my 15063.
1) is a known issue. Already fixed in the dev. version.
2) SecurityHealthService must be related to Windows Defender Security Center.
If you open Defender Security Center, what it tells about Realtime protection? Should be reported as disabled.
Of couser Sergey, Realtime protection is reported as disabled, but I still have those 2 processes still running.
I do hope you will fix this issue in next version of your Tweaker.
Thank you indeed!