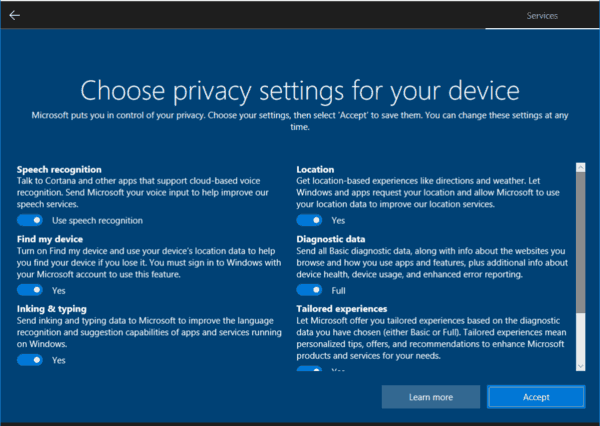
Starting in Windows 10 version 1809, when you sign in to a new user account for the first time, the operating system shows a full screen page with privacy options similar to the one you see when installing Windows 10 from scratch. This page is called 'Privacy Settings Experience'. Today, we will see how to disable it.

During the ongoing development of Windows 10, Microsoft introduced new privacy options in the OS. The company has tried to make the privacy policy more transparent for the end user and explicitly show which data is being collected. When signing in to a new user account or installing the OS, you can quickly revise the important privacy settings such as ads, diagnostics, location, and tailored experiences. A special “learn more” section explains how the collected location, speech recognition, diagnostics, tailored experiences, and ad data will be used.
Advertisеment
If you are not happy with the new Privacy Settings Experience feature, you can disable it. You need to sign in as Administrator before proceeding.
To disable Privacy Settings Experience at Sign-in in Windows 10, do the following.
- Open Registry Editor.
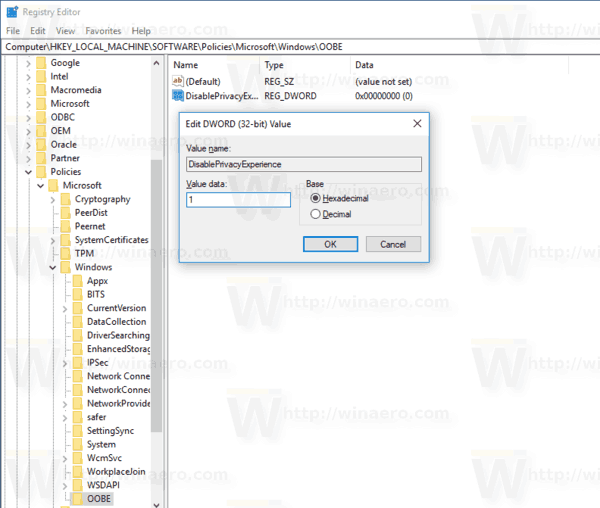
- Go to the following Registry key:
HKEY_LOCAL_MACHINE\SOFTWARE\Policies\Microsoft\Windows\OOBE
Tip: See how to jump to the desired Registry key with one click.
If you do not have such a key, then just create it.
- Here, create a new 32-bit DWORD value DisablePrivacyExperience. Note: Even if you are running 64-bit Windows, you still need to use a 32-bit DWORD as the value type.
Set it to 1 to disable the extra page with privacy options at sign-in in Windows 10.
- To make the changes done by the Registry tweak take effect, you need to restart Windows 10.
Later, you can delete the DisablePrivacyExperience value to re-enable the Privacy Settings Experience feature.
To save your time, I made ready-to-use Registry files. You can download them here:
Using Local Group Policy Editor
If you are running Windows 10 Pro, Enterprise, or Education edition, you can use the Local Group Policy Editor app to configure the options mentioned above with a GUI.
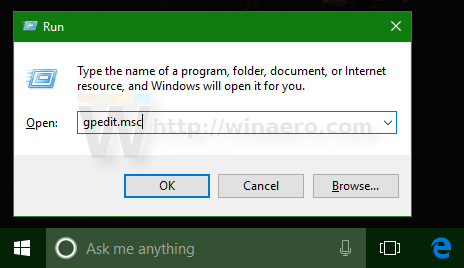
- Press Win + R keys together on your keyboard and type:
gpedit.msc
- Group Policy Editor will open. Go to Computer Configuration\Administrative Templates\Windows Components\OOBE. Enable the policy option Don't launch privacy settings experience on user logon. Set the policy to Enabled.
That's it.
Support us
Winaero greatly relies on your support. You can help the site keep bringing you interesting and useful content and software by using these options:


All right, this may be useful if you want to add a second account. But if you install a fresh version of the OS, this feature will appear again. Am I wrong?
During the build upgrade, it will be hidden if you have this policy enabled.
If you are installing the OS from scratch and want to hide it, you need to use WAIK/AutoUnattend.xml
This is what I was looking for, Though my question is. If you disable it from showing for new users that are created, what are the values that get assigned to the options in the Dialog? Are they all set to ‘No’ by default and this screen enables them? Or do I now have to registry hack all of the values to turn them off too?
There is no ( HKEY_LOCAL_MACHINE\SOFTWARE\Policies\Microsoft\Windows\OOBE ) folder as per your instructions. Please refrain from giving b~~~t helpfull tips.
gpedit.msc doesn’t work with windows 10, at least my version Microsoft Windows 10 home 10.0.19041 Build 19041.
I get an error window stating that Windows cannot find ‘gpedit.msc’. Make sure you typed the name correctly, and then try again.
Try to read the text carefully.
If you do not have such a key, then just create it.Create it manually.
—-
Again, read the text:
If you are running Windows 10 Pro, Enterprise, or Education edition, you can use the Local Group Policy Editor app to configure the options mentioned above with a GUI.You are running Home.
Thanks for the registry keys to disable.
Does disabling via reg set all the prompts to ‘no’? or just it disable the prompt and accept the default settings?
It will disable the prompt without accepting the defaults