Here's how to check and reset Network Data Usage in Windows 11. If you have a limited Internet connection with data caps, monitoring network usage is an essential process to avoid unnecessary expenses. Similar to Windows 10, Windows 11 has a built-in network monitor that shows how much data your apps use. This article will show you how to check and reset network data usage in Windows 11 without downloading third-party apps.
Advertisеment
Windows 11 provides basic information about network usage and how much traffic apps have taken. Remember that your Internet provider might rate data slightly differently. Also, there are no advanced statistics (Windows 11 provides data only for the last 30 days) or network limiters, which means some users might need a third-party app for better traffic control.
If you want to know how much data your apps consumed during the last thirty days, do the following.
How to Check Network Data Usage in Windows 11
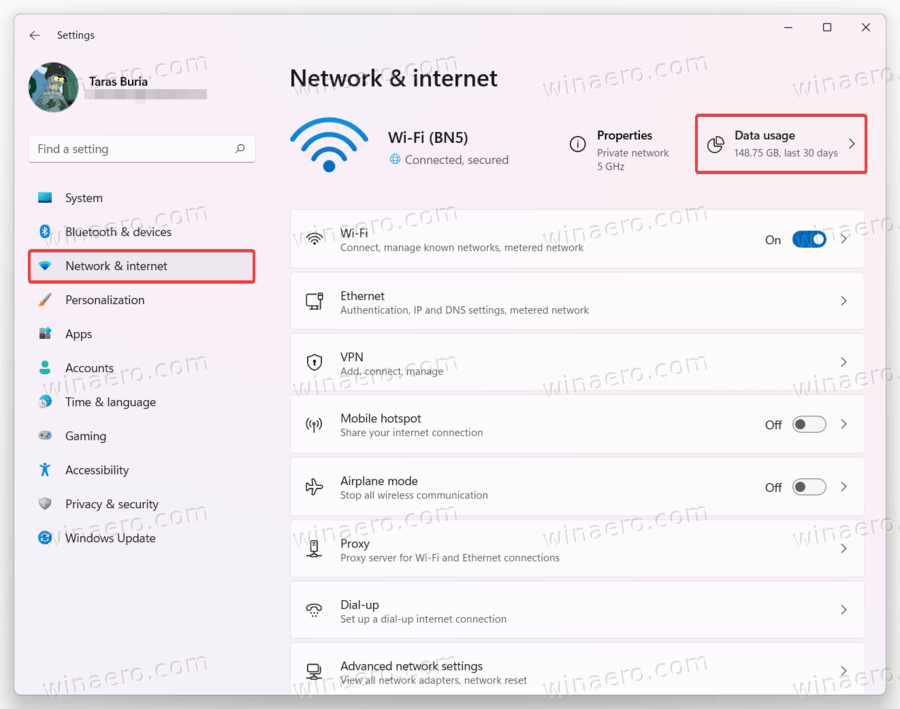
- Press Win + I to open Windows Settings.
- Go to the Network & internet section.
- Click the Data usage button in the upper-right corner. Note that the Windows Settings app shows a data counter right on the button for more convenience.
- On the next screen, you will see the list of all apps that used your current network during the last 30 days.
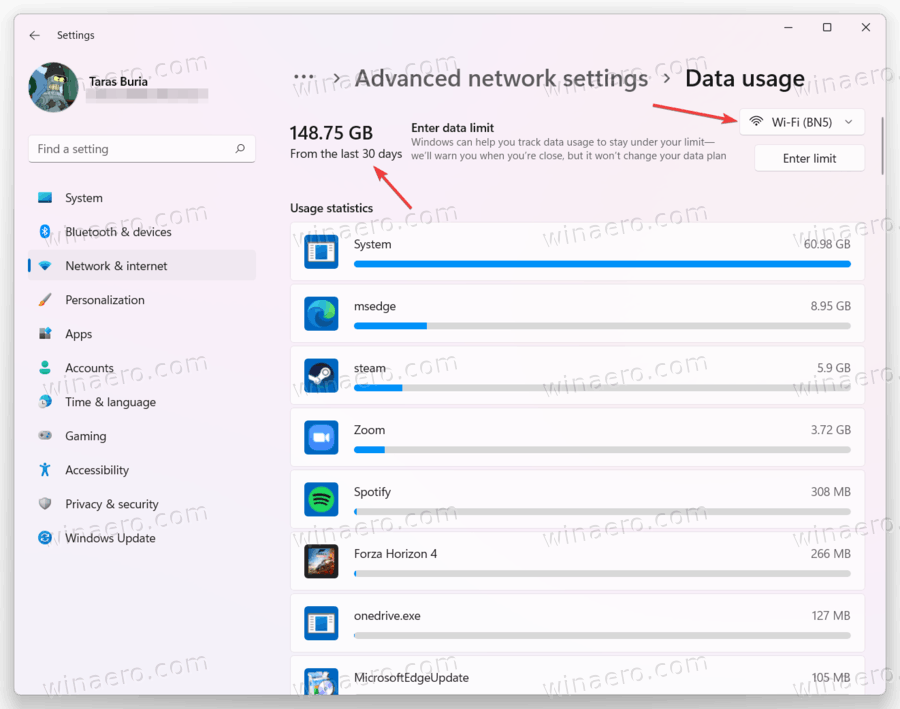
- If you want to check network usage in Windows 11 for another adapter (for Ethernet, for example, instead of Wi-Fi), click the network drop-down in the upper-right corner and select another adapter.
You are done.
The OS counts your network usage for the last thirty days, which means the statistic never resets. Still, you can reset your Internet traffic usage data manually. To reset network data usage in Windows 11, do the following.
How to Reset Network Data Usage in Windows 11
- Open Windows Settings by pressing the Win + I shortcut. You can also use other methods listed in the following article.
- Go to the Network & internet section, then click the Data Usage button in the upper-right corner of the window.
- Scroll down the list of all apps and find the Reset button.
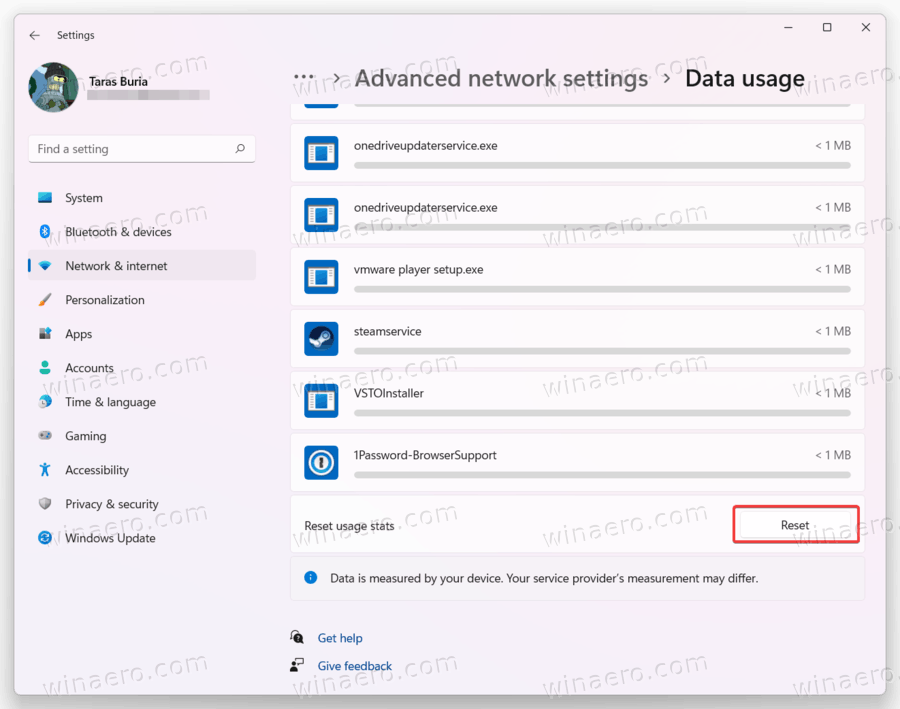
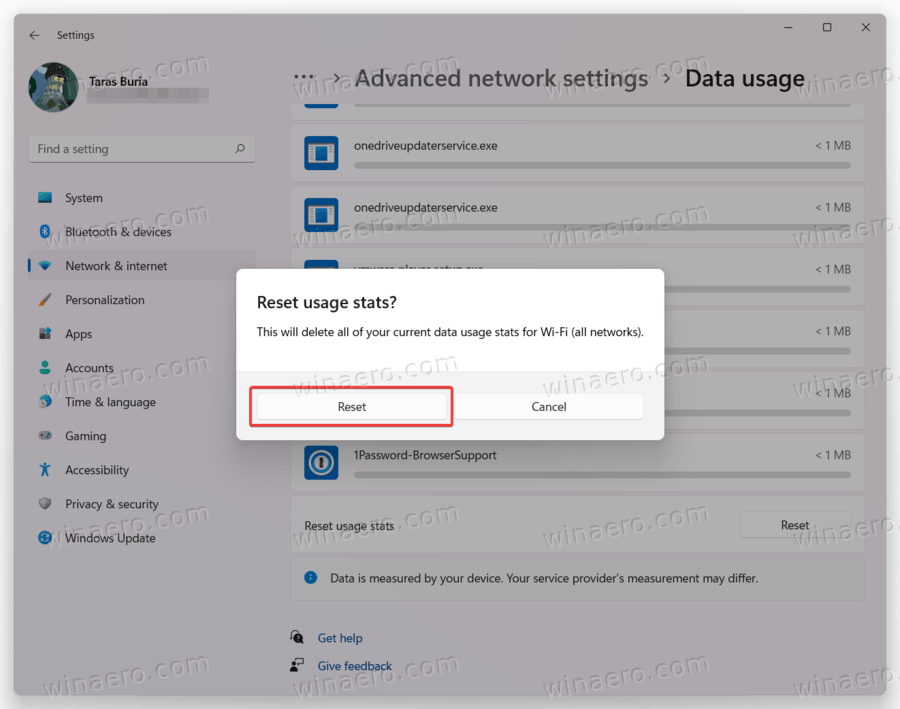
- Click Reset to confirm. Note that Windows 11 resets network usage adapter-wise. That means you need to reset Internet traffic activity separately for Wi-Fi, Ethernet, and all other available network controllers.
- To reset network usage for another controller, scroll up and select a controller from a drop-down list in the upper-right corner of the window. Then, scroll back down and click Reset.
Done!
Finally, there is one more method that involves the Task Manager app.
Using Task Manager
You can also check network usage in Windows 11 using Task Manager. The only thing is that Task Manager, for some reason, displays only UWP-apps, which makes it not the best option to monitor your Internet traffic.
To check the network data usage using Task Manager, do the following.
- Open the Task Manager app.
- Switch to the App History tab.
- Next, click the Network column.
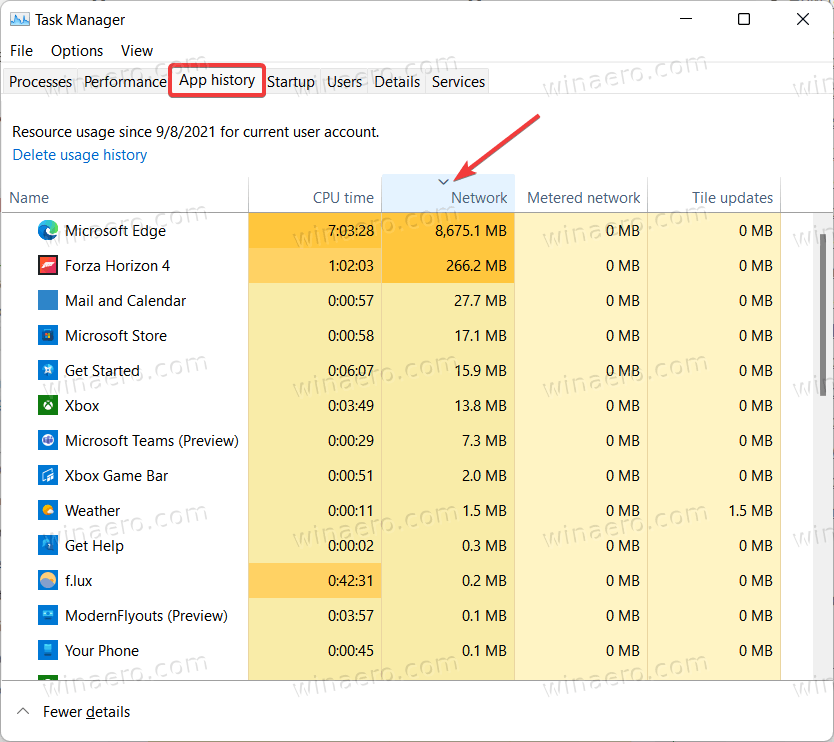
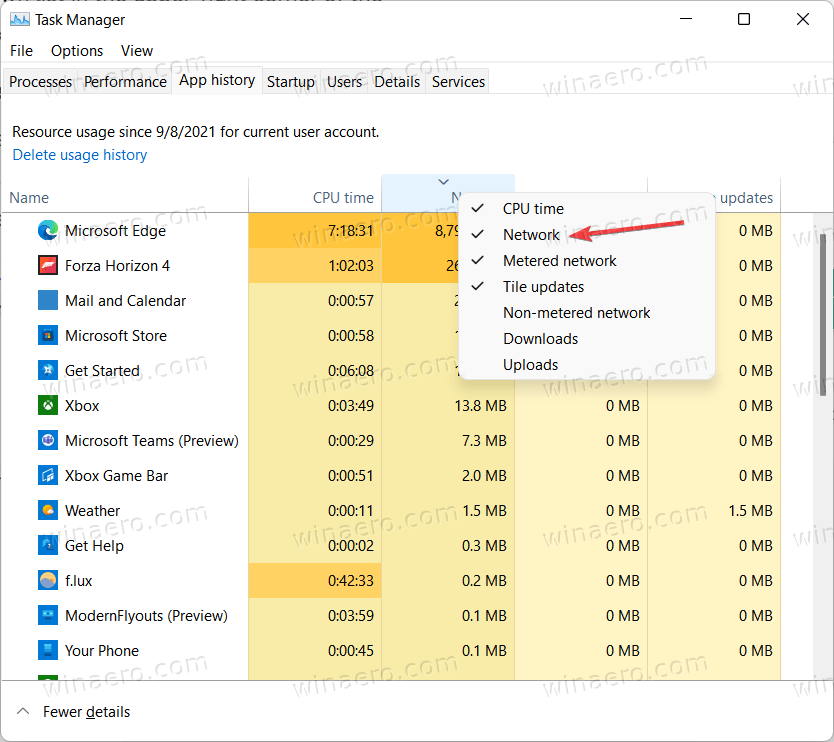
- If there is no Network column, right-click any and select Network from the context menu.
To reset statistics on the App History tab in Task Manager, click the Delete Usage History link.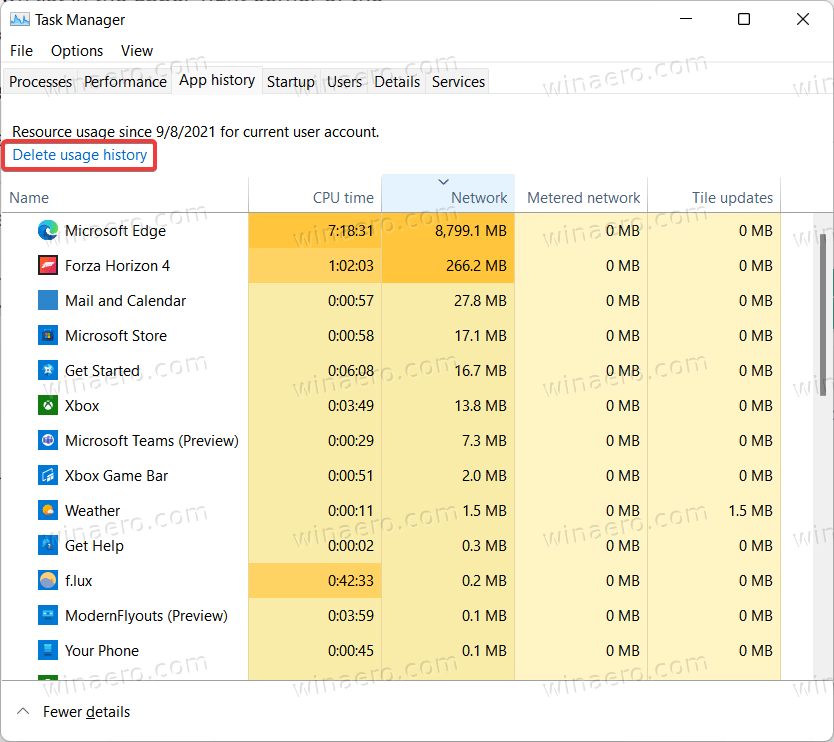
Finally, there is a method to reset all the network data for all connections in Windows 11 with a single command. You need to run it in an elevated Windows Terminal. Do the following.
Reset Data Usage for All Networks in the Command Prompt
- Open a new Windows Terminal as Administrator.
- Select the Command Prompt profile.
- Copy the following command and paste it to the Command Prompt tab:
net stop DPS & DEL /F /S /Q /A "%windir%\System32\sru\*" & net start DPS.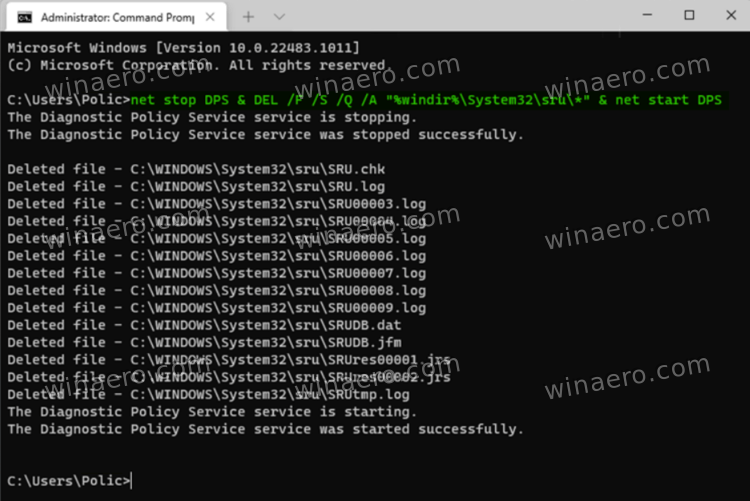
- Wait for the Windows Terminal to finish all the commands.
You are done. You can now close the command prompt tab or the Terminal app if you want.
Finally, you can download a ready-to-use batch file that will do everything the above for you with one click.
Download it, unpack to any folder and double-click. The file will bring the UAC request, and reset the network usage data for all networks with the above mentioned command.
That's it.
Support us
Winaero greatly relies on your support. You can help the site keep bringing you interesting and useful content and software by using these options:

Cool! Thank you for sharing these tips. You even gave us information on how to reset data usage. Really very helpful.