How to Change Display Order of Boot Menu Items in Windows 10
With Windows 8, Microsoft made changes to the boot experience. The simple text-based boot loader is now disabled by default and in its place, there is a touch-friendly graphical user interface with icons and text. Windows 10 has this as well.
Advertisеment
In a dual boot configuration, the modern boot loader shows a list of all installed operating systems. After the specified timeout, if the user has not touched the keyboard, the default operating system will be started. You might want to change the boot entry order for your convenience.
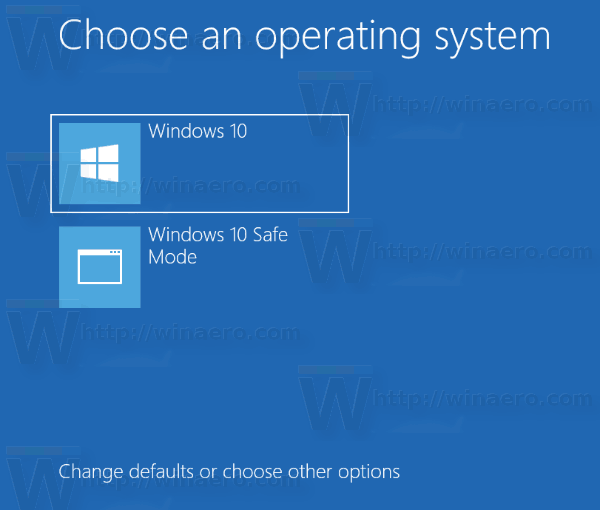
Windows re-arranges the boot entries, placing the last OS installed at the first place in the boot menu. You can change the boot loader entry order according to your preferences.
In order to change it, you must be signed in as administrator. This can be done with the built-in console utility bcdedit.exe. First of all, let's find the current boot entry order without restarting your PC.
See Current Boot Entry Order in Windows 10
- Open an elevated command prompt.
- Type or copy-paste the following command, and hit the Enter key:
bcdedit. - Under the Windows Boot Manager section with the {bootmgr} identifier, see the values in the displayorder line.
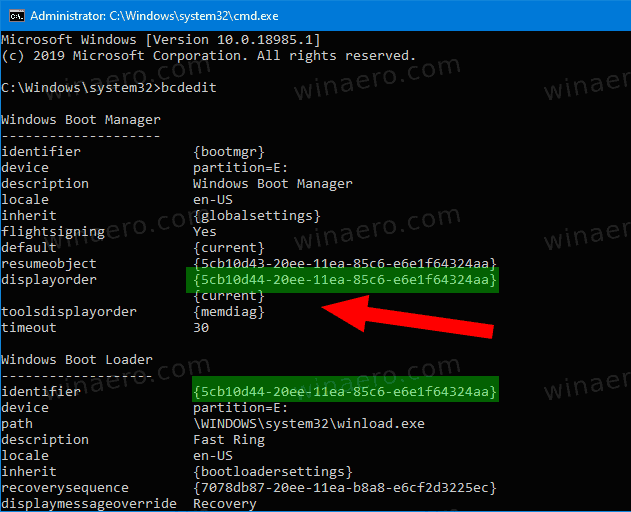
- The currently loaded Windows has the {current} identifier.
- You can find the corresponding IDs under each Windows Boot Loader section for each of the available boot entries to determine the boot order.
To Change Display Order of Boot Menu Items in Windows 10,
- Open an elevated command prompt.
- Enter the following command:
bcdedit /displayorder {identifier_1} {identifier_2} ... {identifier_N}. - Substitute the {identifier_1} .. {identifier_N} values with the actual boot entry identifiers. Re-arrange them in the order you want to get for the boot menu. For example:
bcdedit /displayorder {5cb10d44-20ee-11ea-85c6-e6e1f64324aa} {8ad10c22-19cc-11ab-85c6-e6e1f64324aa} {current}.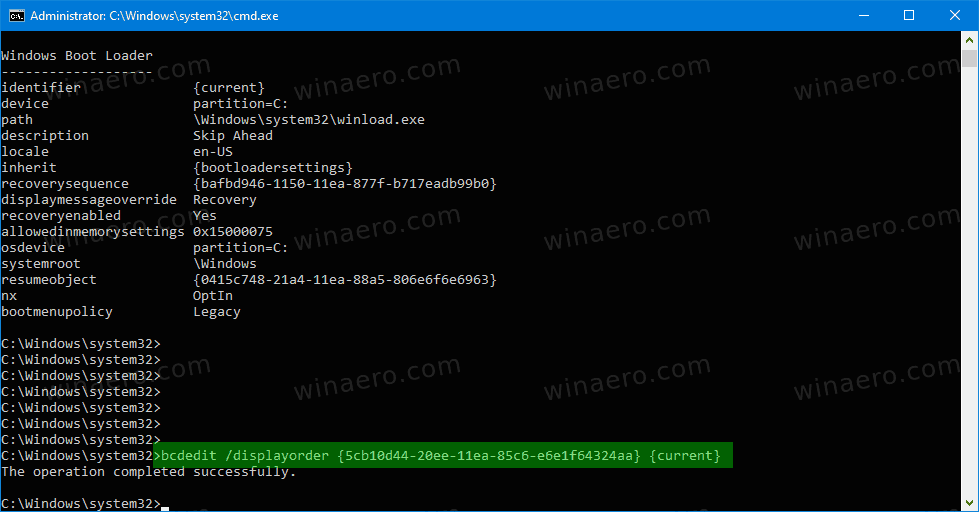
- After that, restart Windows 10 to see the changes you made.
Also, you can move a boot entry to the begging or to the end of the boot menu. Here's how.
Move Specific Boot Entry As First Entry
- Open an elevated command prompt.
- Run
bcdeditwithout parameters to find the {identifier} for the boot entry you want to move. - Execute the command
bcdedit /displayorder {identifier} /addfirst. For example,bcdedit /displayorder {current} /addfirst.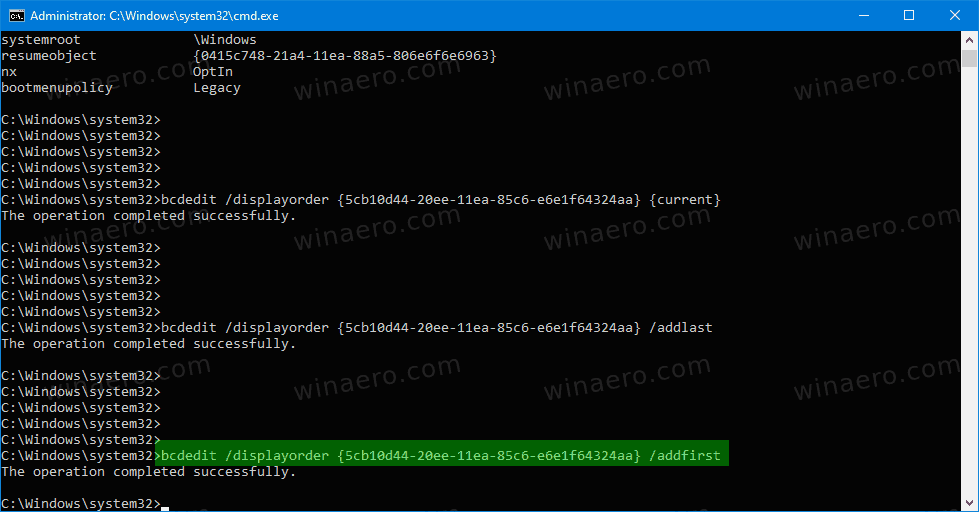
- You can now close the command prompt.
You are done. The specified boot entry is now the first entry in the boot menu.
Move Specific Boot Entry As Last Entry
- Open an elevated command prompt.
- Run
bcdeditwithout parameters to find the {identifier} for the boot entry you want to move. - Execute the command
bcdedit /displayorder {identifier} /addlast. For example,bcdedit /displayorder {current} /addlast.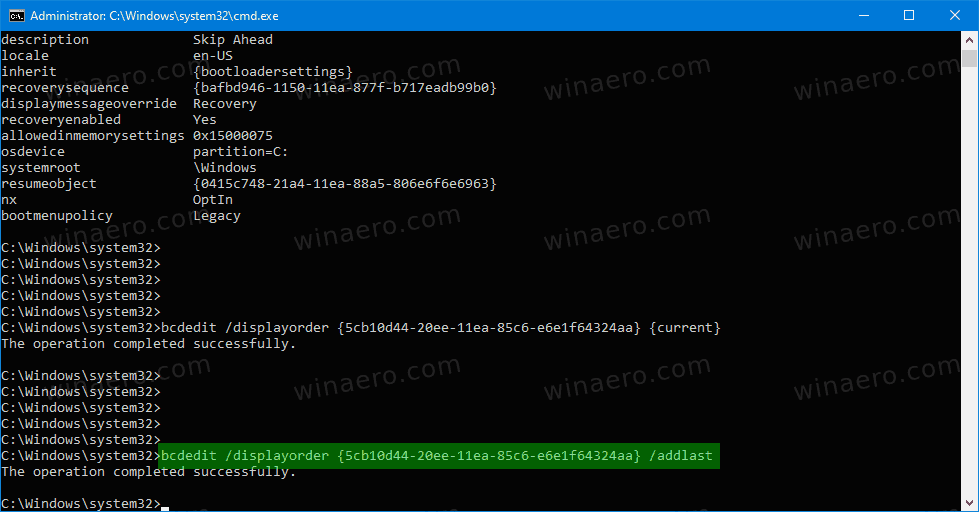
- You can now close the command prompt.
You are done. The specified boot entry is now the last entry in the boot menu.
That's it.
Support us
Winaero greatly relies on your support. You can help the site keep bringing you interesting and useful content and software by using these options:
