OneDrive is the online document storage solution created by Microsoft which comes bundled with Windows 10. It can be used to store your documents and other data online in the cloud. It also offers synchronization of stored data across all your devices. Today, we will see how to reset OneDrive. This is useful when you face some synchronization issues, for example, when it is stuck and doesn't sync a folder or file.
Advertisеment
In Windows 10, OneDrive has very close integration with the OS. Once you are signed in to Windows 10 using your Microsoft Account, it starts prompting you to use OneDrive cloud storage as the place to save files and documents by default. It can be used as your online backup solution. For those who prefer storing files on their local PC, there are options to not use OneDrive as the default save location. Also, you can uninstall it completely in that case as described in the article "An Official Way to Uninstall OneDrive in Windows 10".
If you are using OneDrive but have synchronization issues, you can try to fix OneDrive sync problems as described below.
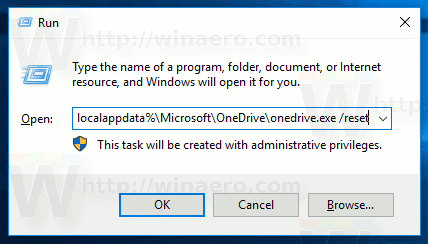
Press Win + R shortcut keys together on your keyboard to open the Run dialog. In the Run box, type or copy-paste the command below and press the Enter key.
%localappdata%\Microsoft\OneDrive\onedrive.exe /reset
This will reset OneDrive's software configuration and settings. The synchronization will start after a minute or two automatically.

During the operation, OneDrive's app icon in the system tray will disappear and then re-appear again.
![]()
Note: If OneDrive does not appear in the notification area after more than a few minutes, sign out and sign in again to your user account. This will restart the app.
That's it.
Support us
Winaero greatly relies on your support. You can help the site keep bringing you interesting and useful content and software by using these options:
