GIMP is a popular open source freeware image editor. It is available for all major Desktop platforms including Windows and Linux. If you are using GIMP to edit and save your PNG images, you might find it useful to optimize them before saving them so that the final size becomes really small. Out of the box, GIMP writes relatively huge PNG files. For an image with 1280 x 720 resolution, it writes files from 33 KB to 300 KB, depending of the number of layers and their contents. There is a way to optimize your PNG image before saving to make it notably smaller.
Here is how it can be done.
How to create small sized PNGs with GIMP
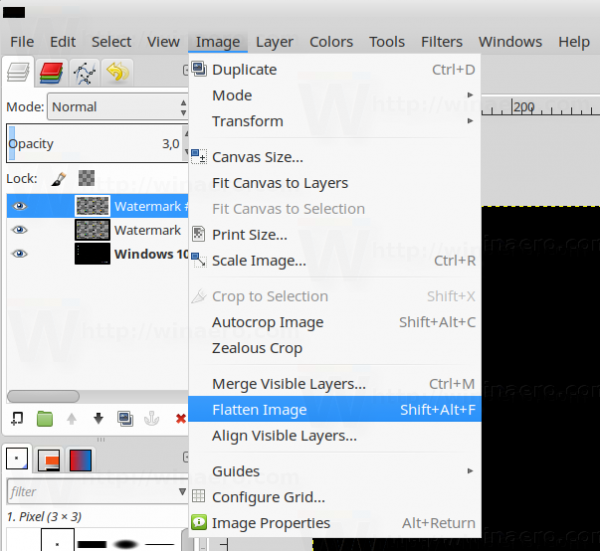
- Merge all layers of your image. Click the Image menu item and select the Flatten Image command.

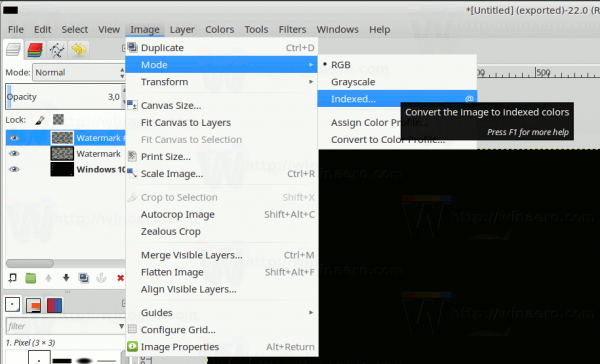
- Once you merge the layers, go to the menu Image -> Mode -> Indexed.

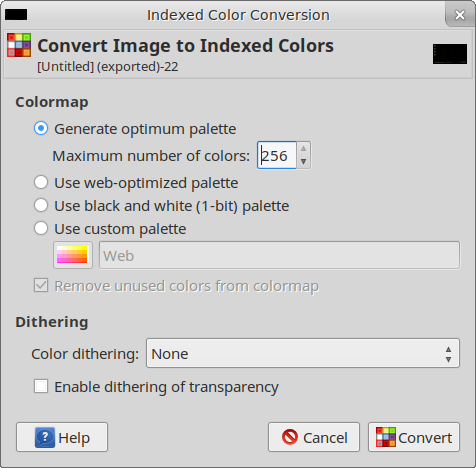
The following dialog will appear on the screen: Play with its parameters to get the best proportion of quality and size. Most of the times, I use the default options you see in the screenshot.
 - Go to the menu File - Export as and export your image as a PNG file.
This simple trick will save you up to 2/3rd of the initial image size. This is especially useful when you need to upload your images online.
Support us
Winaero greatly relies on your support. You can help the site keep bringing you interesting and useful content and software by using these options:
