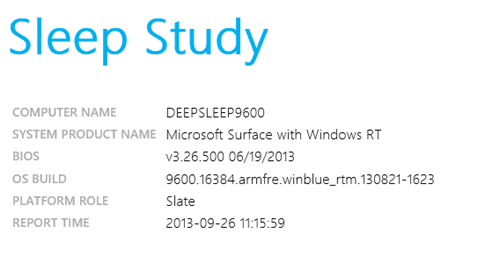
Windows 10 comes with a nice feature called 'Sleep Study report'. It is available on devices which support the Modern Standby/Instant Go (S0 state). Let's see what is included in this report, and how to create it.

Sleep Study tells you how well the system slept and how much activity it experienced during that time. While in the sleep state, the system is still doing some work, albeit at a lower frequency. Because the resulting battery drain is not easily perceptible (you can’t see it draining), Microsoft has included the Sleep Study tool starting in Windows 8.1 to allow the user to track what is happening. The Sleep Study tool has very low impact on battery life, while tracking the battery draining activities.
Advertisеment
InstantGo mode, also known as Connected Standby, is a modern power model which works in tight integration of software (firmware, drivers, OS) with System on Chip (“SoC”) hardware to provide a sleep mode with long battery life and a connected, instant-on user experience. Windows 10 Modern Standby (MS) expands the Windows 8.1 Connected Standby power model to be more inclusive and allows systems based on rotational media and hybrid media (for example, SSD + HDD or SSHD), and/or a NIC that doesn’t support all of the prior requirements for Connected Standby to still take advantage of the low power idle model. In Modern Standby, the PC uses the S0 low power idle model. Modern Standby has the flexibility to configure the default behavior to limit network activity while in the low power state.
To find if your PC supports Modern Standby, refer to the article
How to Find Sleep States Available in Windows 10
To generate a new Sleep Study report, you must be signed in with an administrative account.
To generate the Sleep Study report in Windows 10, do the following.
- Open an elevated command prompt.
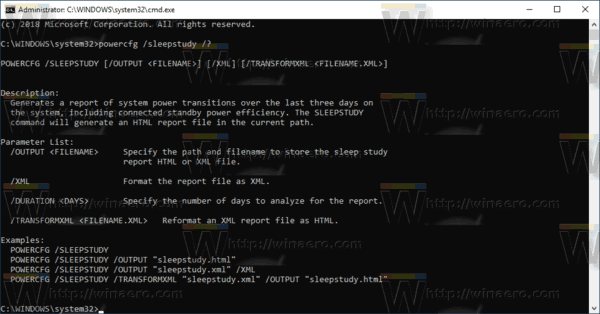
- Type or copy-paste the following command:
powercfg /SleepStudy /output %USERPROFILE%\Desktop\sleepstudy.html
. This will create a new report for the last 3 days analyzed by the tool.
- The next command forms the report for the specified number of DAYS.
powercfg /SleepStudy /output %USERPROFILE%\Desktop\sleepstudy.html /Duration DAYS
- Also, it is possible to save the report to an XML file. The following command does this for the default 3 days:
powercfg /SleepStudy /output %USERPROFILE%\Desktop\sleepstudy.xml /XML
- Finally, you can specify the number of days for the XML format, as follows.
powercfg /SleepStudy /output %USERPROFILE%\Desktop\sleepstudy.xml /XML /Duration DAYS
The Sleep Study HTML output is designed so you can easily read and interpret it. The sections are:
Machine information
Battery drain chart
Chart Legend
Connected standby session summary table
Connected standby session 1
Session #1 summary
Top 5 duration activities
Detailed breakdown of sub components
Connected standby session 2
(Repeat for each subsequent session).
Battery information
Tip: You can execute "powercfg /sleepstudy /?" to see additional command line options.

That's it.
Related articles:
- Create a Wi-Fi history report in Windows 10 (Wlan Report)
- How to Create System Performance Report in Windows 10
- Create System Diagnostics Report Shortcut in Windows 10
- How to Create System Diagnostics Report in Windows 10
- Create System Sleep Diagnostics Report in Windows 10
Source: Microsoft
Support us
Winaero greatly relies on your support. You can help the site keep bringing you interesting and useful content and software by using these options:

Nice feature? For who?! For desktop users? SleepStudy is useless for desktop, still AC power users! Better write how disable SleepStudy and stop still writing files on SSD.