When you have an MSI package, you might be interested in extracting its contents without installing the app. This can be quickly done without using third party tools. Windows already comes with everything required for the operation. In this article, we will see how to add a useful command "Extract" to the MSI file's context menu.
Advertisеment
Windows handles MSI packages via the msiexec app, which is part of Windows Installer. It is a built-in tool which supports a number of command line switches. You can learn about them by running the following command.
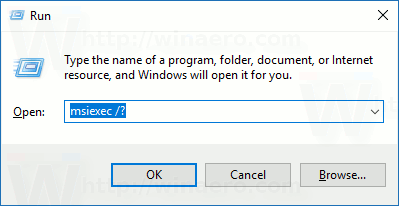
- Press Win + R shortcut keys on the keyboard to open the Run dialog.
- Type the following in the Run box:
msiexec /?
- Windows Installer will display the help contents in a window:
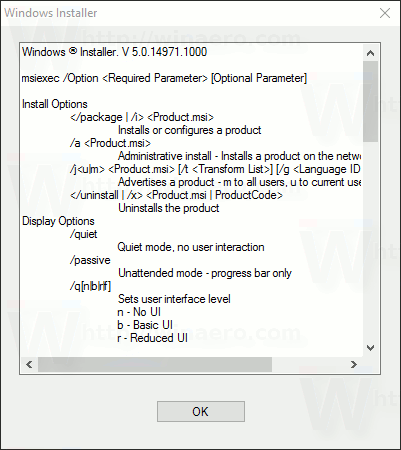
It supports the following switches:
Install Options
Installs or configures a product
/a Administrative install - Installs a product on the network
/j<u|m> [/t ] [/g ]
Advertises a product - m to all users, u to current user
Uninstalls the product
Display Options
/quiet
Quiet mode, no user interaction
/passive
Unattended mode - progress bar only
/q[n|b|r|f]
Sets user interface level
n - No UI
b - Basic UI
r - Reduced UI
f - Full UI (default)
/help
Help information
Restart Options
/norestart
Do not restart after the installation is complete
/promptrestart
Prompts the user for restart if necessary
/forcerestart
Always restart the computer after installation
Logging Options
/l[i|w|e|a|r|u|c|m|o|p|v|x|+|!|*]
i - Status messages
w - Nonfatal warnings
e - All error messages
a - Start up of actions
r - Action-specific records
u - User requests
c - Initial UI parameters
m - Out-of-memory or fatal exit information
o - Out-of-disk-space messages
p - Terminal properties
v - Verbose output
x - Extra debugging information
+ - Append to existing log file
! - Flush each line to the log
* - Log all information, except for v and x options
/log
Equivalent of /l*
Update Options
/update [;Update2.msp]
Applies update(s)
/uninstall [;Update2.msp] /package Remove update(s) for a product
Repair Options
/f[p|e|c|m|s|o|d|a|u|v] Repairs a product
p - only if file is missing
o - if file is missing or an older version is installed (default)
e - if file is missing or an equal or older version is installed
d - if file is missing or a different version is installed
c - if file is missing or checksum does not match the calculated value
a - forces all files to be reinstalled
u - all required user-specific registry entries (default)
m - all required computer-specific registry entries (default)
s - all existing shortcuts (default)
v - runs from source and recaches local package
Setting Public Properties
[PROPERTY=PropertyValue]
The option that concerns this situation is /a. Although it is described as "Administrative install - Installs a product on the network", it can be used to extract the contents of a single MSI package to smaller individual files which can be serviced by a patch. The following command can be used:
msiexec /a "path\to\package.msi" /qb TARGETDIR="path\to\the\destination\folder"
TARGETDIR is a property common for every package which specifies the destination folder for the MSI package contents.
The switch "/qb" tells Windows Installer to show the basic interface during the process. It will show a dialog with the Cancel button and the progress bar.
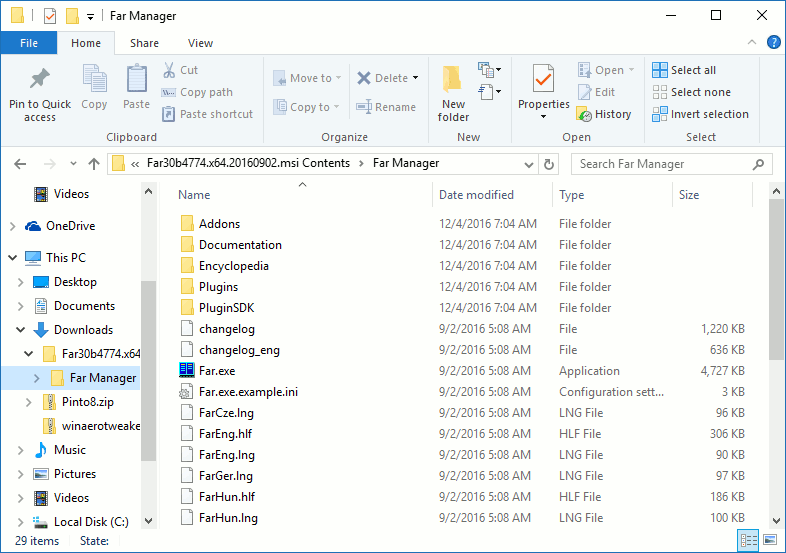
For example, I can use the following command to unpack the MSI installer of the FAR Manager:
msiexec /a "C:\Users\winaero\Downloads\Far30b4774.x64.20160902.msi" /qb TARGETDIR="C:\Users\winaero\Downloads\Far"
If the target folder doesn't exist, it'll be created automatically. In my case, the Far subfolder in the Download folder will be created.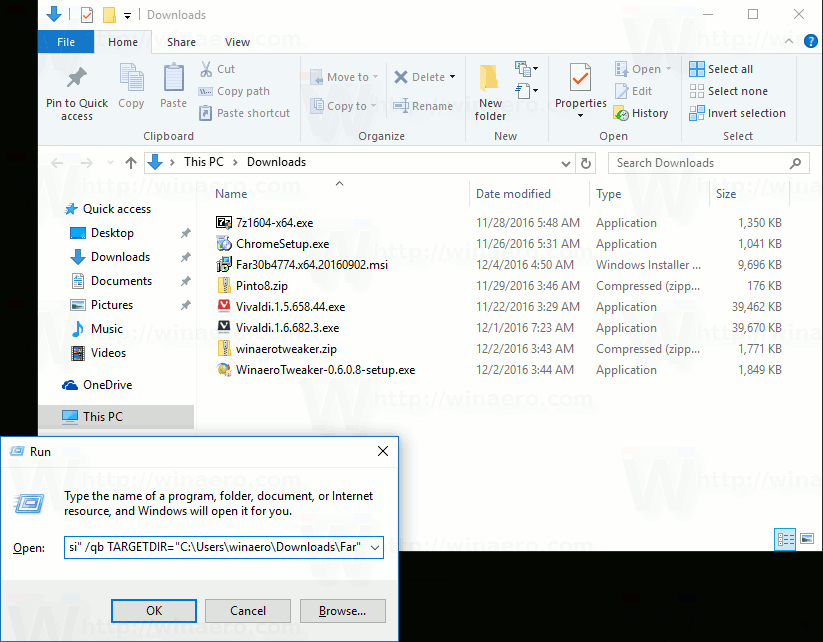
The command above can be entered directly in the Run dialog.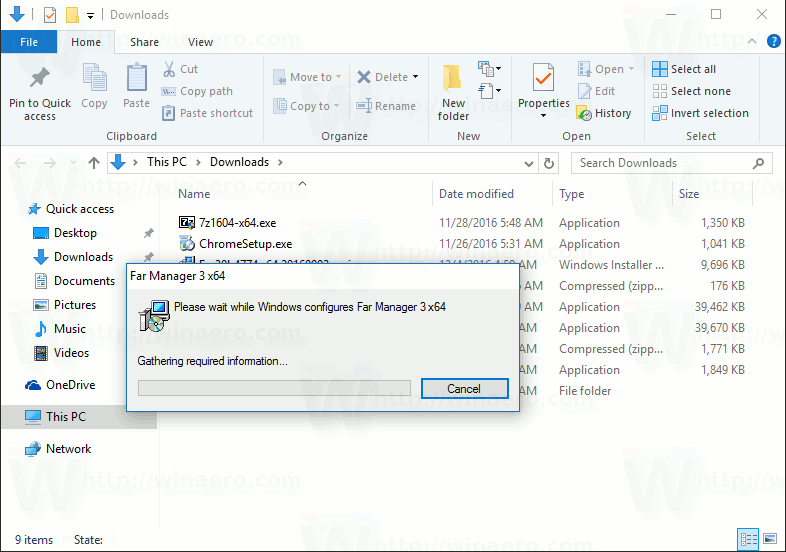
 You can use the information above to add a context menu command to extract the MSI file's contents with one click. Here is how it can be done.
Add Extract Context Menu Command to MSI Files
- Open Registry Editor.
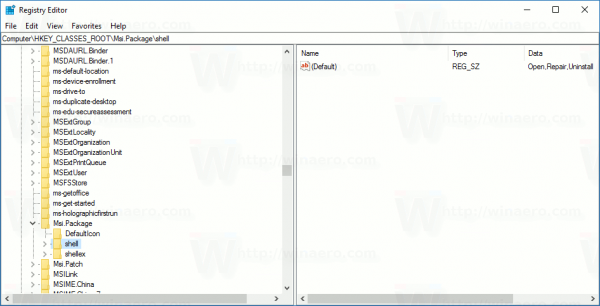
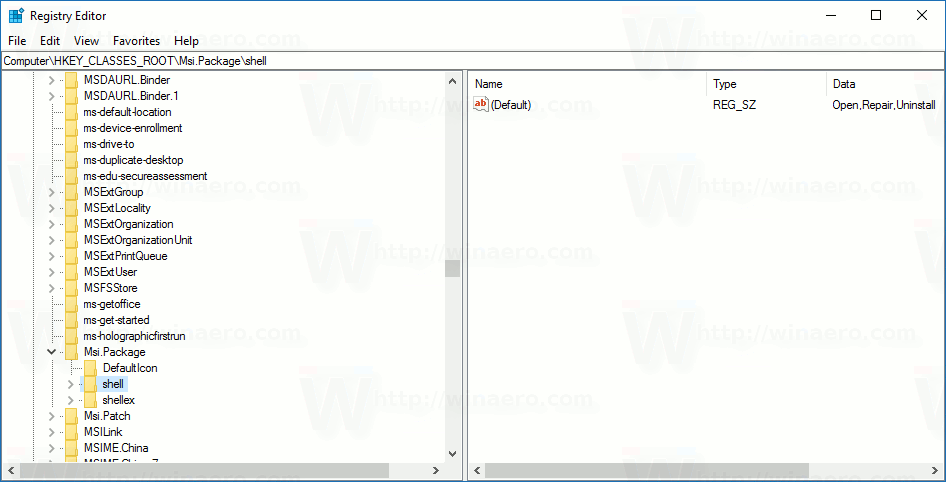
- Go to the following Registry key:
HKEY_CLASSES_ROOT\Msi.Package\shell
Tip: How to jump to the desired registry key with one click.
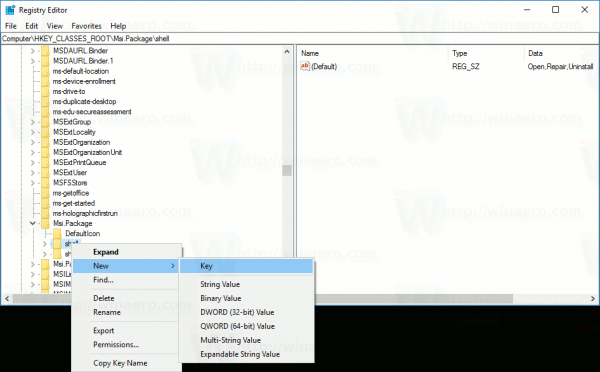
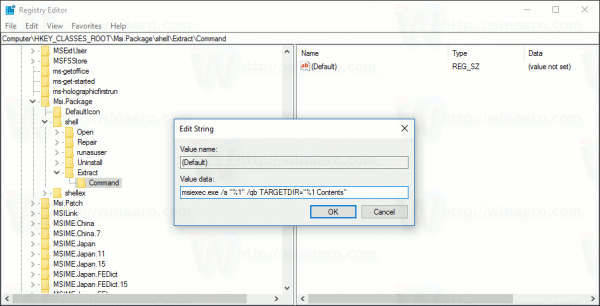
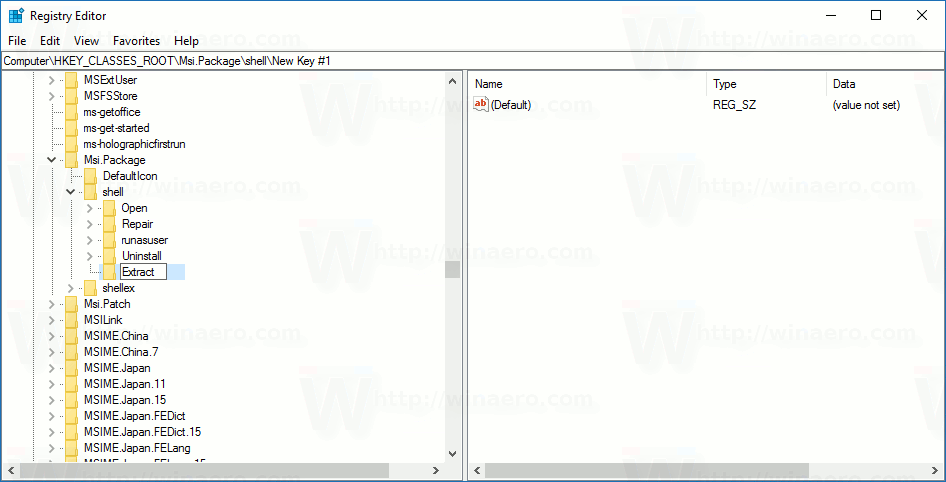
- Create a new subkey here and name it Extract.
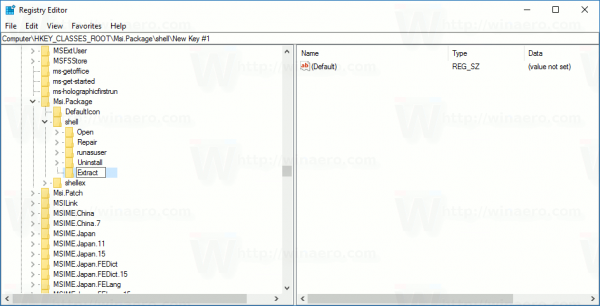
- Under the Extract key, create a new subkey and name it Command:
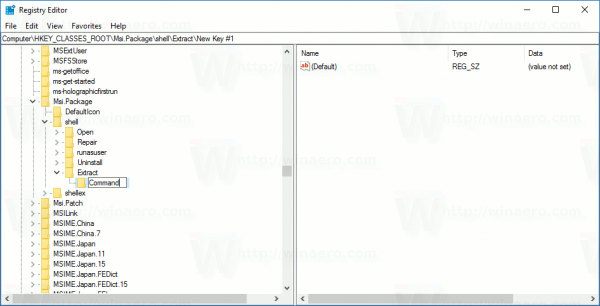
- Set the default value of the Command subkey to the following string:
msiexec.exe /a "%1" /qb TARGETDIR="%1 Contents"
See the following screenshot:


Once you right click an MSI package in File Explorer, you will find a new context menu item "Extract". If you execute it, it will create a new directory "package_name.msi Contents" in the current folder and extract the package's contents there. See the following screenshot: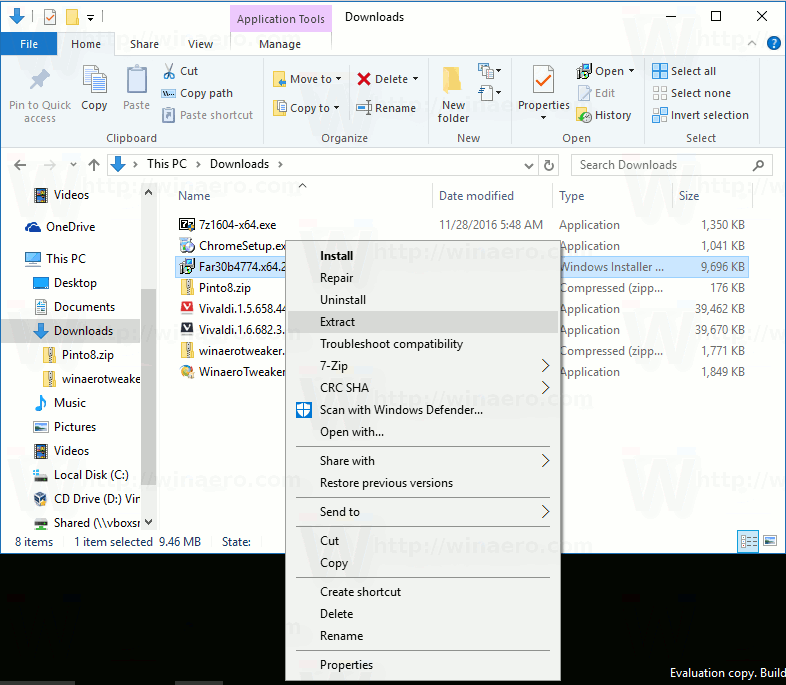
To save your time, I made ready-to-use Registry files. You can download them using the link below.
The undo file is included.
This trick works in Windows 10, Windows 8 and Windows 7.
Note that some packages do not support administrative install. They cannot be extracted using this method. Also, when you extract an MSI package this way, its administrative install point (the folder where it is extracted) becomes servicable. A Windows Installer patch (MSP) can be used to update it so when the package is installed, the patch is also applied.
Support us
Winaero greatly relies on your support. You can help the site keep bringing you interesting and useful content and software by using these options:

Thank you! This one is very useful to me